
You might have found yourself in need of automating screenshots of one or more web pages. If you are a developer, you've probably heard of Selenium, a standard when it comes to automating web browsers. But are you sure it's the best tool for the job?
When taking screenshots, you might need them for compliance, UX research, cross-browser testing, competitor monitoring, or any number of other reasons. But you want the pictures to look great—at least as good as they would if you were manually taking them from your OS.
In this article, I will help you compare Selenium and some of its alternatives to help you get the screenshots you need.
But Why Not Selenium?
Before we explore alternatives, why not just go with the standard browser automation tool? It’s been around for ages and is usually the go-to when developers need to automate browser tasks for testing, debugging, and more. I’ve done a comparison for you. I took these screenshots from Windows 11 Snipping Tool and Selenium.
To get these images I’ve set up a Virtual Machine on Oracle, installed Selenium, Chrome WebDriver, Node, NPM and a few other stuff. Once set up, it was time to get coding. After a lot of troubleshooting I had a beautiful script.js to run via SSH.
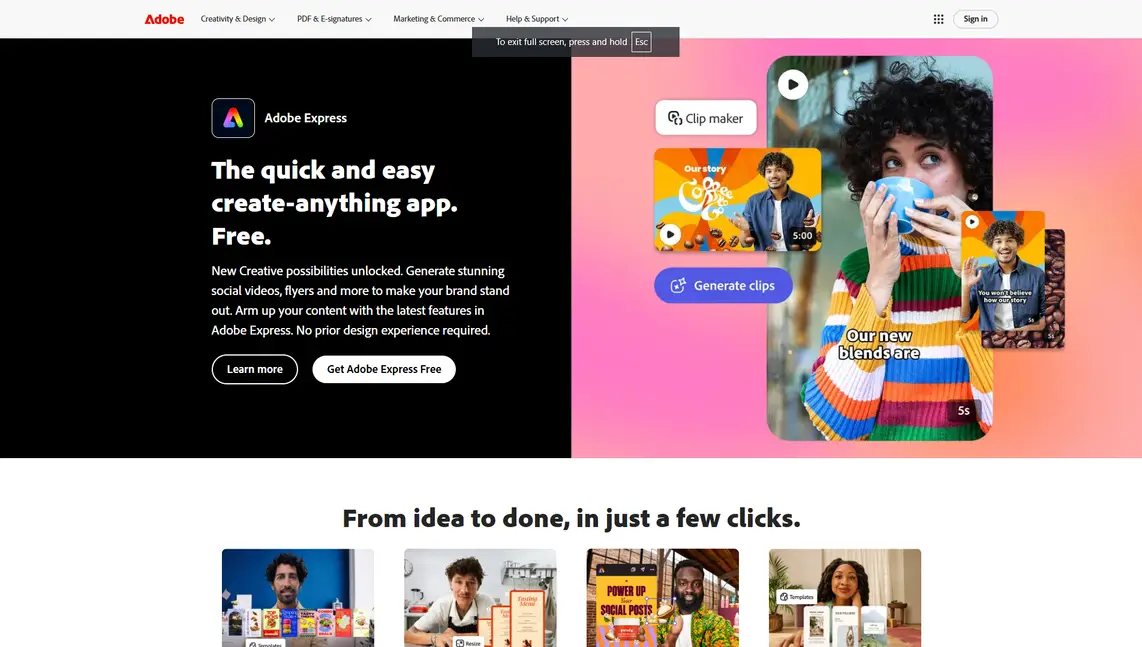
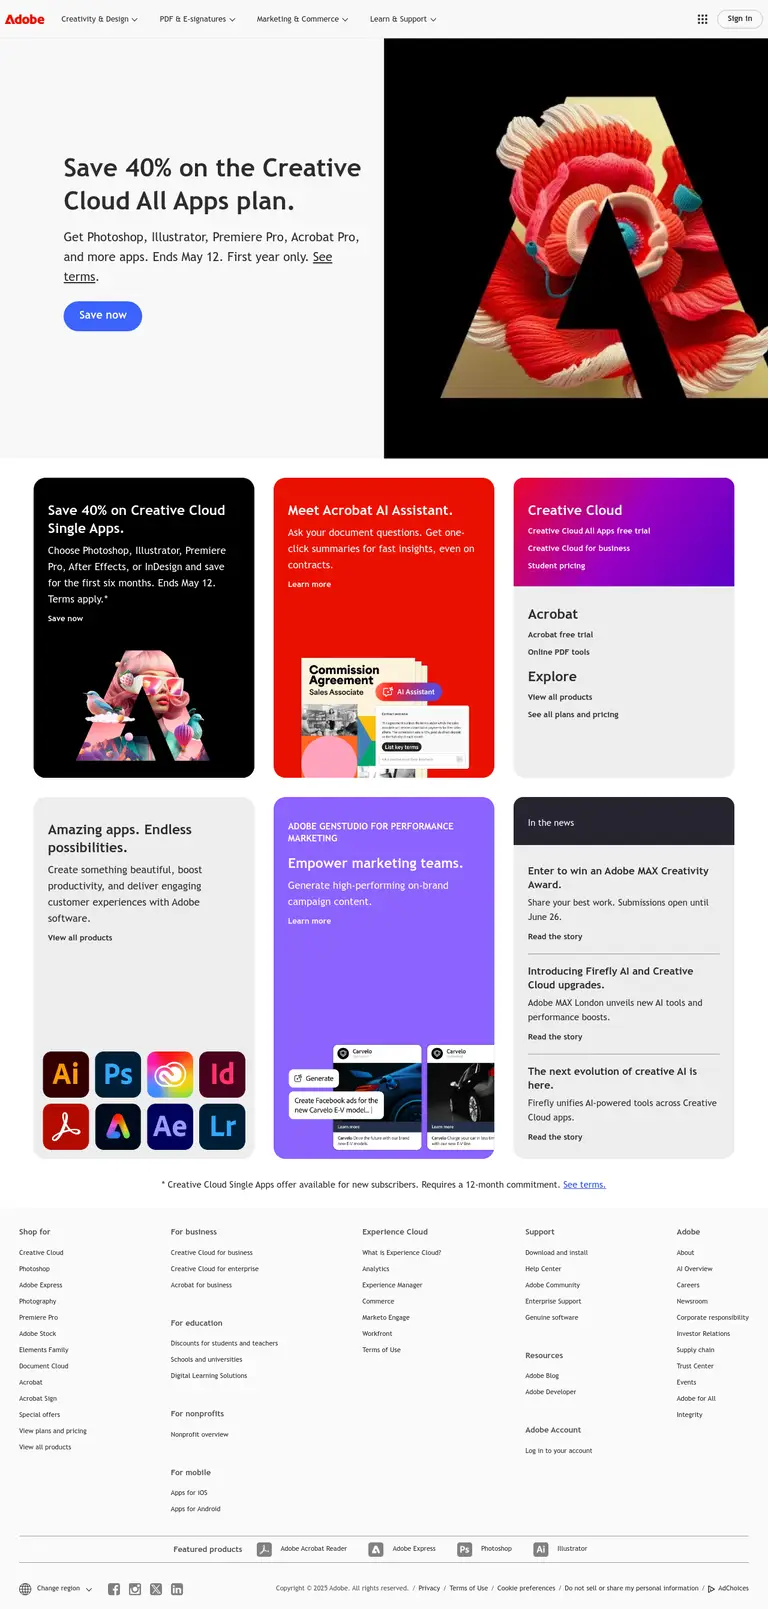
Adobe blocks selenium, so we would need to fix this

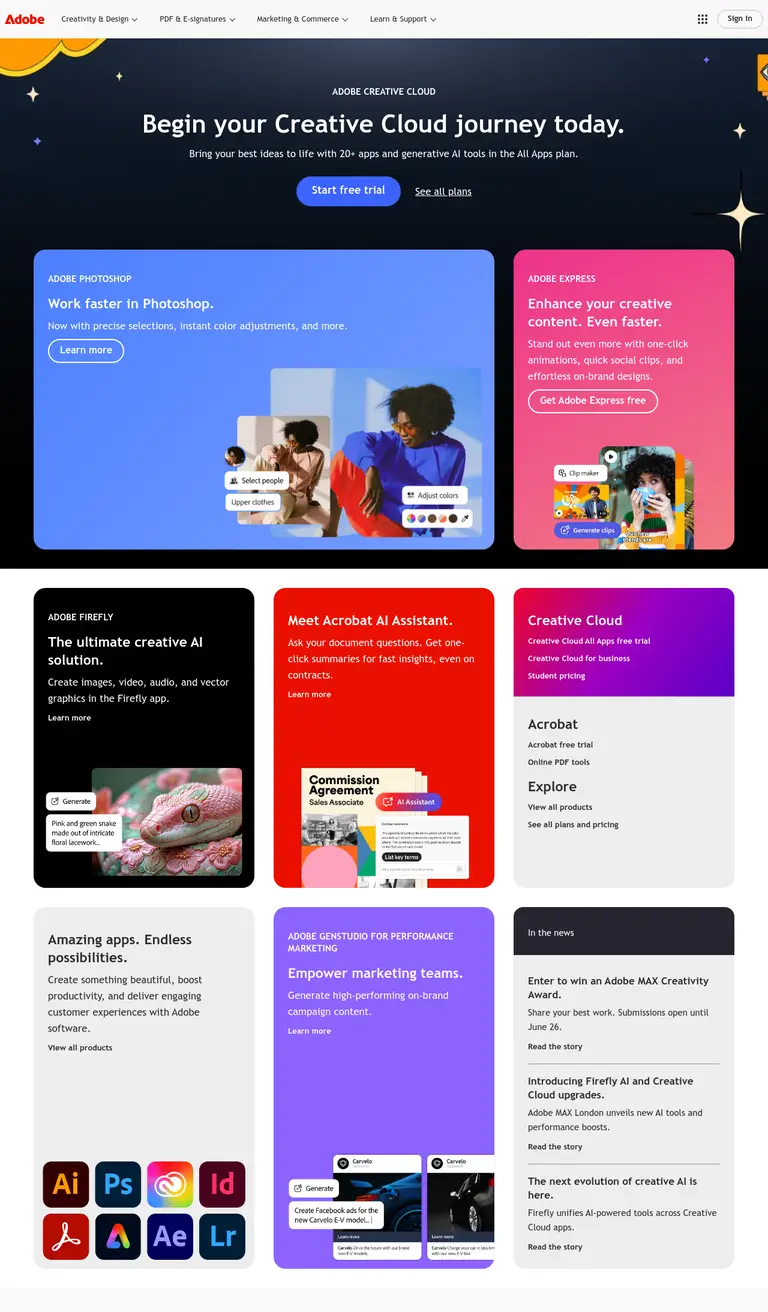
Taken from Windows 11 Snipping Tool
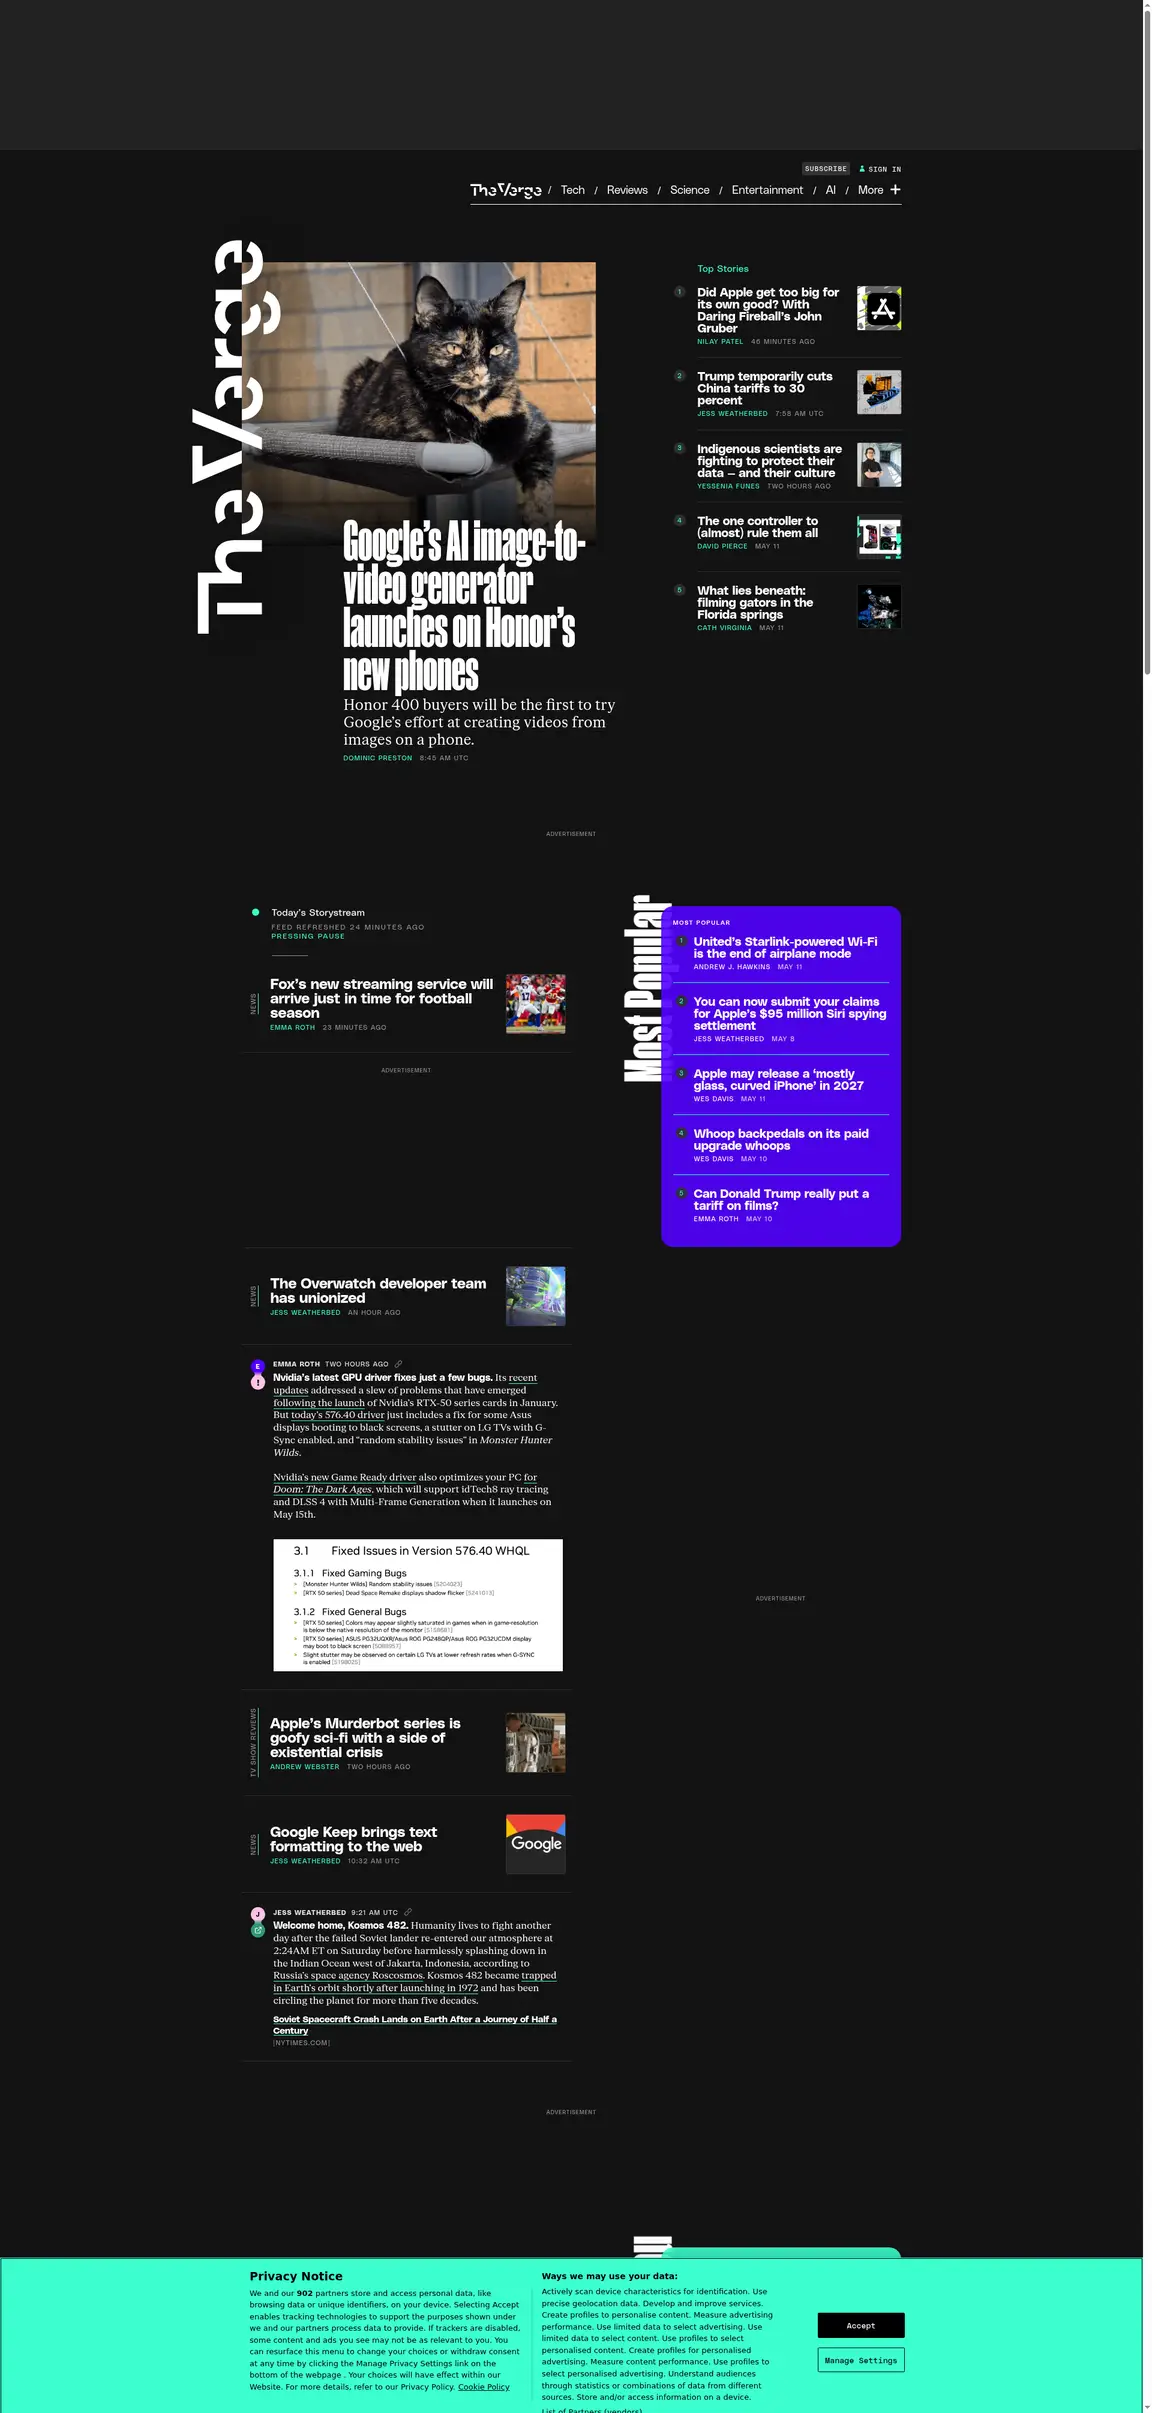
Taken from Selenium
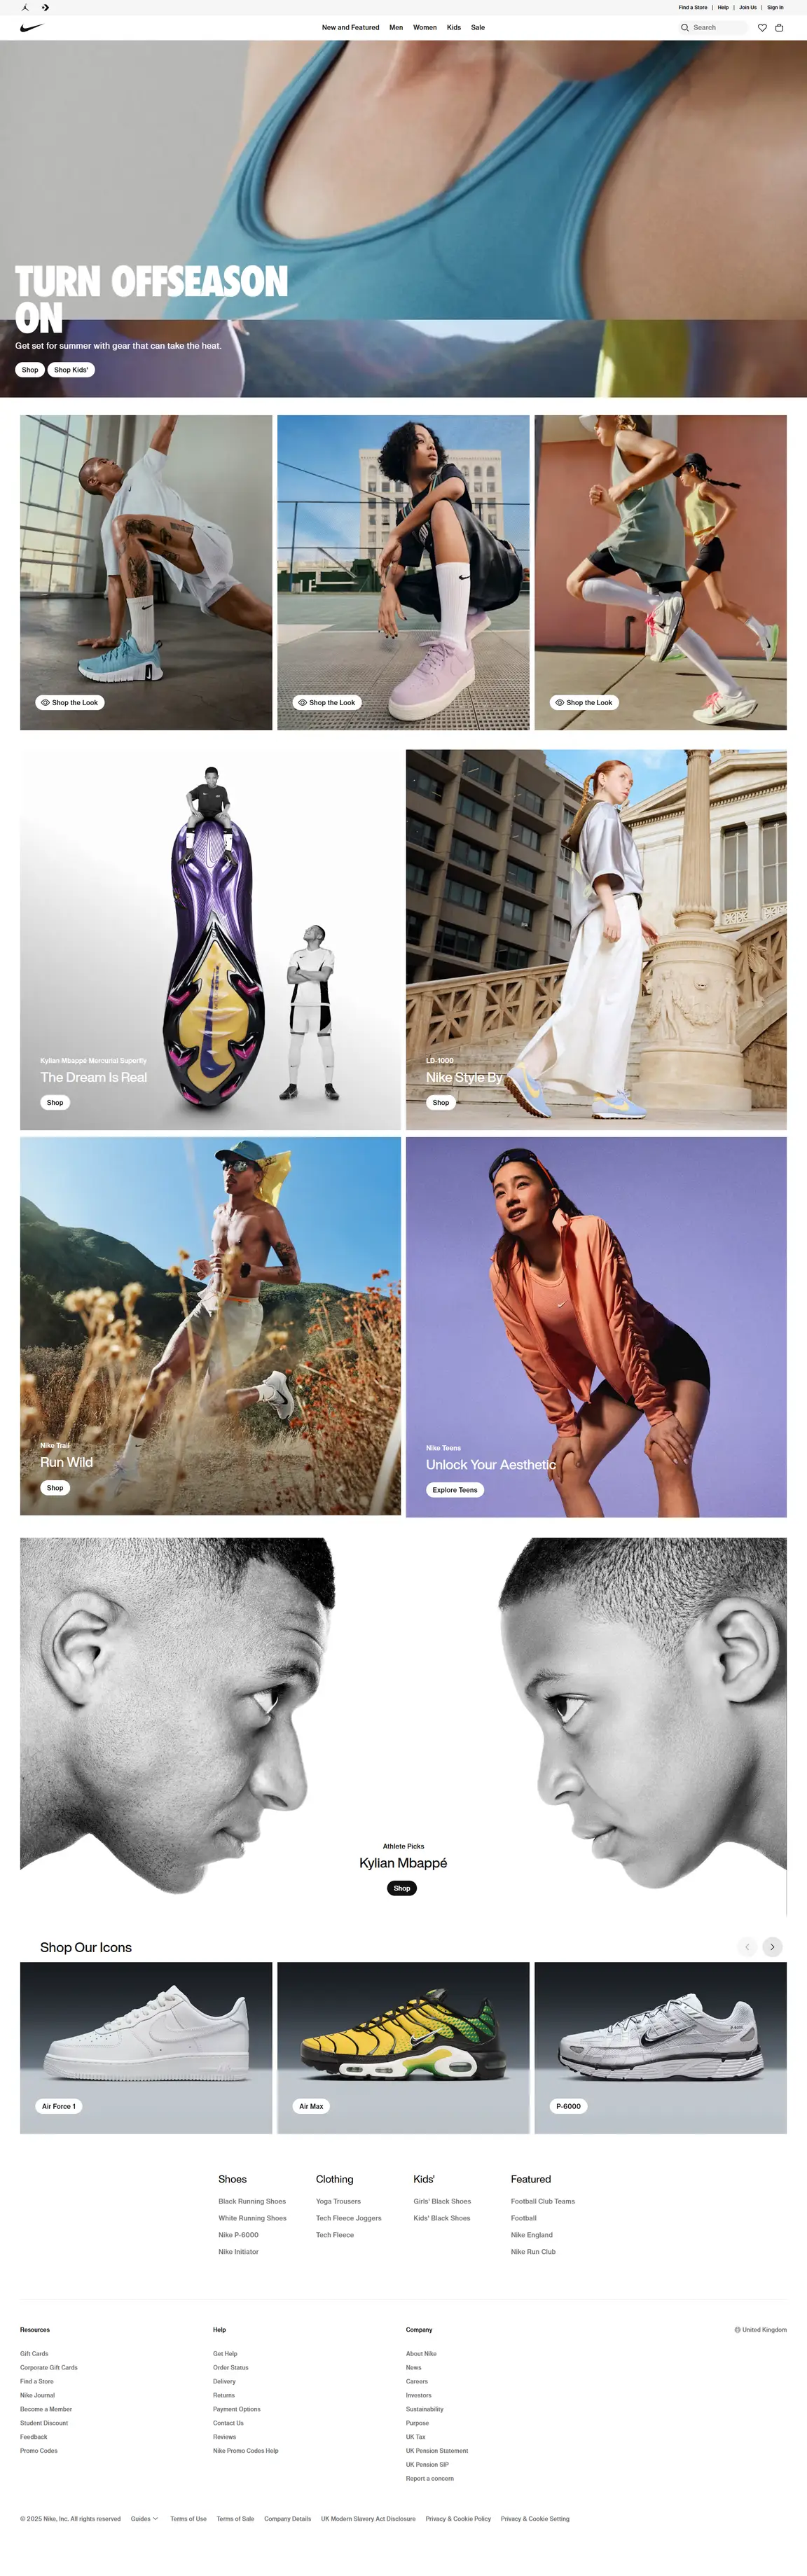
Taken from Windows 11 Snipping Tool
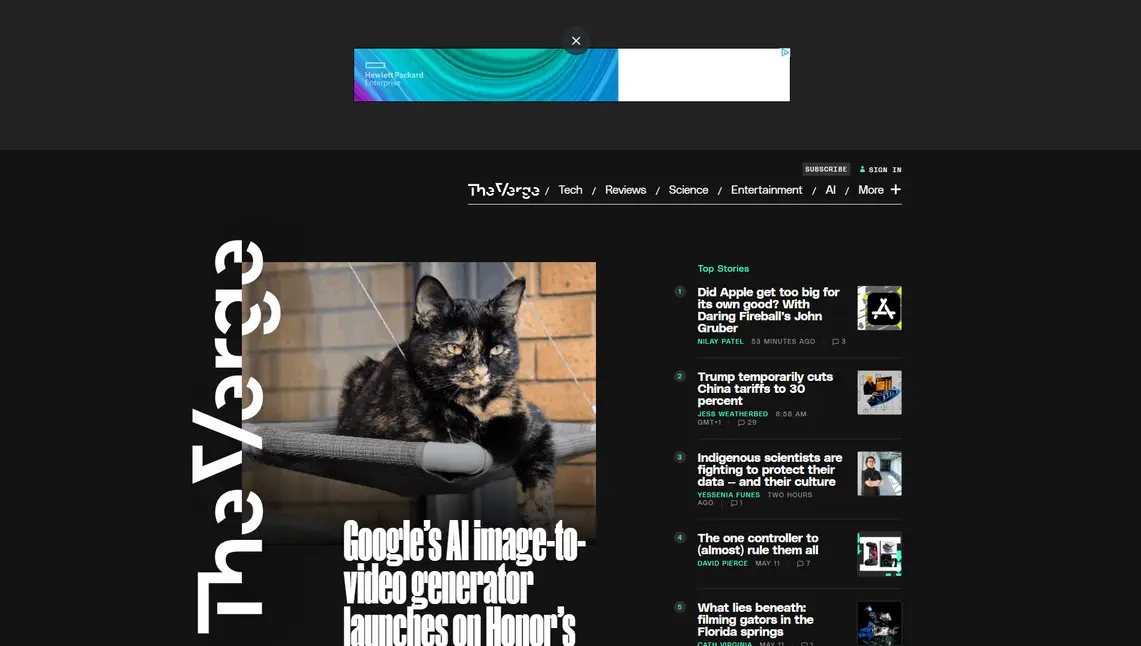
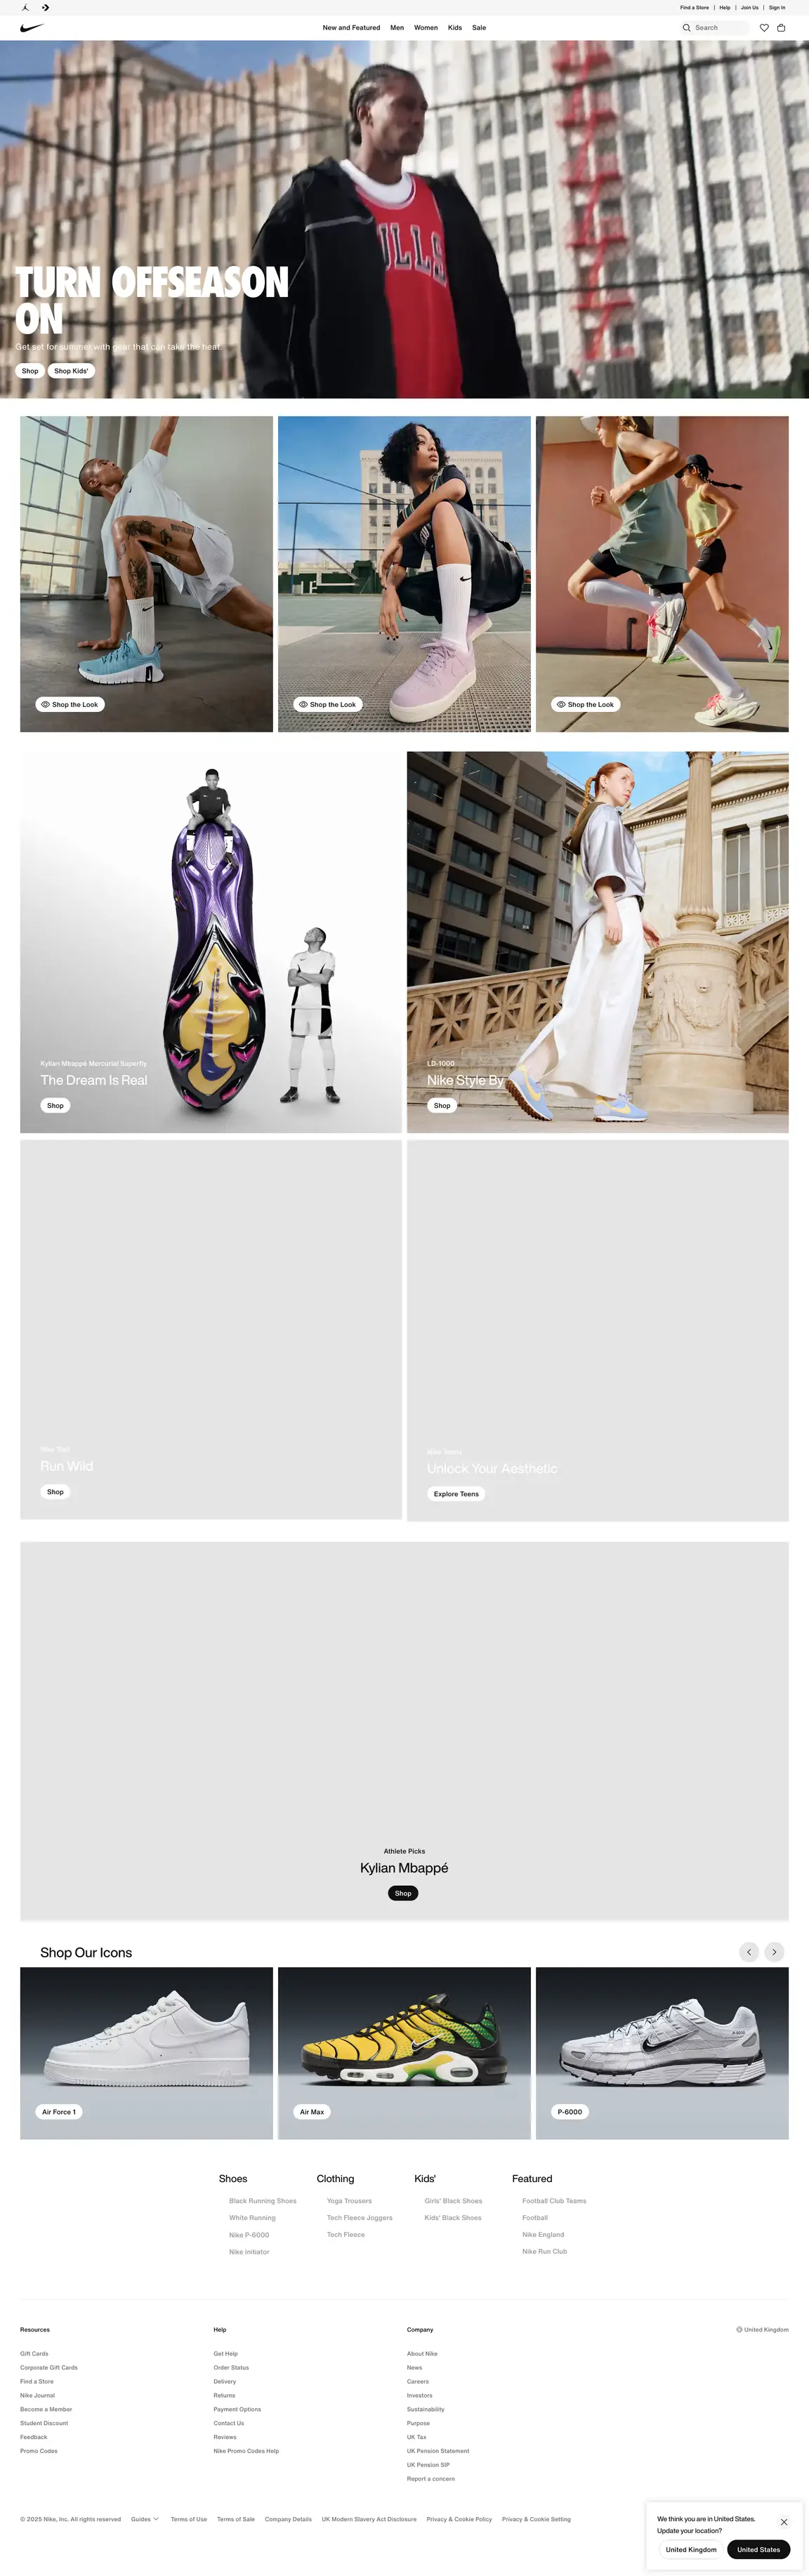
Taken from Selenium

Taken from Windows 11 Snipping Tool
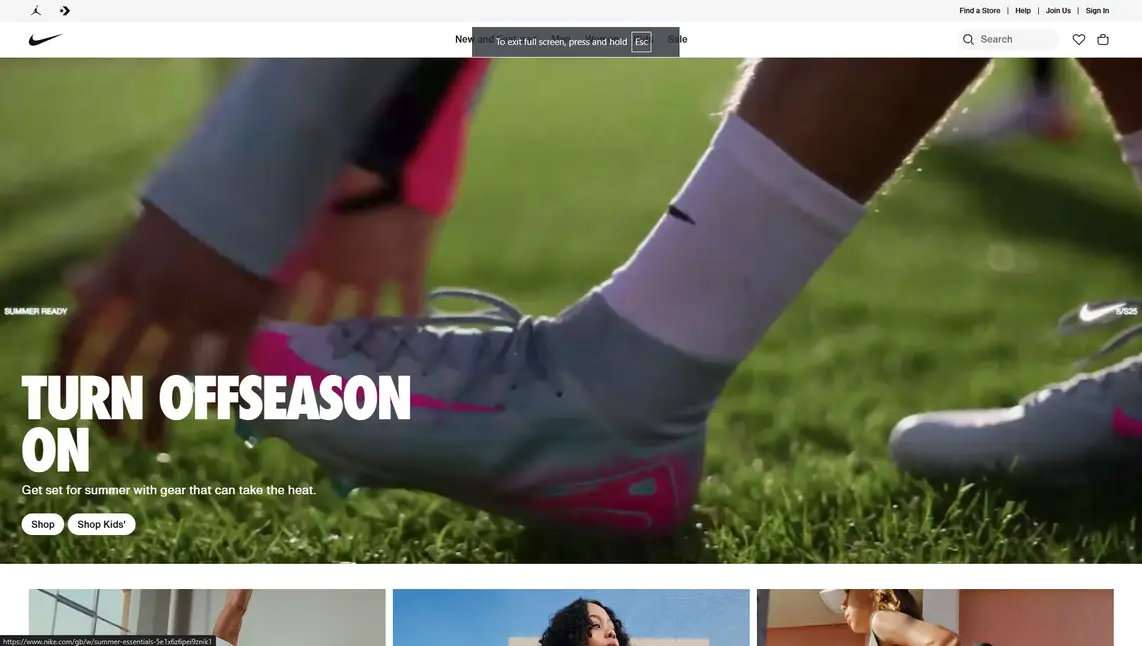
Taken from Selenium

Taken from Windows 11 Snipping Tool

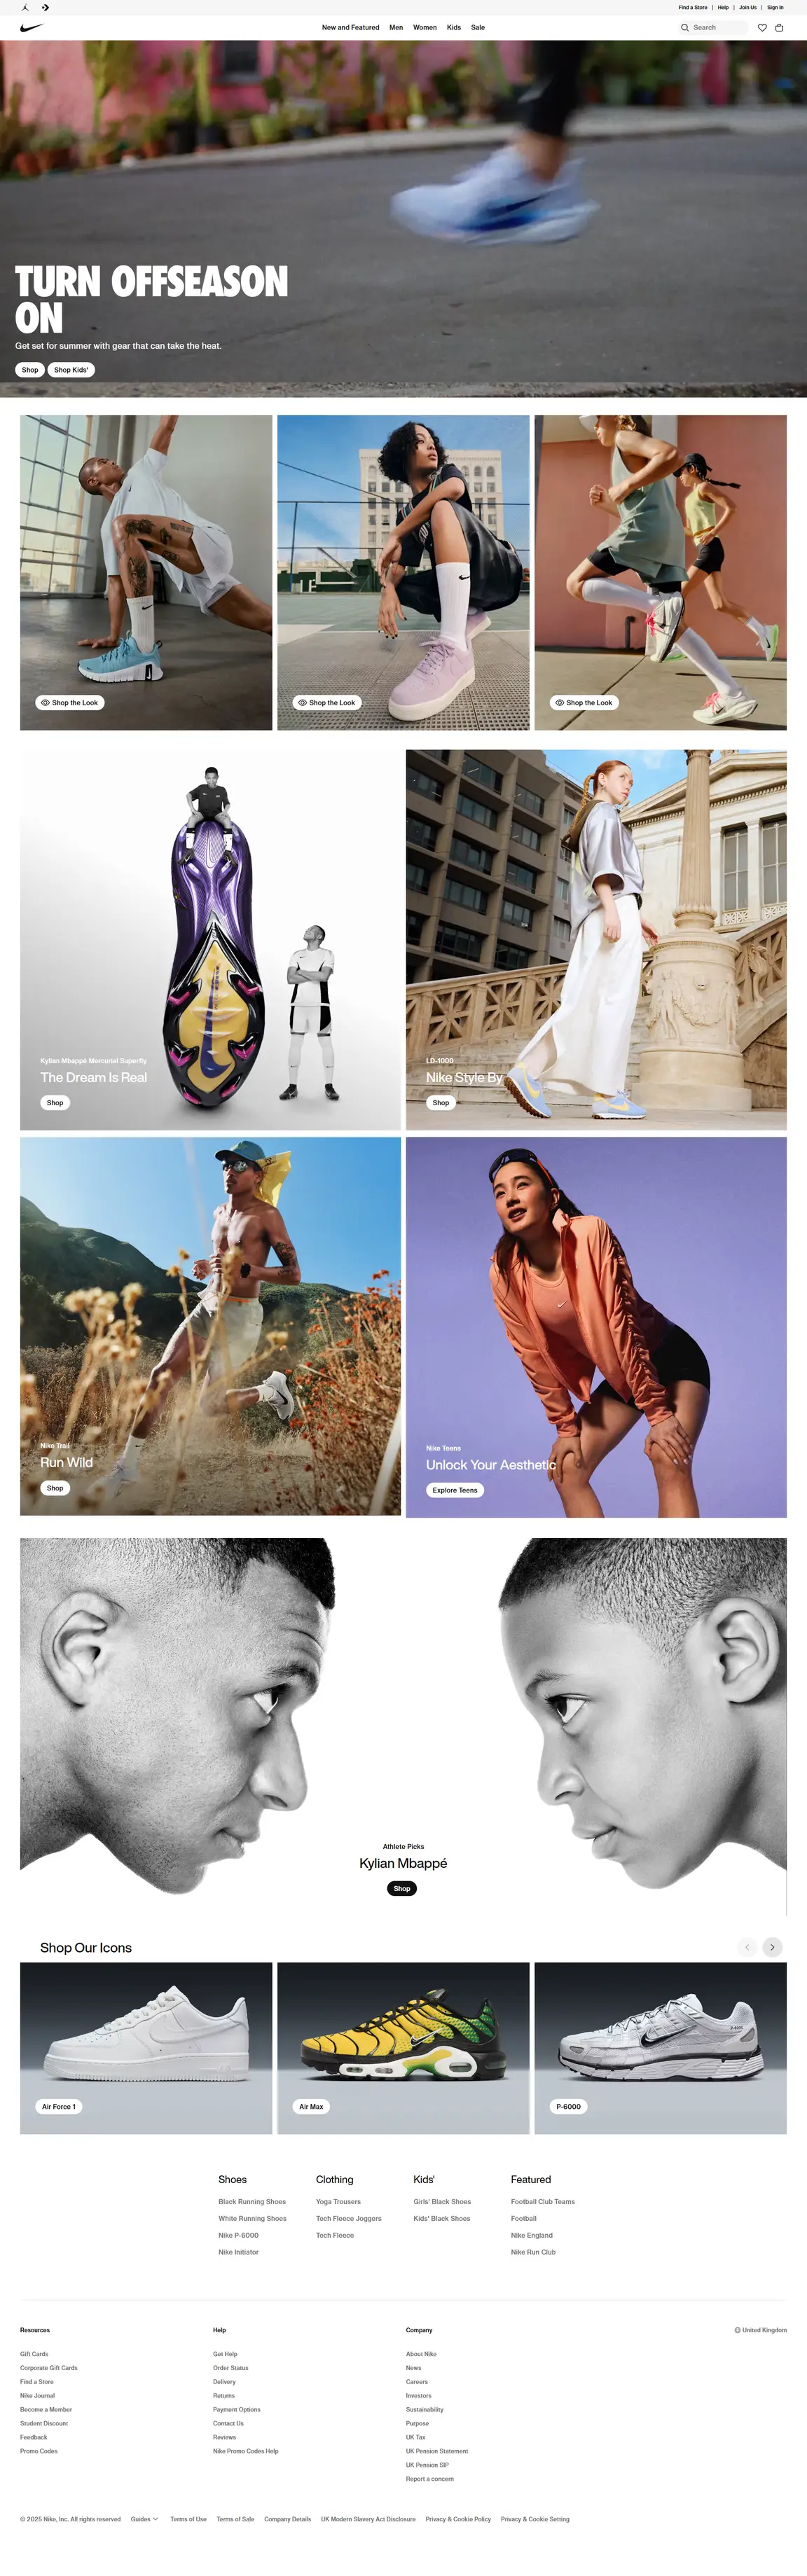
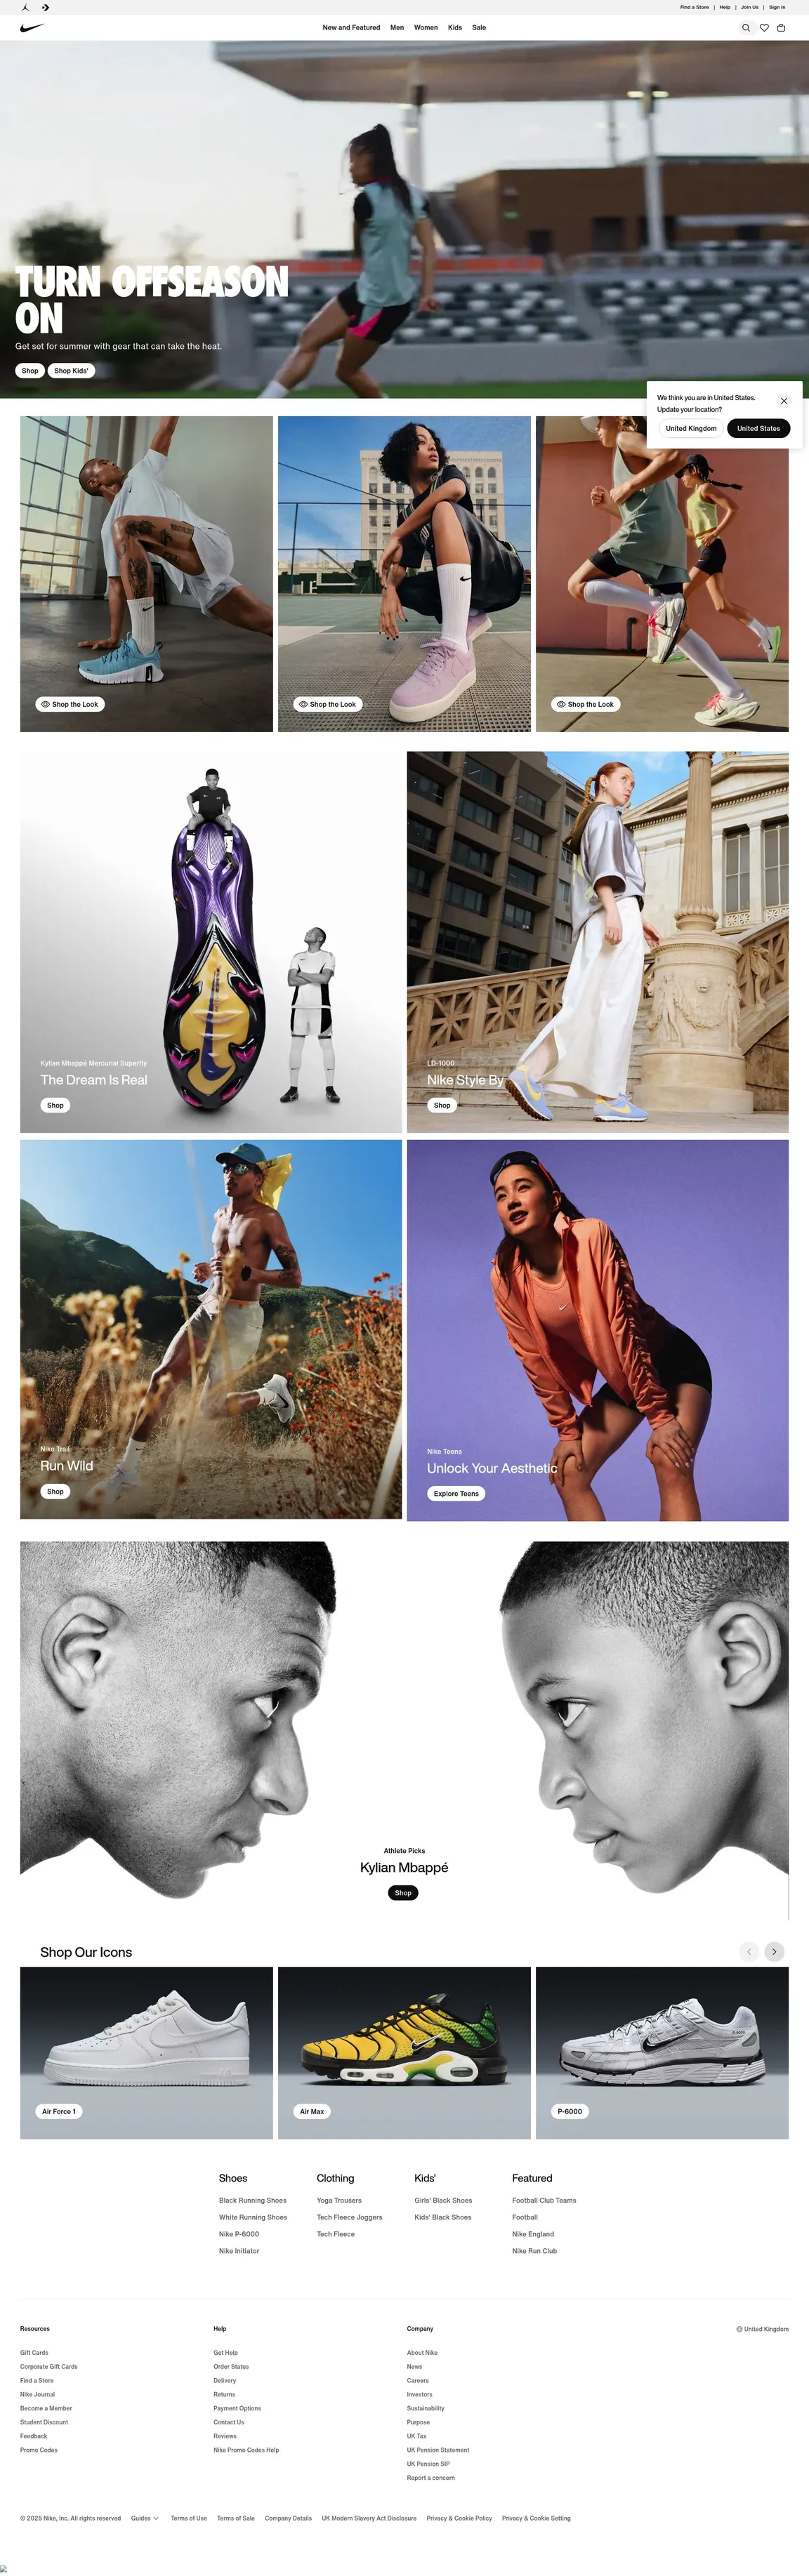
The image quality overall is not that bad. CSS loads well, the fonts from the example websites were loaded correctly but media is a problem. Nike has an autoplay video that Selenium did not start and displayed the video controls instead. Also, the pages did not render fully because the height was not dynamic, further coding would be necessary.
For every new page I will need a lot of coding and troubleshooting. Can I investigate and fix the issue with Adobe? What about Nike’s video? How much time would I spend troubleshooting? How do I take these screenshots via HTTP or from my own application instead of using ssh?
This is exactly why we are exploring alternatives. For every issue we have with Selenium, we must spend hours to fix it. It is an automation tool, and we must automate the behaviour for every different page, we must also wrap it around any service we would like to turn it into, and then we should also maintain our newly created API.
How Do I Choose the Best Tool?
Finding the right tool can be quite subjective, as each user has their own specific needs to fulfill. However, I believe some of the most common factors to consider are: accuracy, because regardless of why you need the screenshots, they must reflect what you'd see when browsing the webpage in an up-to-date browser. Fonts should render correctly, media must load properly, and your CSS must be in place. Reliability, because no matter how many screenshots you're taking, you need to trust that the software will work when you expect it to. And customization, because while needs may vary, a tool with robust customization options is more likely to let you tailor it to your exact requirements.
Then comes speed — some cases require the screenshots to be ready within less than 3 seconds. While some prefer the peace of mind of the next point. Security — maybe you have a specific request with sensitive information and you don’t want that to be exposed. Bear in mind that additional security measures may have a direct impact on speed. And finally, initial cost. As you’ve noticed on the Selenium example, an extensive setup can get quite costly in terms of development time and costs. Instead of creating your own Screenshot service, you might want to consider stuff that’s already out there.
10 Selenium Alternatives for Website Screenshots
I tested some of the most popular screenshot tools and compared them based on the following criteria:
- Onboarding - How hard it is to get the first screenshot, automate and tweak options
- Accuracy and Quality - Image definition and content display
- Speed - For all-in-one services, we collected the average time to render different sized pages with the service default options. Services that do not provide an API were not tested for speed.
- Customization - How much control do you have over the screenshot.
Urlbox
Great user interface for one-off screenshots and API setup. Great consistency.
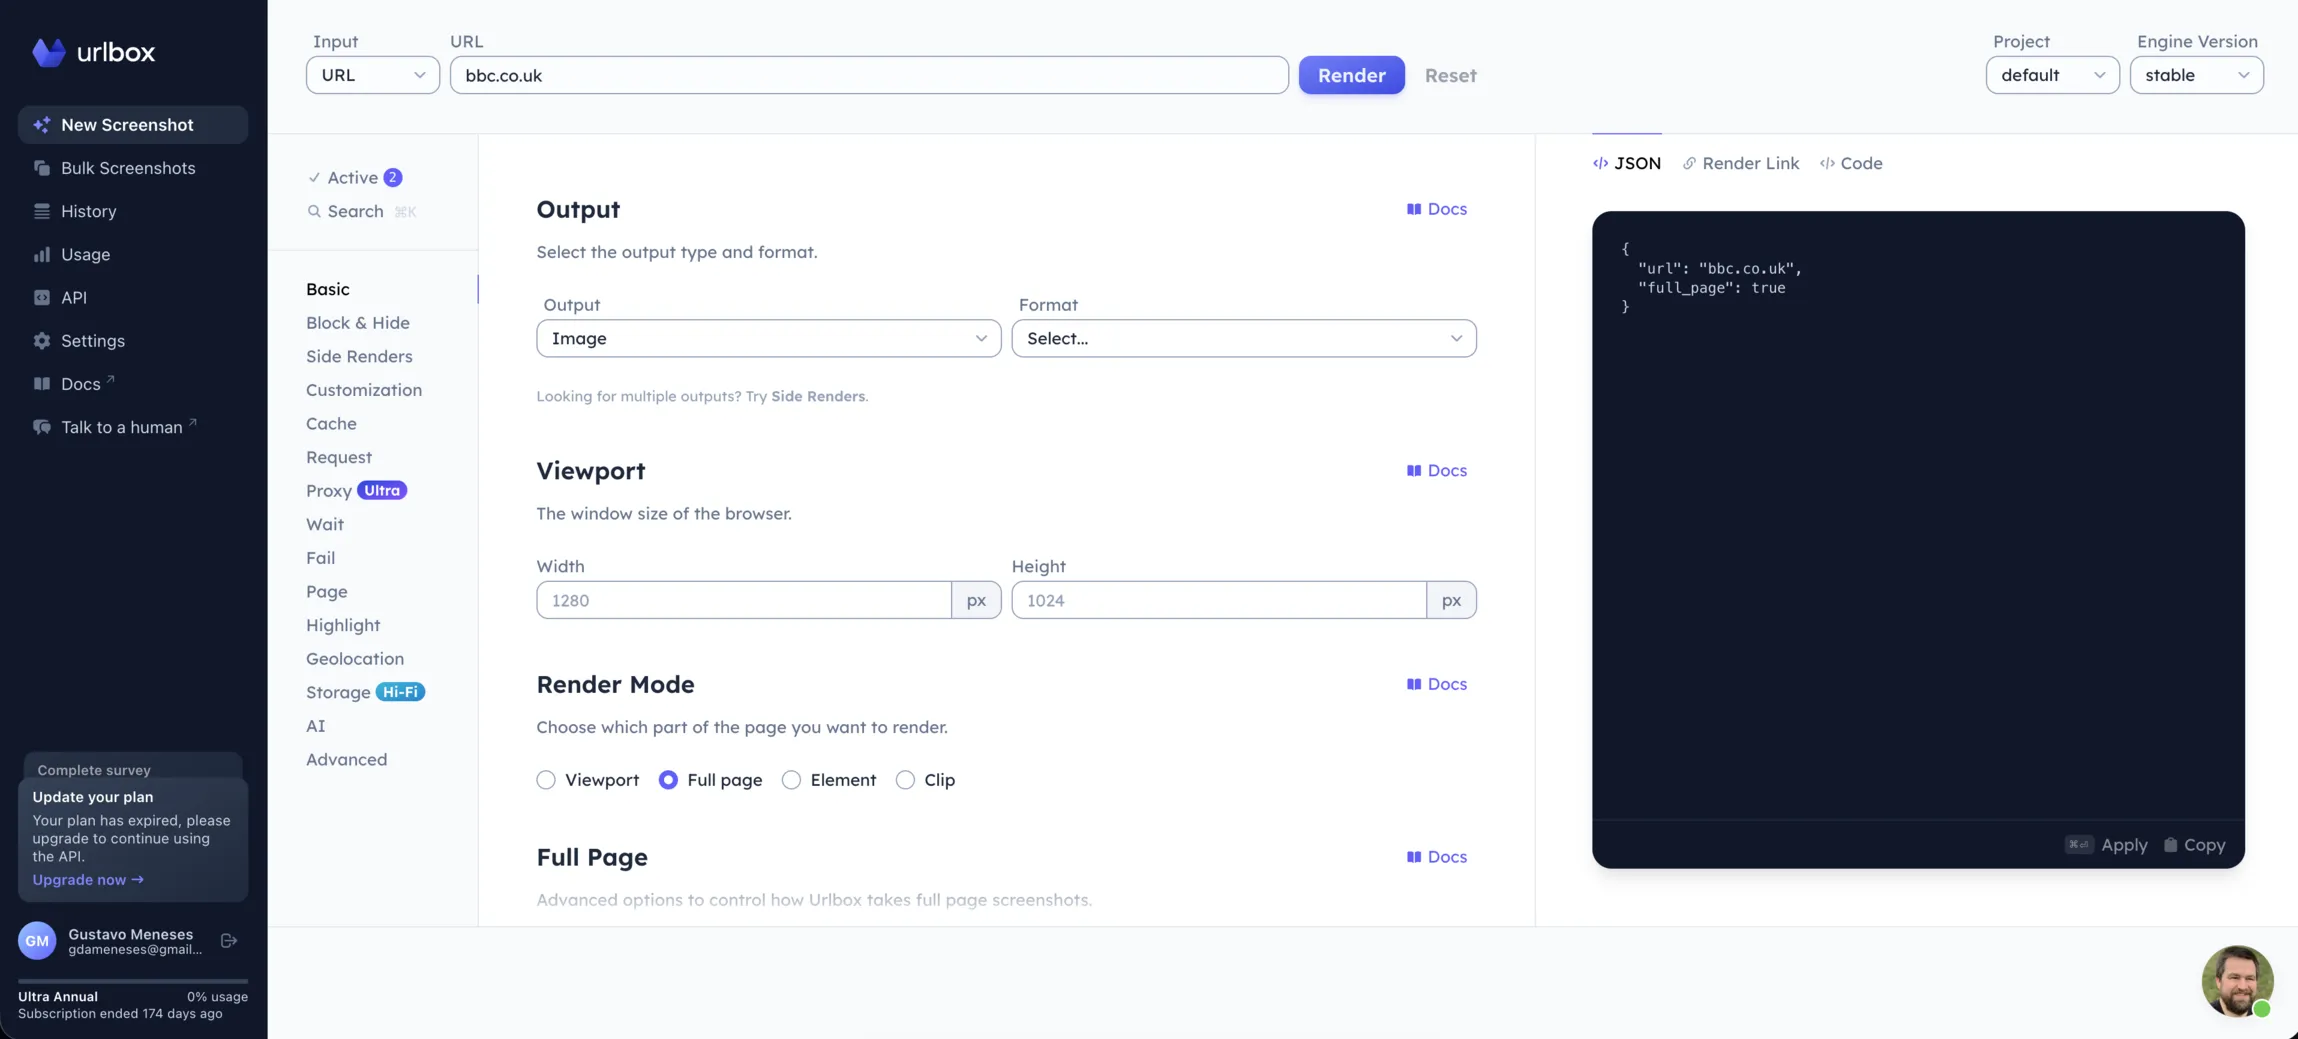
At first glance, UrlBox is very easy to get started with. It offers an API for automation and you can customize and make requests from a very intuitive user interface.
Onboarding
9/10
Onboarding with Urlbox is a breeze. Without much setup, we took the same screenshots from before. I simply pasted the URL, selected Full page and hit Render.
With a well-documented REST API, they also provide a JavaScript SDK. Using their dashboard gives you the request options for both.
With such an easy-to-use interface and an API that works out of the box, the development costs of using Urlbox are minimal. You spend a few minutes customizing your request and that’s it.
If you want to automate the screenshot process, you’d have to wrap the API call around a script or another service.
Accuracy and Quality
8/10
It is clear quality is taken seriously at Urlbox. Fonts are displayed correctly and the video from nike.com was correctly displayed. Without any extra configuration, we already got a picture that showed no scrollbars, no media controls and accepted cookies.
They offer a Retina option for screenshots with 2x the resolution, allowing for pixel perfect images with sharper definition.
The sticky navbar from notion.so behaved a bit funny. It did not display unless the Full Page Mode was set to native, but then the navbar displayed a little above the Hero, another try with the same setup on the next day returned a perfect render, subsequent requests had the layout problem again.
Speed
8/10
Urlbox is not the fastest tool in the market. This is even more present when using the higher quality Retina option. Obviously, the bigger the image, the longer it takes.
On our speed tests, Urlbox finished 2nd averaging 13.5 seconds per render.
Customization
8/10
They offer a wide range of customization for your screenshots. You have options for Blocking, JavaScript injection, Screenshot Delay, CSS selectors to hide elements, HTTP Request with Proxy, custom headers, and even word highlighting.
They do not offer an out of the box option for automation, so you would have to embed their API requests with another tool and they only provide a Node SDK, although you can call their REST API directly using HTTP requests.
Everything you do on their user interface gives you the code to consume their API via HTTP request or the JSON for their SDK.
Stillio
Great automation option for periodic screenshots.
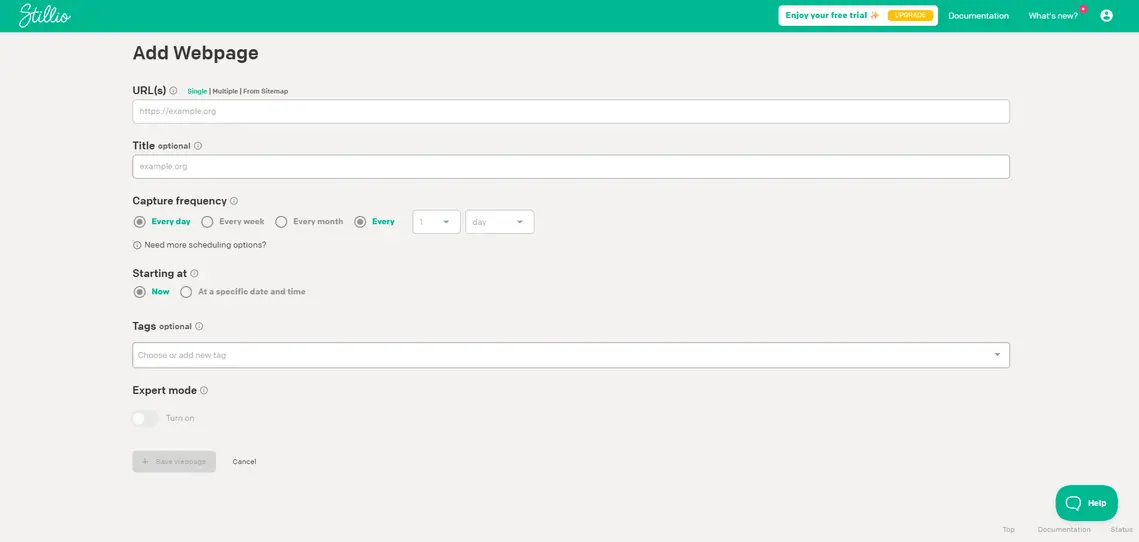
As soon as you get to Stillio’s dashboard, you realize it is fully focused on automation. You add your web pages and set the capture frequency. You have options to download them automatically and via API. Unfortunately, there is no API for setting up your captures.
Onboarding
8/10
Easy enough to get started. All you have to do is add your web pages and set the frequency for the screenshots. The option to add multiple URLs on the same flow was a great plus and allowed me to get setup with my screenshots quickly, although it automatically set the capture time 1 minute apart. The option to add the webpage from a sitemap XML is great for monitoring ongoing changes on several different pages of the same site. Their API only allows you to access your images via HTTP requests.
For developers who are looking for an API to call from their app, Stillio is not for you.
Accuracy and Quality
7/10
Displays media correctly, hides cookies dialogue box, fonts are rendered correctly, and even the sticky navbar from notion.so was not a problem for them. There isn’t a lot of customization for quality here and their screen resolution is limited to a maximum width of 1920. Not great for simulating a 4k screen.
If you are looking for high quality or a scaling factor, Stillio currently does not support that as it is focused on the automation side of things.
Although not great on the image definition, out of the box it had no issues with any of the example websites and displayed them perfectly.
Speed
4/10
As I tried to time how long it took for each screenshot to be rendered, Stillio’s focus on automation wouldn’t allow me to pinpoint exactly when a capture was started. I added multiple URLs for the pages I wanted and it automatically set each capture 1 minute apart.
When I added a single page, it took less than a minute and a few page refreshes to see the first screenshot when selecting now for the starting at option. But again, single screenshots are not the focus on Stillio.
On our speed tests, Stillio finished 4th averaging 55 seconds per render.
Customization
6/10
Stillio is heavily focused on automation. They do offer an expert mode that allows you to use some CSS selectors to manipulate behaviour, but there isn’t much customization on the end result of the screenshot. You can manipulate the screenshot delay, a custom User Agent, and define cookies.
They also don’t provide an API for setting up your environment, which complicates things when you want to embed them inside your app.
Their focus is automation and simplicity.
ScreenshotOne
Up to 3x pixel ratio and the fastest tool out of the box
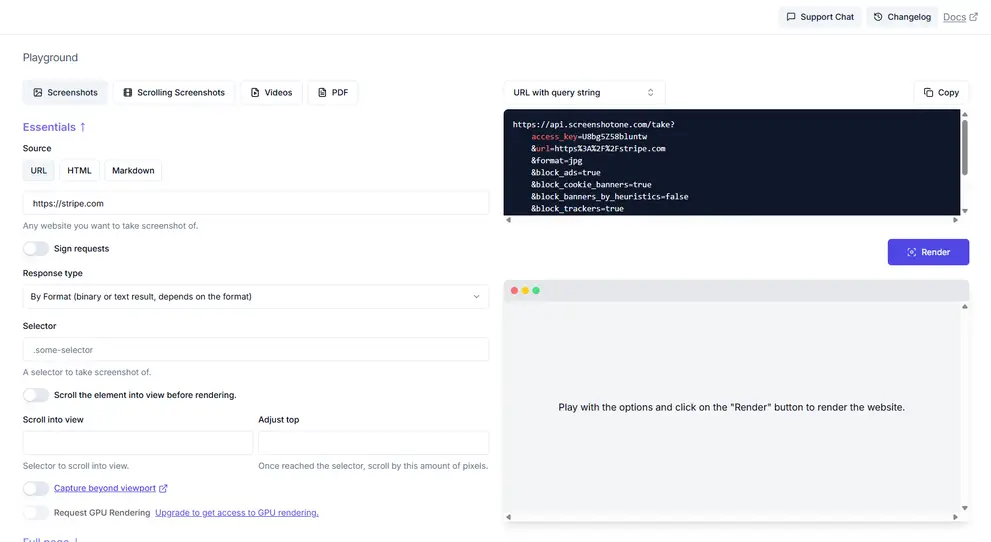
Out of the box setup is not heavily focused on quality but their customization allows the user to take pixel-perfect images with higher resolution. Similar to Urlbox, they offer you an API and a playground to test your requests. Problems with the user interface layout might happen.
Onboarding
8/10
You’re asked on account creation if you would like to try out their “playground” first or go directly to the API key. From their playground, it is easy to get your first screenshot out, although some of the default options do not focus on image quality out of the box.
Tweaking with the options takes a little bit of getting used to their interface, and I felt some of the options that were hidden under their collapsing menu could be classified as essentials, and some of them didn’t really feel like they belong in the section they were placed. A lack of information in some of the options might leave the less experienced screenshoting user a bit disoriented.
Overall, it is easy enough to get your first screenshots out with ScreenshotOne, and consuming their API is also as simple as calling an HTTP request.
Quality and Accuracy
6/10
For the ones that are really looking to zoom in the pictures, ScreenshotOne goes all the way up to 3x scale on resolution. Although their default options are not focused on image quality, you can still get high-resolution images by simply adjusting the viewport scale option.
When it comes to accuracy, they had no problem with the media at nike.com/gb, they block ads automatically, which may leave a few empty boxes in your render, and notion.so was not rendered fully, the bottom section of the page was cropped out. Their render of adobe.com was not great and left all images out when trying a Full page screenshot, even when marking the Scroll option that supposedly forces render of lazy loaded images, although that wasn’t a problem with theverge.com.
Unfortunately, although you can go crazy on the resolution, accuracy was not a strong point with ScreenshotOne.
Speed
10/10
Although their accuracy was not at its best, they did make up for this with their speed. Of course, if you try the higher resolution options, the render time will increase, but their default options allowed them to be the fastest tool we tested.
On our speed tests, ScreenshotOne finished 1st averaging 10 seconds per render.
Customization
8/10
ScreenshotOne allows several tweaks to your render. From image output, there’s a generic quality selector from 0-100, corresponding to jpg compression, you can also customize caching, clipping, geolocation, delay, and even integrate with your OpenAI key with a prompt for their vision API.
You can heavily customize the browser request before the screenshot is taken by modifying User Agent, Headers, and Cookies. Although they offer a lot of customization options, I wouldn’t say their user interface is in the best shape as of today. I had to zoom out in order to see the full menu due to layout issues.
They do offer an API, and several SDKs for a smooth integration within your app. They support the following languages: Go, Ruby, JavaScript, Python, PHP, C#, and Java. The file encoding is up to you, after you get the result, but they do offer integration with S3 out of the box.
ApiFlash
A simple API to get your screenshots
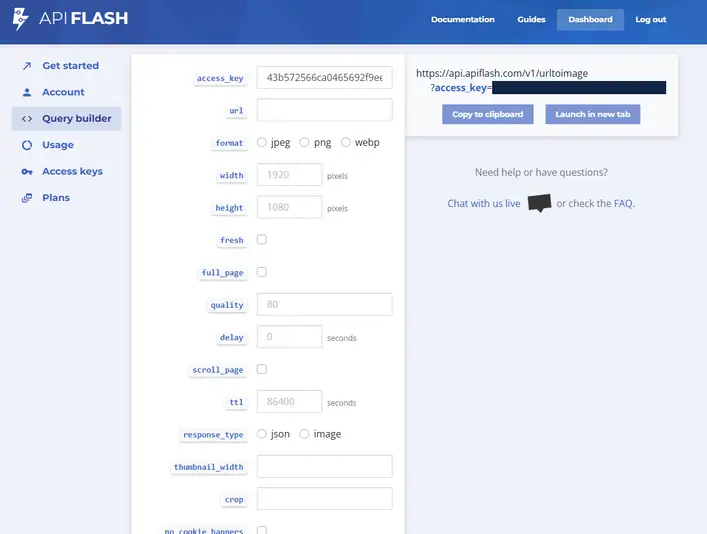
Focused on their API, with their user interface working as query builder, you can still check the results of a render on a new tab.
Onboarding
9/10
ApiFlash sells itself as a simple service and that is really the case. Using their visual query builder to get your URL request ready is very easy, and the hover explanation of each option is also a great plus. Very easy onboarding with a free plan that has no date limit.
Their user interface is not so friendly for non-developer users, and they offer no SDK as of today.
Quality and Accuracy
6/10
The lazy loading on full page seems like a trend now. ApiFlash did well when loading the images on adobe.com, but the footer was left out. It also struggled to render images that were further down the longer pages, Nike, Notion, and TheVerge had images only on the top half of the render.
Even when trying a capture with higher resolutions, or using their scale factor (for double resolution), the sharpness just wasn’t really there, it feels like there is some compression going on, even if you set quality to 100.
Speed
6/10
Without any tweaking and using their out of the box setup, APIFlash felt a bit slow on the response time.
On our speed tests, APIFlash finished 3rd averaging 20.2 seconds per render.
Customization
6/10
They offer plenty of customization and even a direct integration with S3 to upload your captures. But they do not offer half of the customization options we have seen in the competitors. You have very little control over the image and no post-processing options.
You can still make changes on Geolocation, JavaScript Injection, User-Agent, headers, cookies, and some more options related to the client used on the request.
GoFullPage
Chrome extension that works with one click.
If you are looking for an easy alternative to get one-off screenshots on the go, GoFullPage is an extension that, once installed, captures your current Chrome tab fully by clicking on the extension. It is not for you if you are not using Chrome, or looking for customization.
Onboarding
10/10
There really isn’t much to be said here. You install the extension with a few clicks, you click the extension, and see it scrolling down the page, as it captures it, and then you see your capture on a new tab. There is no sign-up, no plan choice, no customization. You hit one button, you get the screenshot.
Quality and Accuracy
7/10
I believe this is very subjective. GoFullPage is not running on a server anywhere. It uses your machine to capture your Chrome tab. Hiding cookies banners, and any behaviour prior to the screenshot, is done by you. For that reason, it is very complicated to give it a rating, simply because I am not rating the service, I am rating my specific Chrome session on my specific machine and OS at the time of capture.
Accuracy and reliability also get tricky here. I remember when I used Linux Mint, all the fonts looked a bit jagged, and if I were to capture with GoFullPage on that system, you can see where I am going, right?
Still, on the session I had, I was actually very satisfied with the end result. The saved image looks much better than the preview, so keep that in mind.
Customization
1/10
There isn’t much. This is an extension that captures your browser window as it is when clicked. If you don’t want the cookie banner, accept them or dismiss the dialogue.
They do offer a premium plan with some extras but nothing related to changing the request and more focused on post-processing of the image. In all fairness, you would change your request using other tools since it’s your Chrome session.
You can actually save the results as a .pdf and there’s an edit option that is only for premium users, as you would then have to sign up to export the results.
GoFullPage is very specific for what it does and it is not trying to solve a different type of problem.
Fireshot
A browser extension that goes beyond Chrome and gives you more control
Another easy alternative, very similar to GoFullPage, is Fireshot. It gives you some extra controls and supports Chrome, Firefox, Edge, and Safari.
They offer an API that adds some sprinkles to how you use the extension, enabling partial automation of the flow, making editing and exporting the results a bit faster. However, it’s not something you can call remotely. It’s simply designed to automate the extension’s control on your browser.
Onboarding
10/10
Very easy to get started. It is simple to install, no sign-up required, no plan choice. But one extra click here to select what type of capture you are taking. Once captured, saving the image or sending it via email is done very quickly.
Exploring its different options and features was also very simple.
Quality and Accuracy
6/10
Again, it relies more on your computer and behaviour before triggering the screenshot than anything else. The image definition is great and since this is not done online, they do not worry about image compression, so you get a very good result regarding pixel presence.
Reliability and accuracy are the same as GoFullPage. I had issues with Fireshot on bigger pages. theverge.com had some black boxes on the page, which I imagine is where the image is stitched together, and it captures as fast as it scrolls, so a few elements were still loading before they got captured. This issue would be fixed if you were to scroll the page back and forth before capturing or altering the scroll speed on the options.
Maybe tweaking with some options would help improve the quality, but the result out of the box wasn’t great.
Customization
6/10
Of course, not an automation system for screenshots, they do offer extras on top of simply taking a screenshot of your Chrome tab. You can set a list of URLs to capture but these are going to open on your Chrome and run the capture process. You can choose to capture a full page, a visible viewport, or a selection of the page, as you would with Snipping Tool or Firefox screenshot tool.
On the result page, you can select to simply copy the image to your clipboard so you can Ctrl+V it away, directly attach it to a blank email on Gmail, or download it as an image or .pdf. Before capturing, you can tweak a few options on the extension and even alter the scroll speed and file format.
Comparing it against GoFullPage, it would be a 10/10 for customization, but today we’re not only evaluating browser extensions.
Playwright
A browser automation tool focused on tests with support for .NET, Python, JS and Java
Playwright is an end-to-end testing tool. It can also be used to capture some screenshots, but without a user interface. Its code felt easier to implement than Selenium, and it had less problem with media.
Some websites will block headless browsers and that would incur extra work in avoiding their efforts. I wasn’t able to get to adobe.com or theverge.com. Same as Selenium, for each problem, you code to fix it.
Onboarding
7/10
The documentation is very clear and the first screenshot came out in a few minutes, but Playwright is an automation tool made for writing test scripts and if you want to use it as a screenshotting tool you are going to put in some work. The onboarding costs would depend on a lot of factors, and you will have to write every functionality or customization you want. You’ll need specific selectors for the cookies, you’ll need specific behaviour automation to get lazy loading in, etc.
On top of that, if you want to use Playwright remotely or as a separate service, you would have to fully create the service, API endpoints and storage.
Although it is a developer option, Playwright’s setup is easy enough and simple screenshots can be taken easily.
Quality and Accuracy
8/10
You are in control of the setup here. You can change Scale Factors to get better resolutions or change some of the many options the screenshot function accepts as arguments.
Accuracy also depends on the implementation you take here. You can add evaluations to ensure all images and fonts are correctly loaded or you can add timeouts to wait for complex animations to complete. Using it out of the box we had to fix the cookie banners showing on the renders and images on the bottom of the fullpages were not loaded properly. You would have to simulate some user behavior to ensure lazy loads work.
Regardless of the out of the box lack of accuracy, the resolution of the images was great even on a 1x scale. Making it a 10/10 depends on how long you want to improve the code you are running.
Speed
?/10
Another point that you are in control of. It felt surprisingly fast to use Playwright without much configuration. I was running the same Ubuntu VM on Oracle’s free tier from Selenium and still averaged around 11 seconds for the screenshot to be saved. Add this to how long it would take to send the file to your favourite storage and get the url for the image back and there’s your speed.
Of course, I did this directly via ssh. Wrapping the service around an API and considering security measures would play an impact on the end speed of service. You could make this better by using a more robust machine with a setup focused on speed or you can opt for better quality output that will increase your processing.
For that reason, it wouldn’t be fair to compare Playwright’s speed of service with the Full services we saw here.
Customization
10/10
This is where the browser automation tools shine. Differently than Selenium, Playwright’s screenshot function has many options regarding quality, output and even disable CSS animations - Capturing notion.so page would greatly benefit from this.
You can customize everything from the request to the output. Once you have the image buffer, you can really decide what to do with it, you can add any storage service you want, send it via email or whatever else you need.
I felt like I had full control over the implementation if wanted, but still having a lot of default options is also a great option to not worry so much about details.
Puppeteer
Browser automation focused on JS
Puppeteer It works with only Chrome or Firefox, it provides proprietary support only for JS, although you have community driven libraries in other languages.
Similarly to other automation tools, you are running a headless browser that will get blocked by some pages and you’ll need to work around this obstacle. Adobe.com and Theverge.com both blocked our attempts.
Onboarding
7/10
With good enough documentation and a much simpler set of features than Playwright, getting started with Puppeteer was easy enough, and the only problem I had was having to customize it to run with Chromium rather than the native Chrome option, since I ran it on my Ubuntu VM on an ARM processor.
Getting my first screenshot from there was very quick. Since this is a developer-focused tool with a focus on end-to-end tests, the implementation cost to set your own screenshotting service here would depend fully on how complex your system needs to be.
Bear in mind, Puppeteer is simply the headless browser automation tool; it does not offer you an API for remote access, storage, or anything similar. You are in charge here.
Quality and Accuracy
7/10
Being in control is great, but I am measuring the result, out of the box, without tweaking for quality. The media on Nike’s website was displayed correctly and no scrollbars were visible. But several issues regarding accuracy are visible here. You do have many options to change; for example, the quality option affects how compressed JPG and WebP images are—the lower the quality value, the higher the compression. When setting your device viewport, you can also set a device scale factor for higher pixel density resulting in better definition.
The problem with lazy loading is still present and requires further implementation in the capture algorithm to fix. Any image on the bottom half of the window for full page render is simply not loaded.
If you are developing for constant screenshots of a single page, it’s worth spending some time ensuring you get a perfect result, but keep in mind, more pages means more work.
Speed
?/10
Also heavily dependent on the overall implementation. It is quick enough to command the browser to navigate to a certain page, take a screenshot and save it to a path with the default configurations on a 1080p viewport—around 7 seconds. But then again, this is only how long it took for Puppeteer to do its job; if you build an API around it, make changes to the quality and depending on the setup you’re running, the speed will get impacted.
For that reason, just like with Playwright, we are not comparing Puppeteer’s speed with the API services we have.
Customization
10/10
As you’d expect, developer focused tools allow a lot of control. Although it has fewer features than Playwright, Puppeteer’s customization is still nothing to be ashamed of. It allows you to customize from file format output, image clipping directly from the algorithm and even use its test features, such as evaluate and assert, to guide its behaviour ensuring you have a great page render before you capture the screenshot.
You can also customize your request’s headers, cookies, what to do with the output after the capture, and elements to omit. You can customize pretty much everything, and even their Screenshot interface allows many arguments to shape the capture.
Conclusion
It was great to test all these different tools. As I am a software developer myself, I can’t avoid getting dragged closer to the tools made for developers. For a fully customized option, I really enjoyed working with Playwright.
If I am choosing an all-in-one solution, Stillio and Urlbox are great options with a few different objectives. Urlbox allows me to wrap their API and make pretty much any use of it with a great level of customization, similar to what I have with Playwright and Puppeteer without the fuss of hosting and writing a full API. Stillio focuses on the periodically taken screenshots and automation out of the box. Both have great quality and differ in image definition and accuracy.
If what you need is a one-off screenshot, I hardly recommend going with Snipping Tool or a native screenshot from the OS, simply because GoFullPage allows for great results of full-page renders with just one click.
There were other tools I really wanted to test but couldn’t. Either because of a “Contact our sales team” sign-up wall or simply not working when I did the tests. Those were: ScreenshotAPI, PageVault, PageFreezer, and Pikwy.
I hope I was able to help you in your decision of choosing the best tool for your needs by testing them all so you don’t have to. Now it is all about making a choice and getting it to work.
Comparison
Here are all the captures if you want to have a peek on each of the results I got.
ApiFlash - Adobe
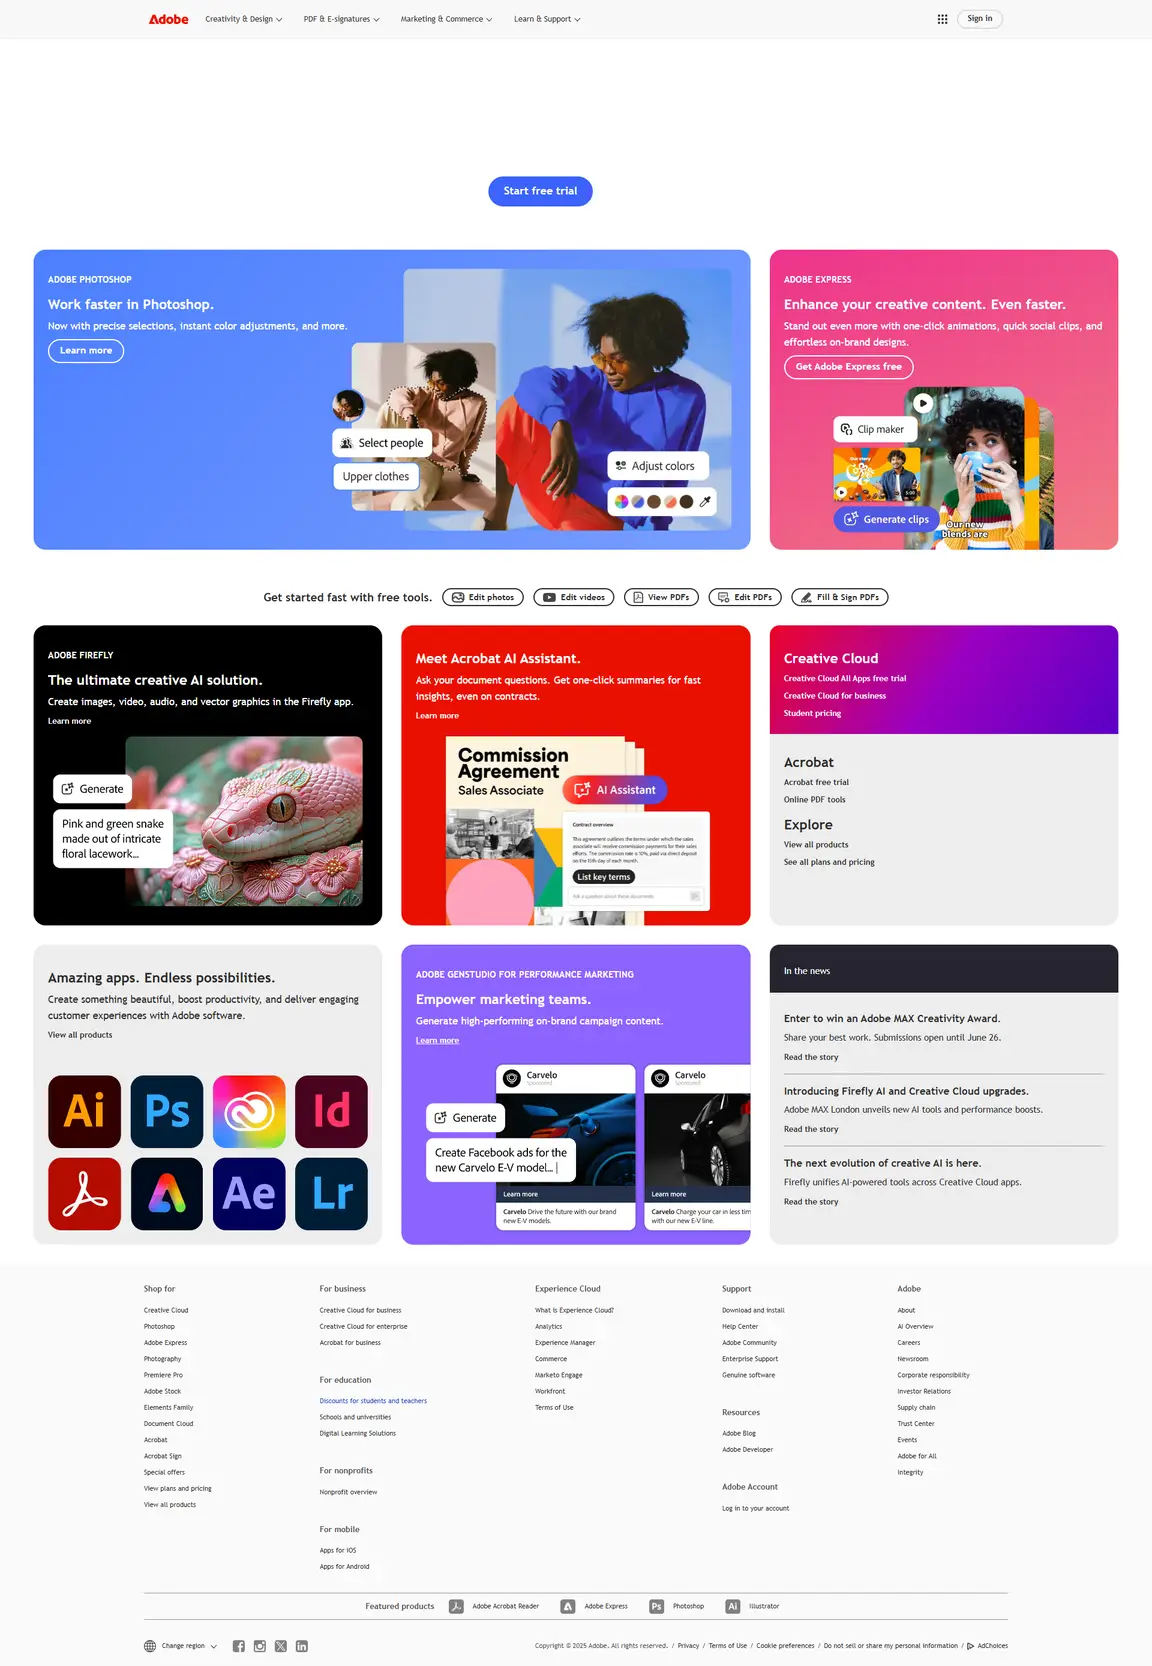
Fireshot - Adobe
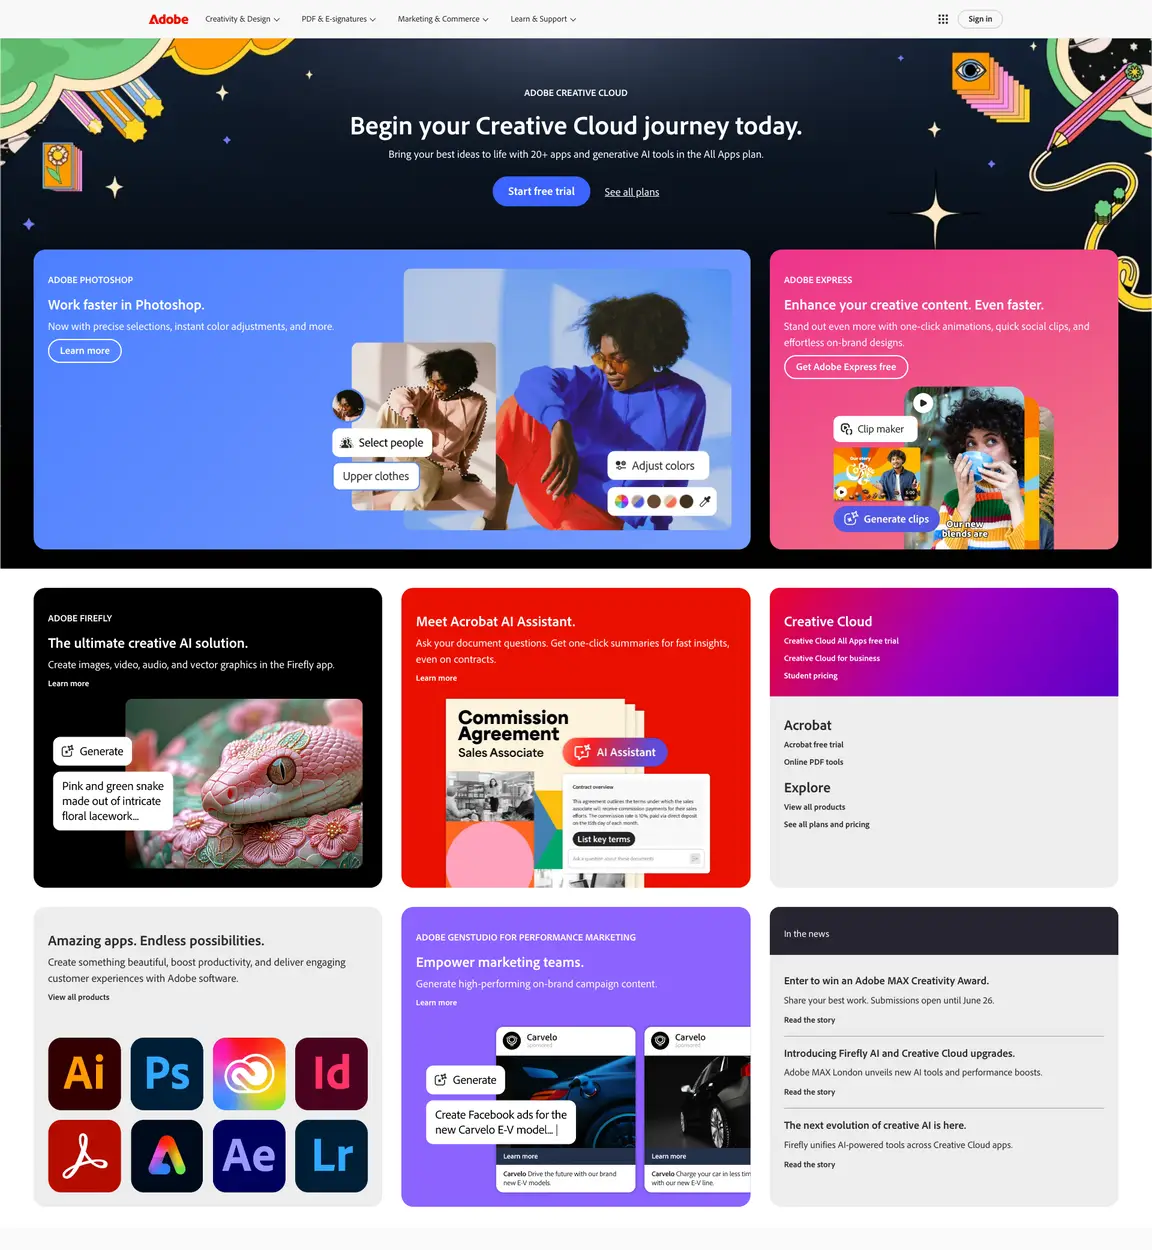
GoFullPage - Adobe
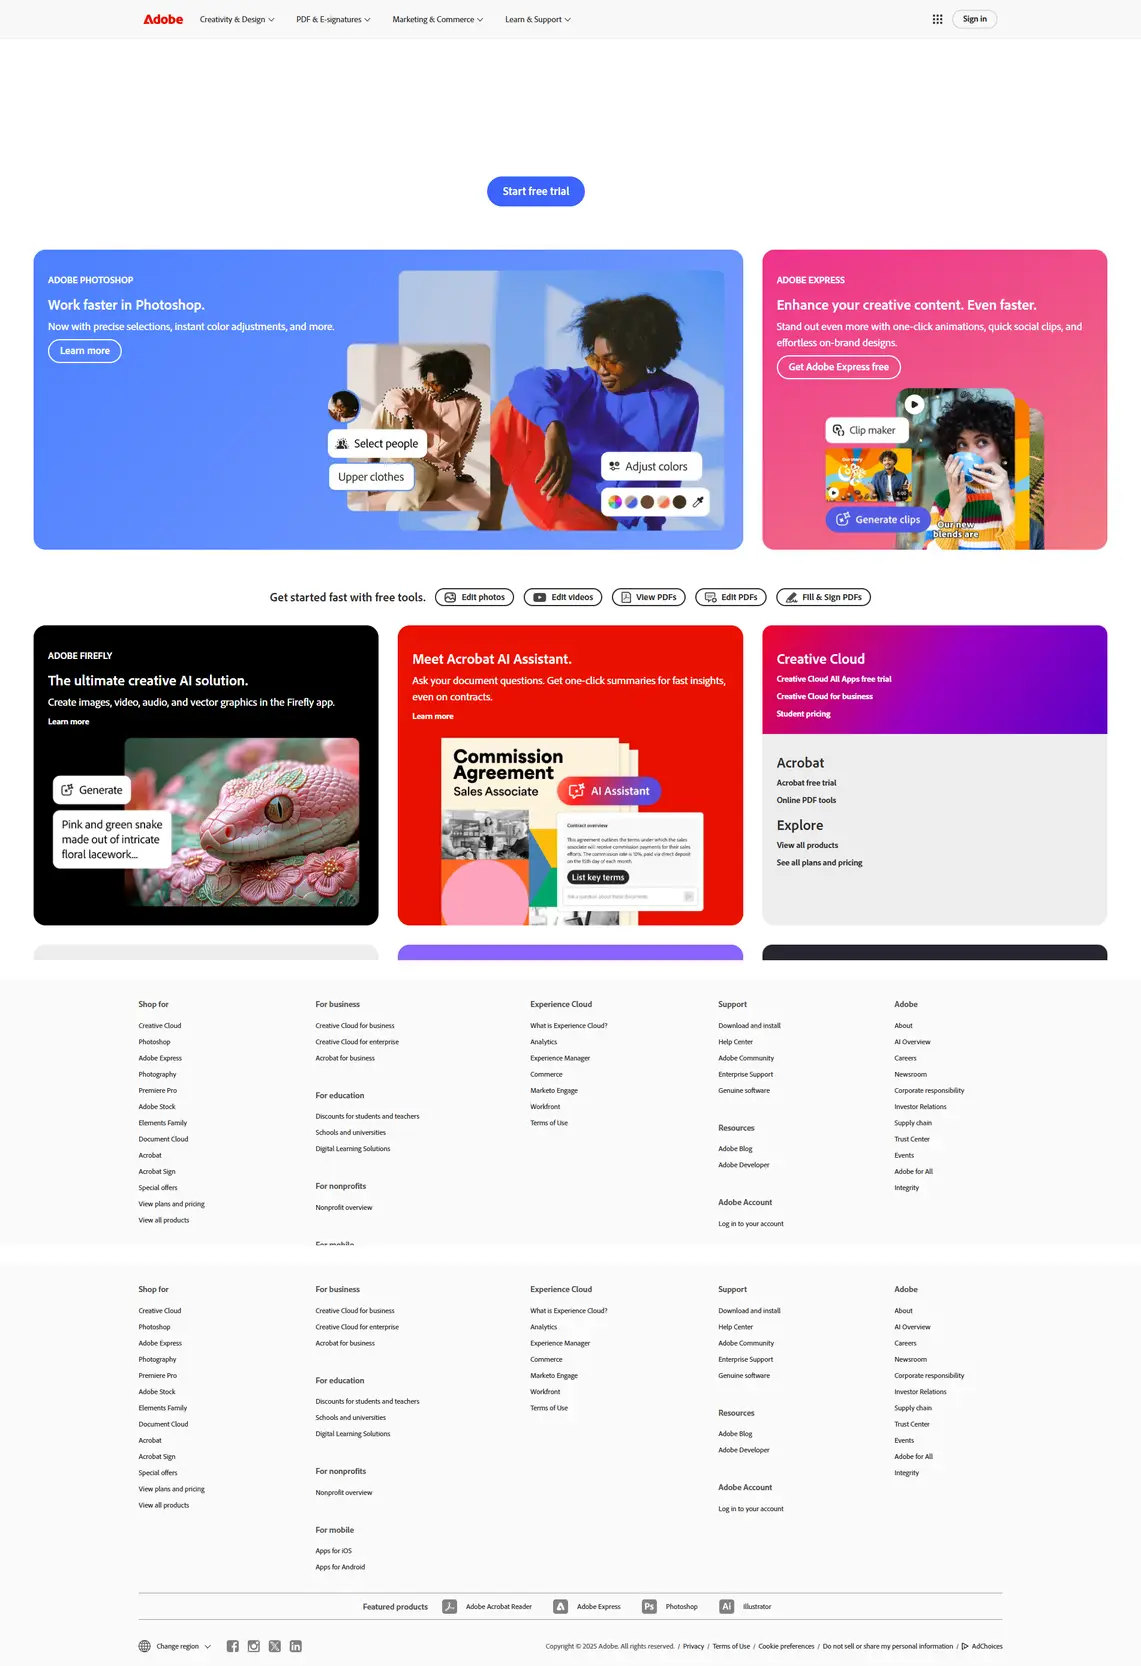
ScreenshotOne - Adobe
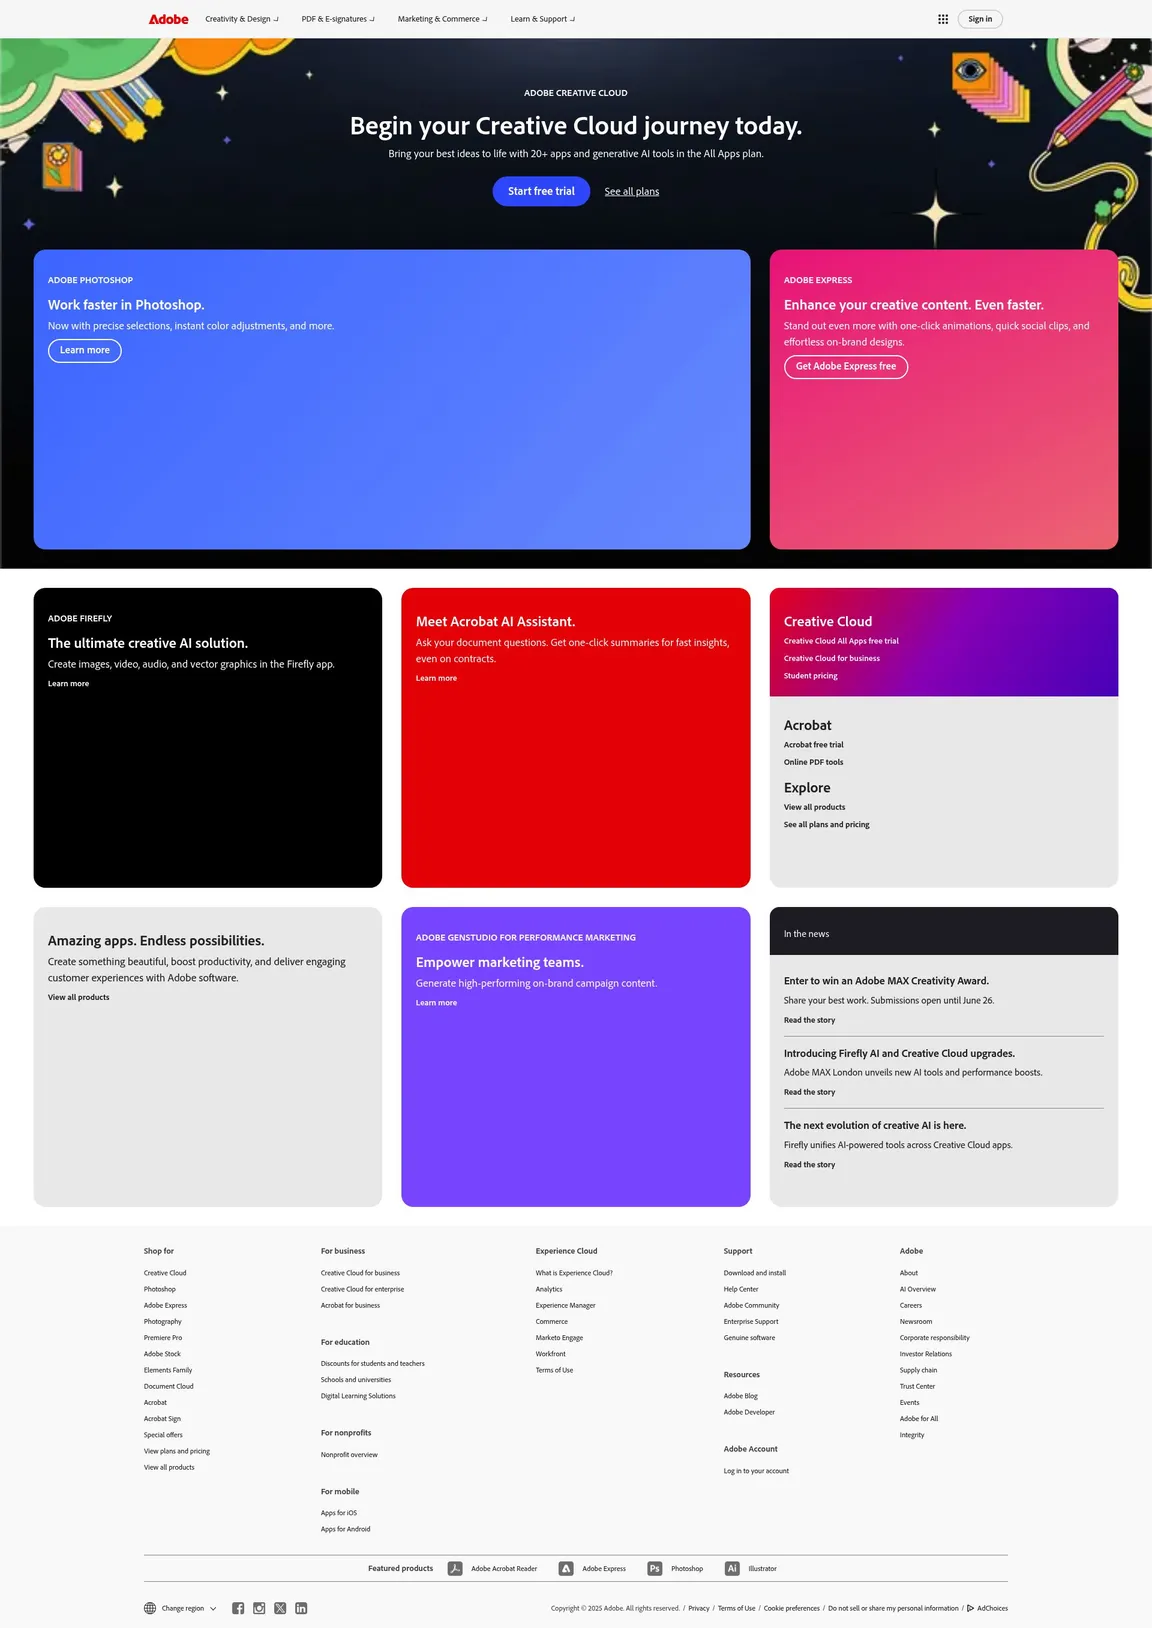
Selenium - Adobe

Snipping Tool - Adobe

Stillio - Adobe
Urlbox - Adobe
ApiFlash - Nike
Fireshot - Nike
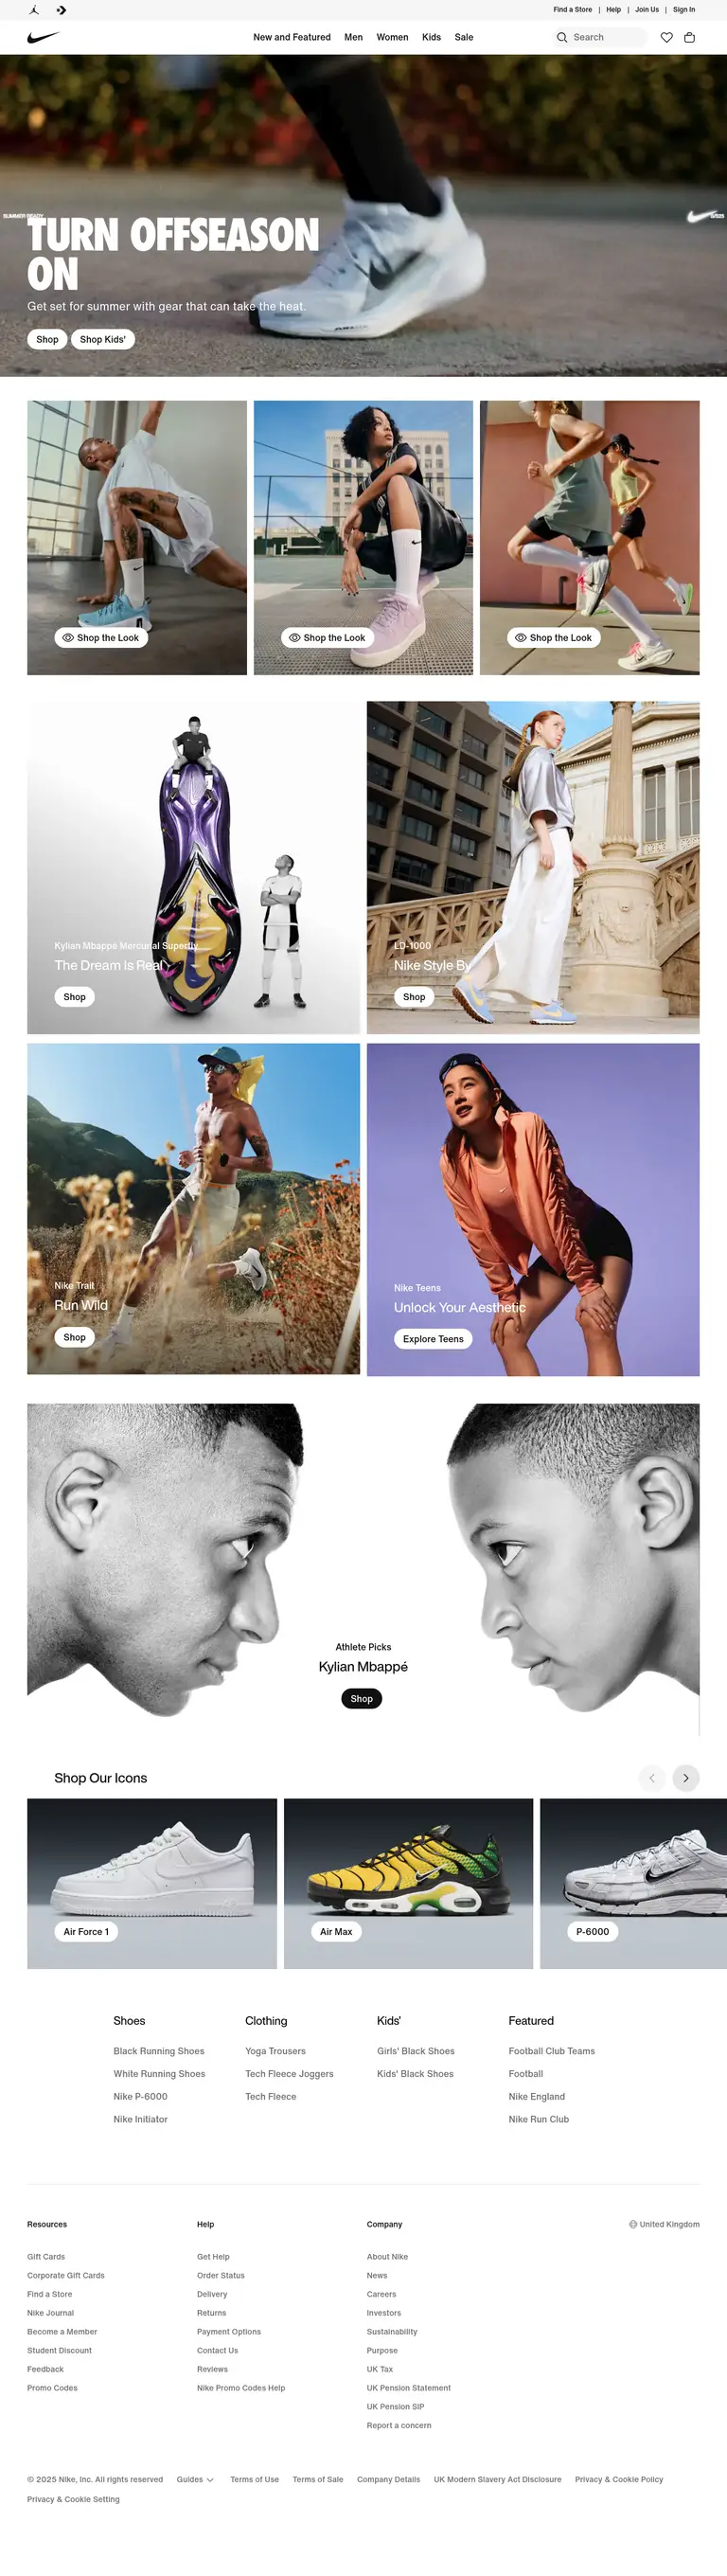
GoFullPage - Nike
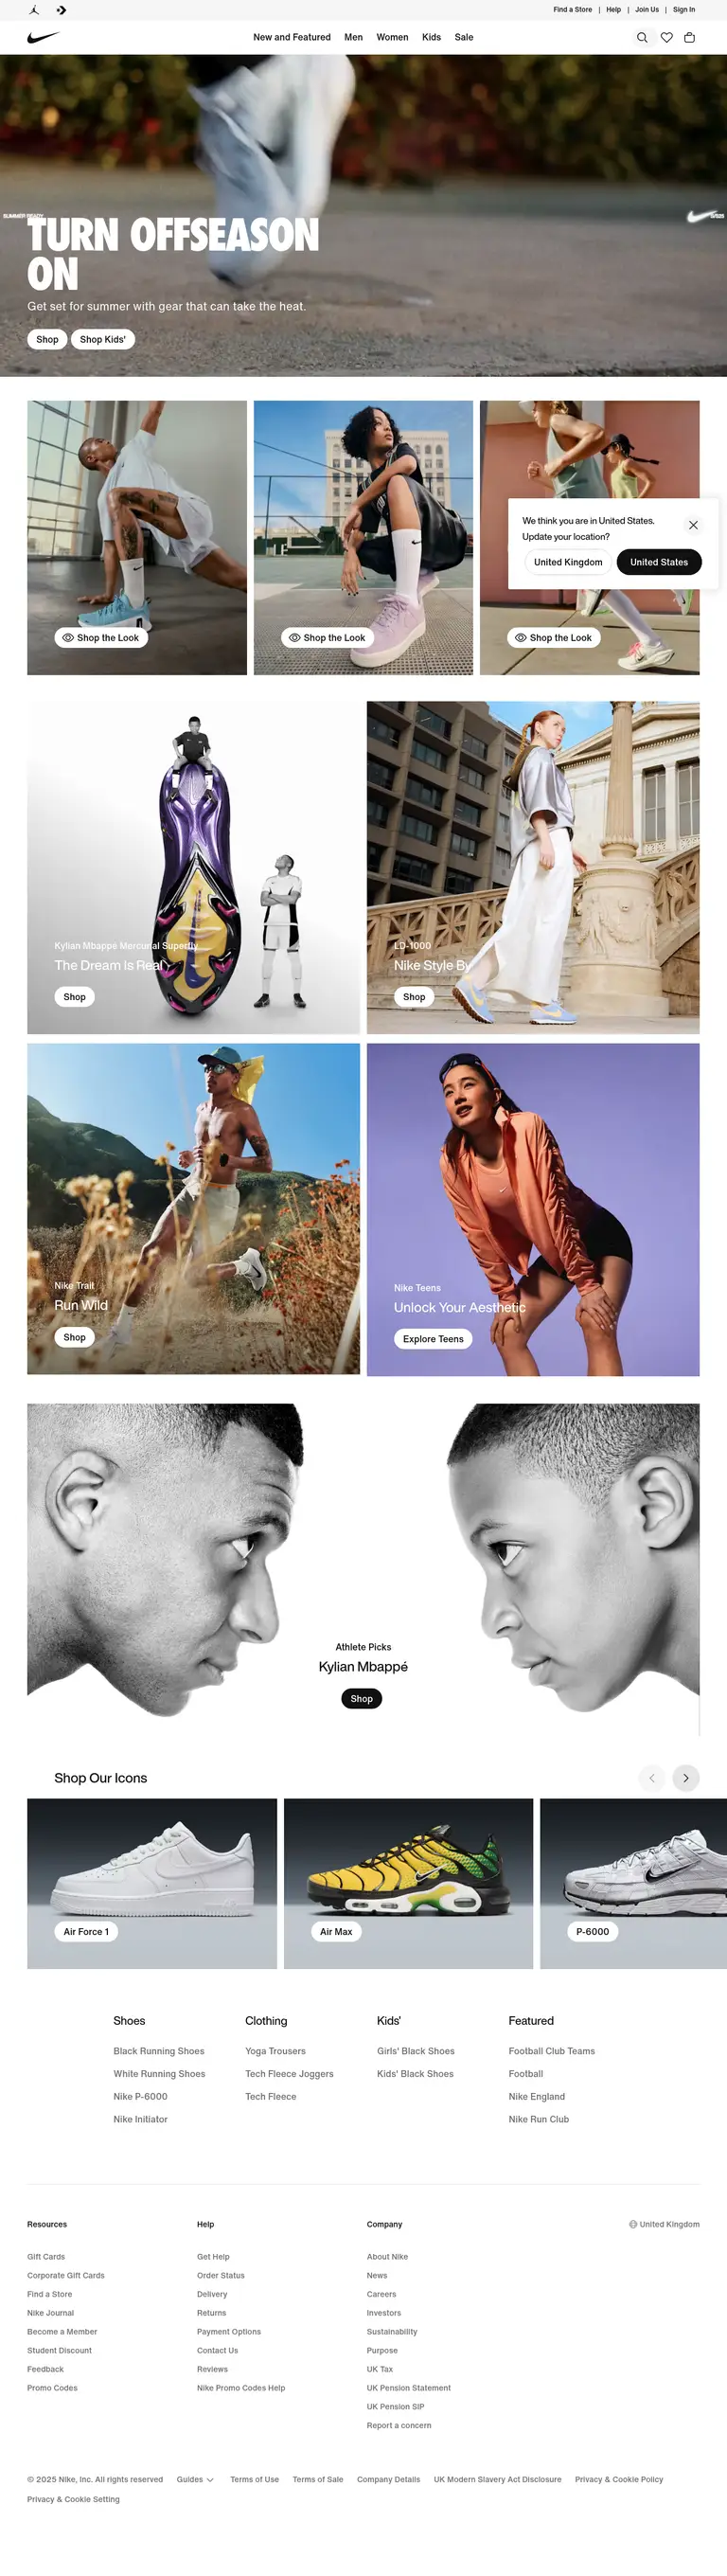
ScreenshotOne - Nike
Selenium - Nike

Snipping Tool - Nike

Stillio - Nike
Urlbox - Nike
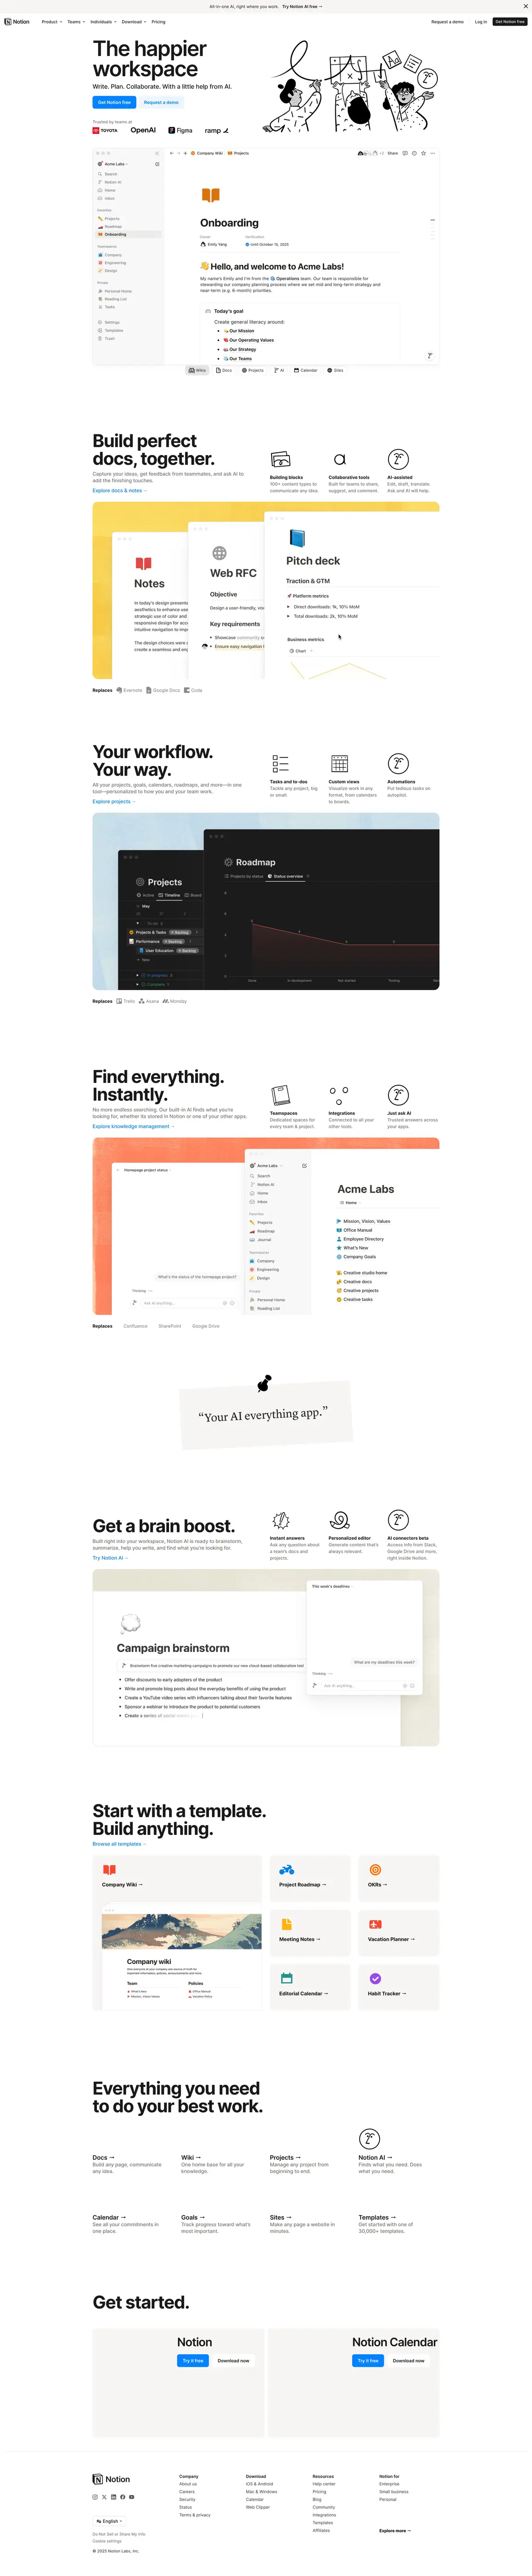
ApiFlash - Notion
Fireshot - Notion
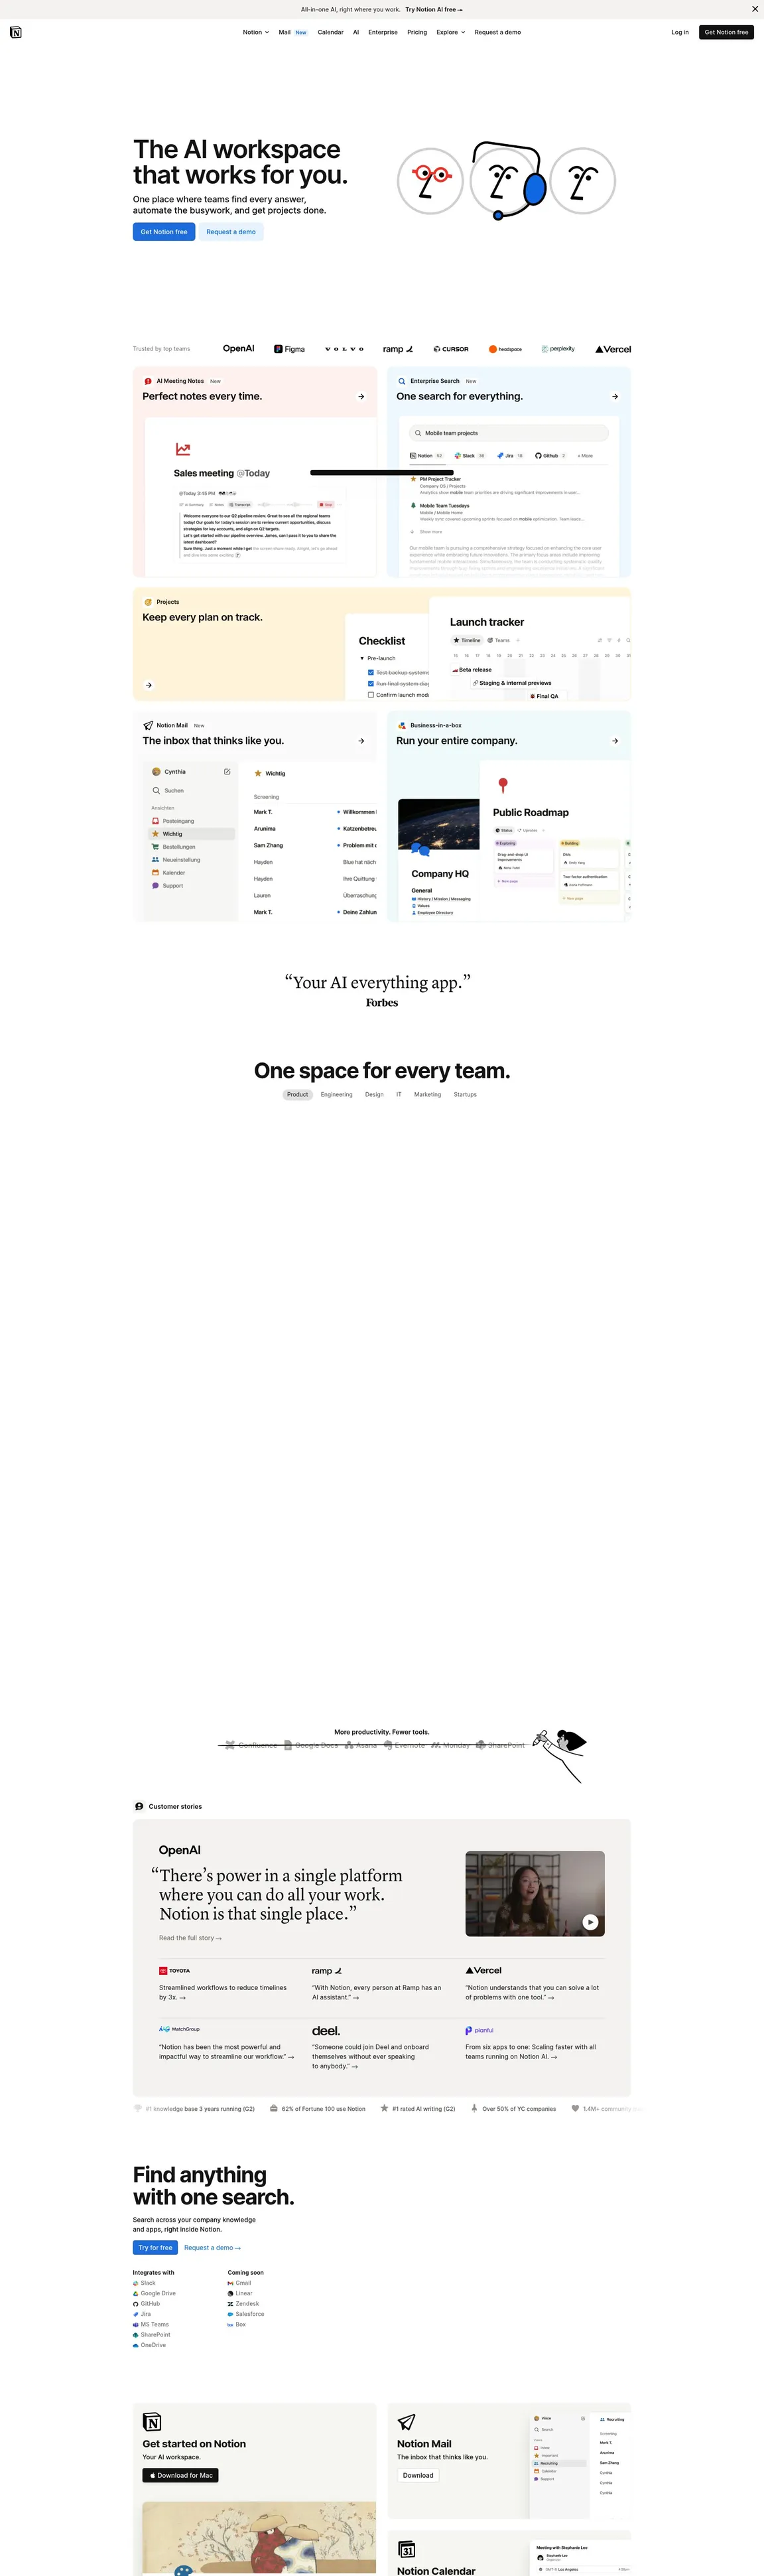
GoFullPage - Notion
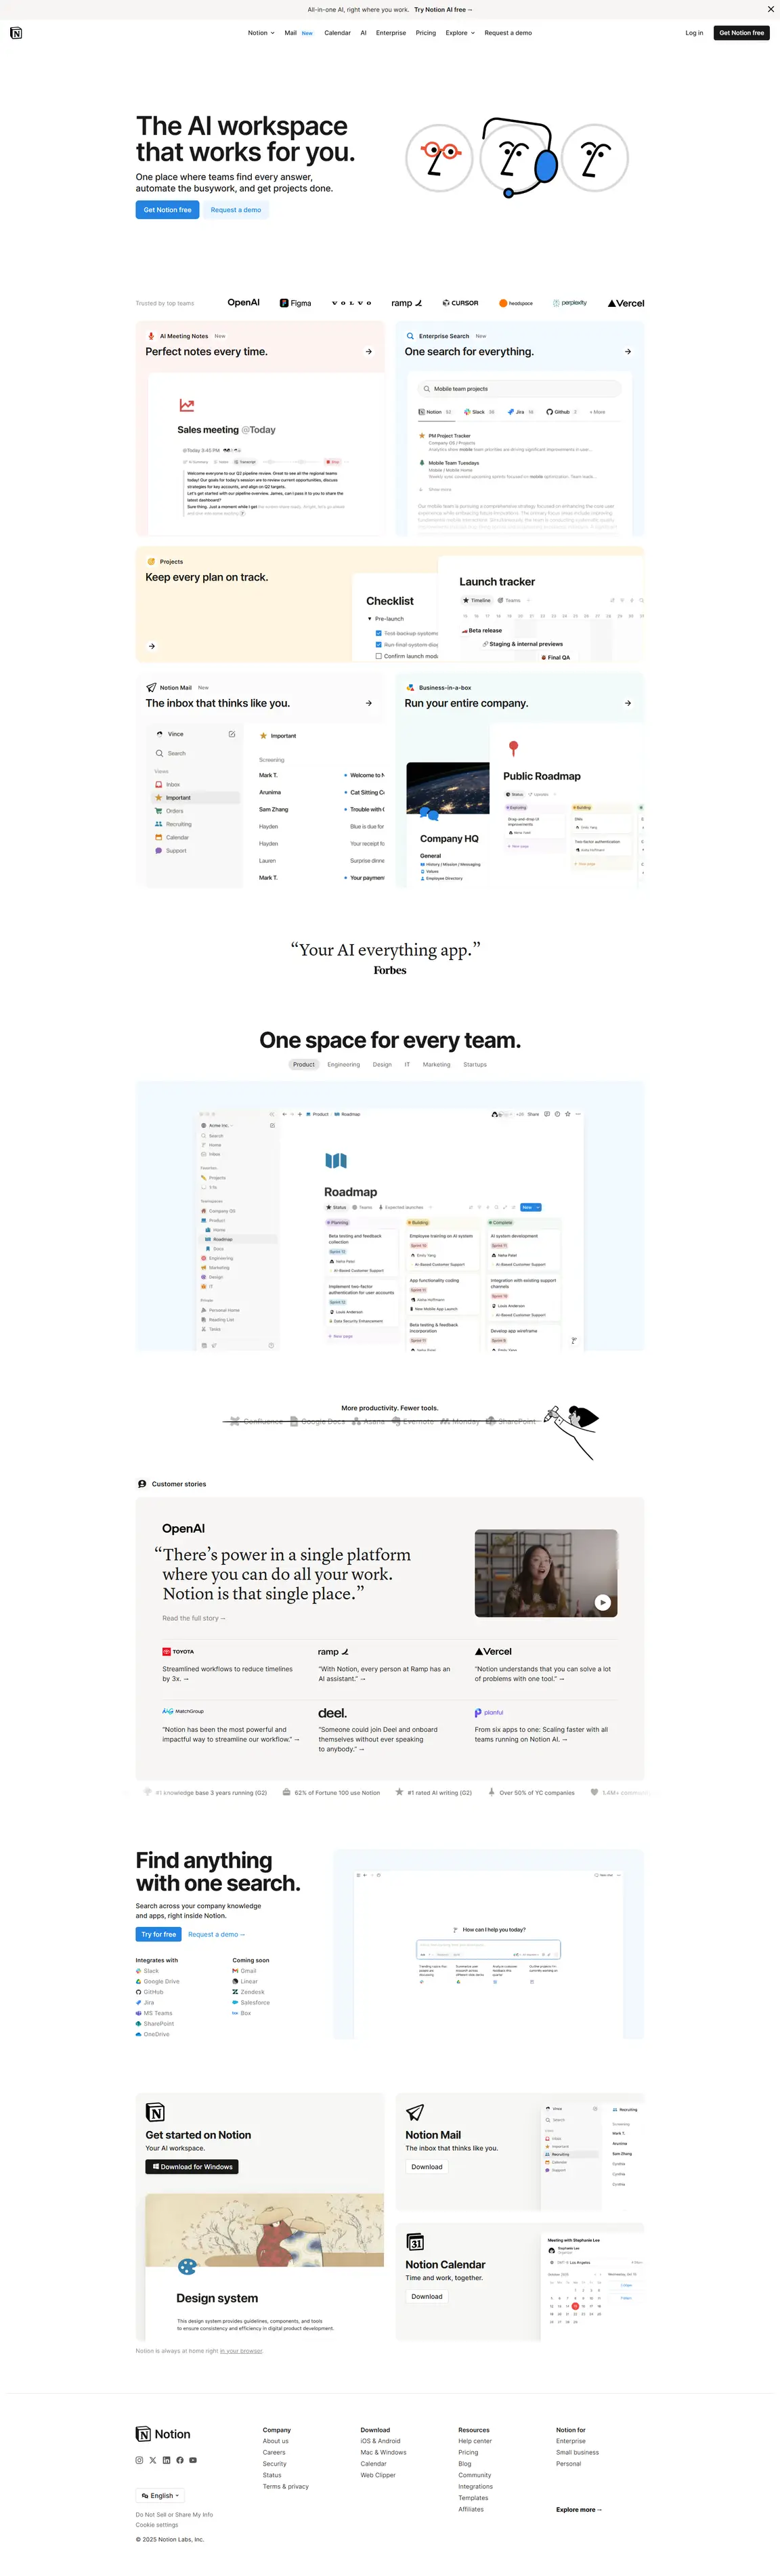
ScreenshotOne - Notion
Selenium - Notion

Snipping Tool - Notion

Stillio - Notion

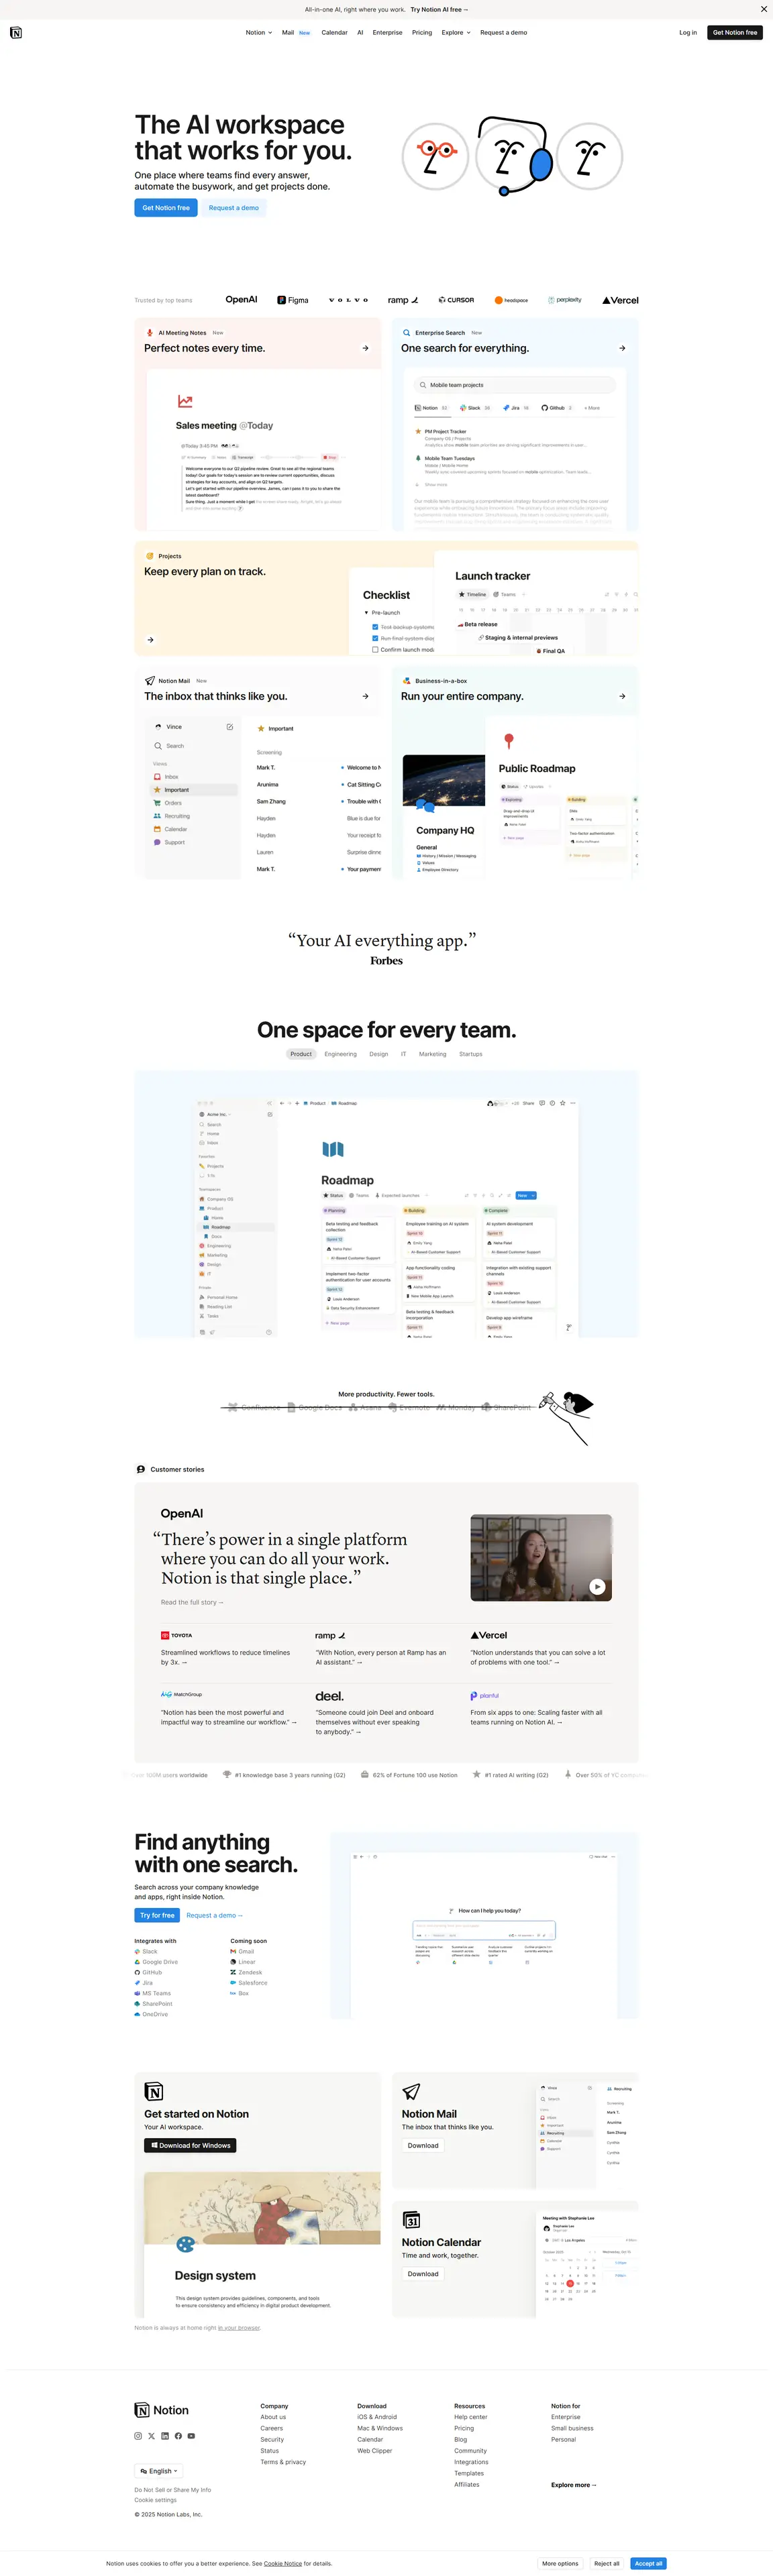
Urlbox - Notion

ApiFlash - The Verge

Fireshot - The Verge
GoFullPage - The Verge

ScreenshotOne - The Verge

Selenium - The Verge

Snipping Tool - The Verge

Stillio - The Verge

Urlbox - The Verge

Urlbox Retina - The Verge

For full resolution images click here!