
Urlbox now integrates with n8n. If you're already using n8n for workflow automation, you can add your renders directly into your workflow.
Let's look at a common use case: you've got a Google sheet of URLs and you want screenshots of each one, with links saved back to the sheet.
What we'll build
A workflow that:
- Reads URLs from a Google Sheet
- Captures a screenshot of each URL using Urlbox
- Writes the screenshot URL back to the spreadsheet
Step 1: Set up your Google Sheet
Create the example spreadsheet with your URLs in one column. Add a second column called 'Screenshot' which will hold the resulting location of the stored screenshot that we'll populate automatically.
| URL | Screenshot |
|---|---|
| https://stripe.com | |
| https://tailwindcss.com/ | |
| https://www.crunchydata.com/ | |
| https://urlbox.com | |
| https://capturedeck.com | |
| https://apple.com | |
| https://rubyonrails.org/ |
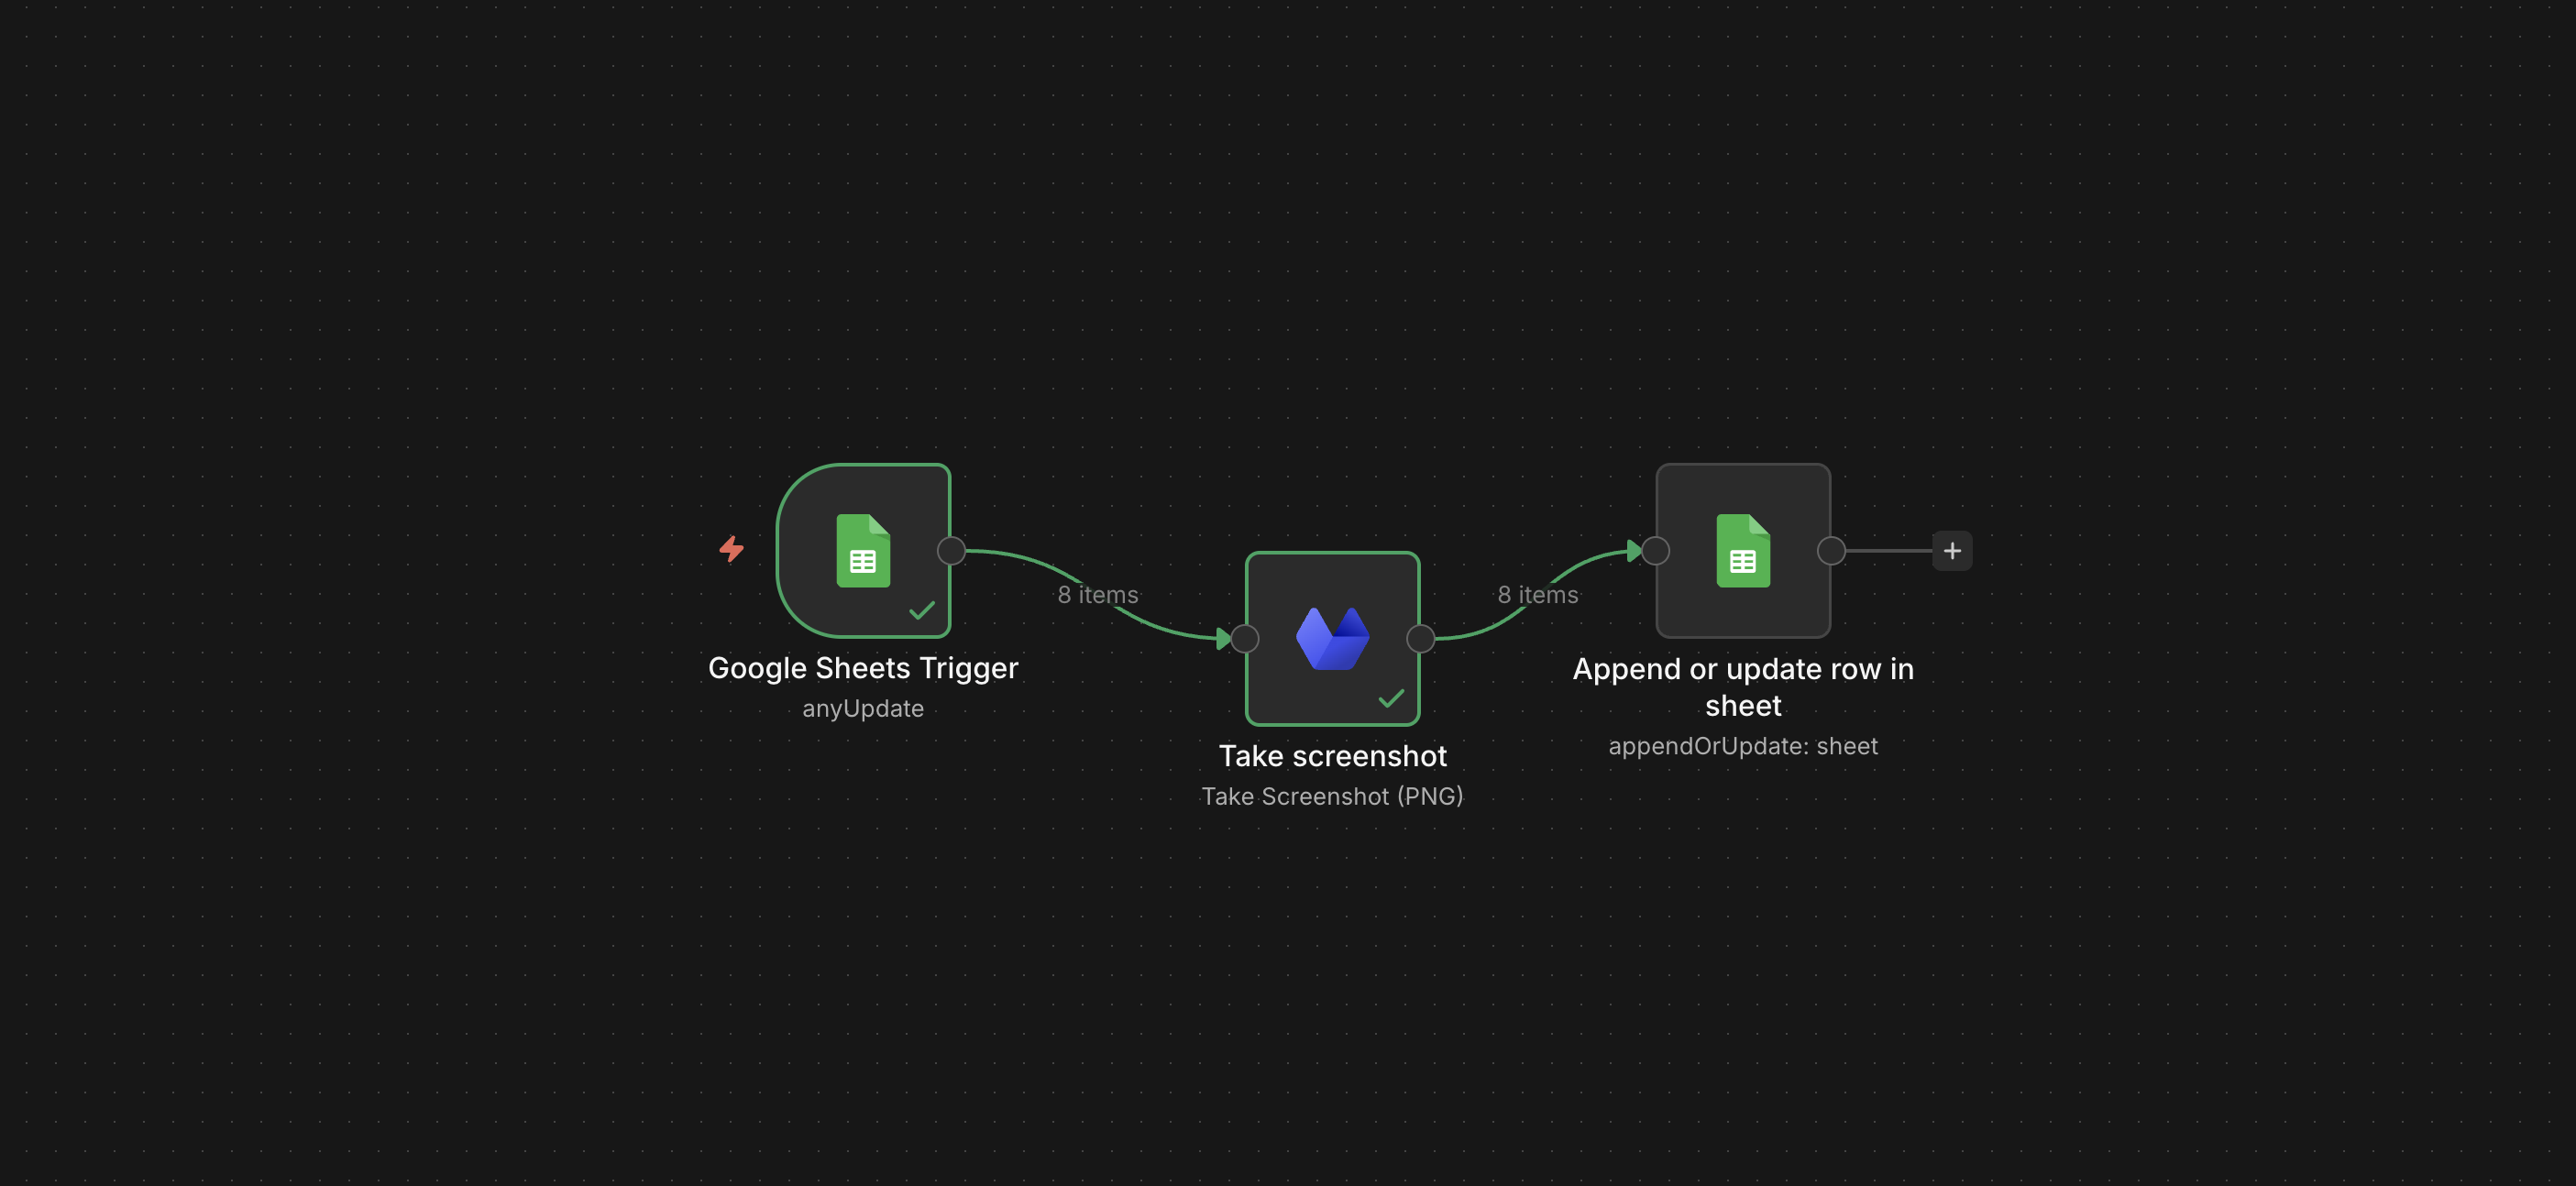
Step 2: Create your n8n workflow
In n8n, create a new workflow with the following nodes:
Google Sheets Trigger
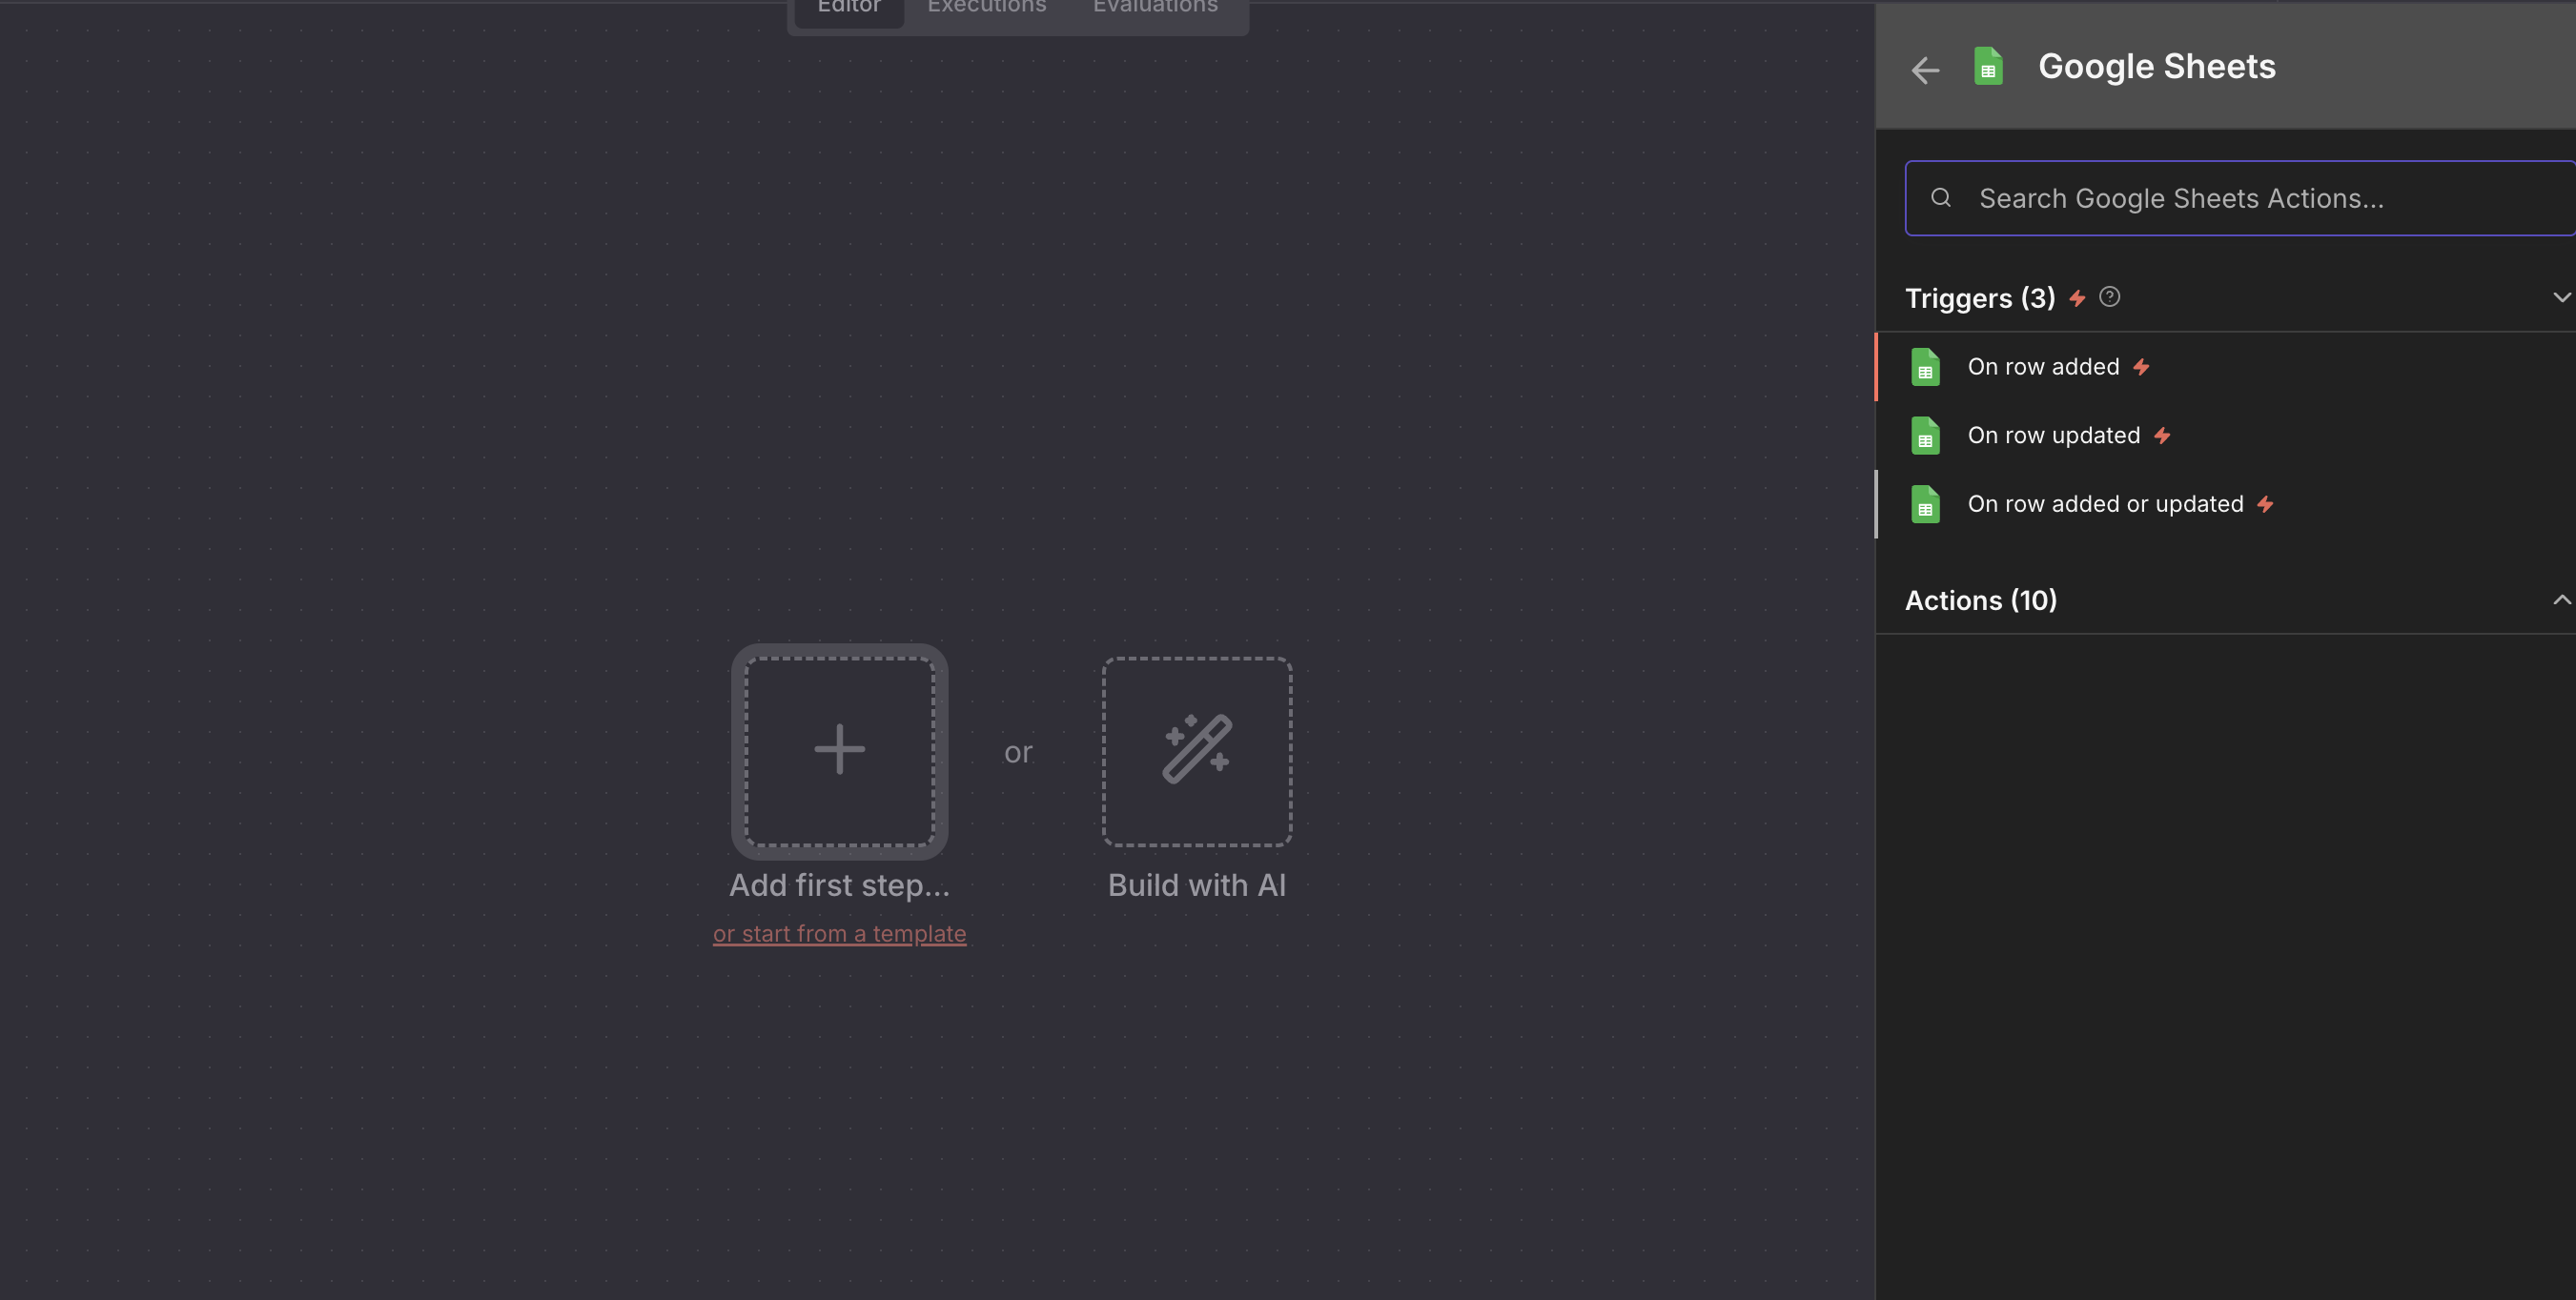
Hit 'Add first step' and search for Google sheets, then select the Trigger 'On row added or updated'.
You'll need to set up your credentials for Google Sheets. Under 'credentials to connect with' you'll see an option to create one. If you can't login already using single sign on (SSO), you might need to take a look at this guide.
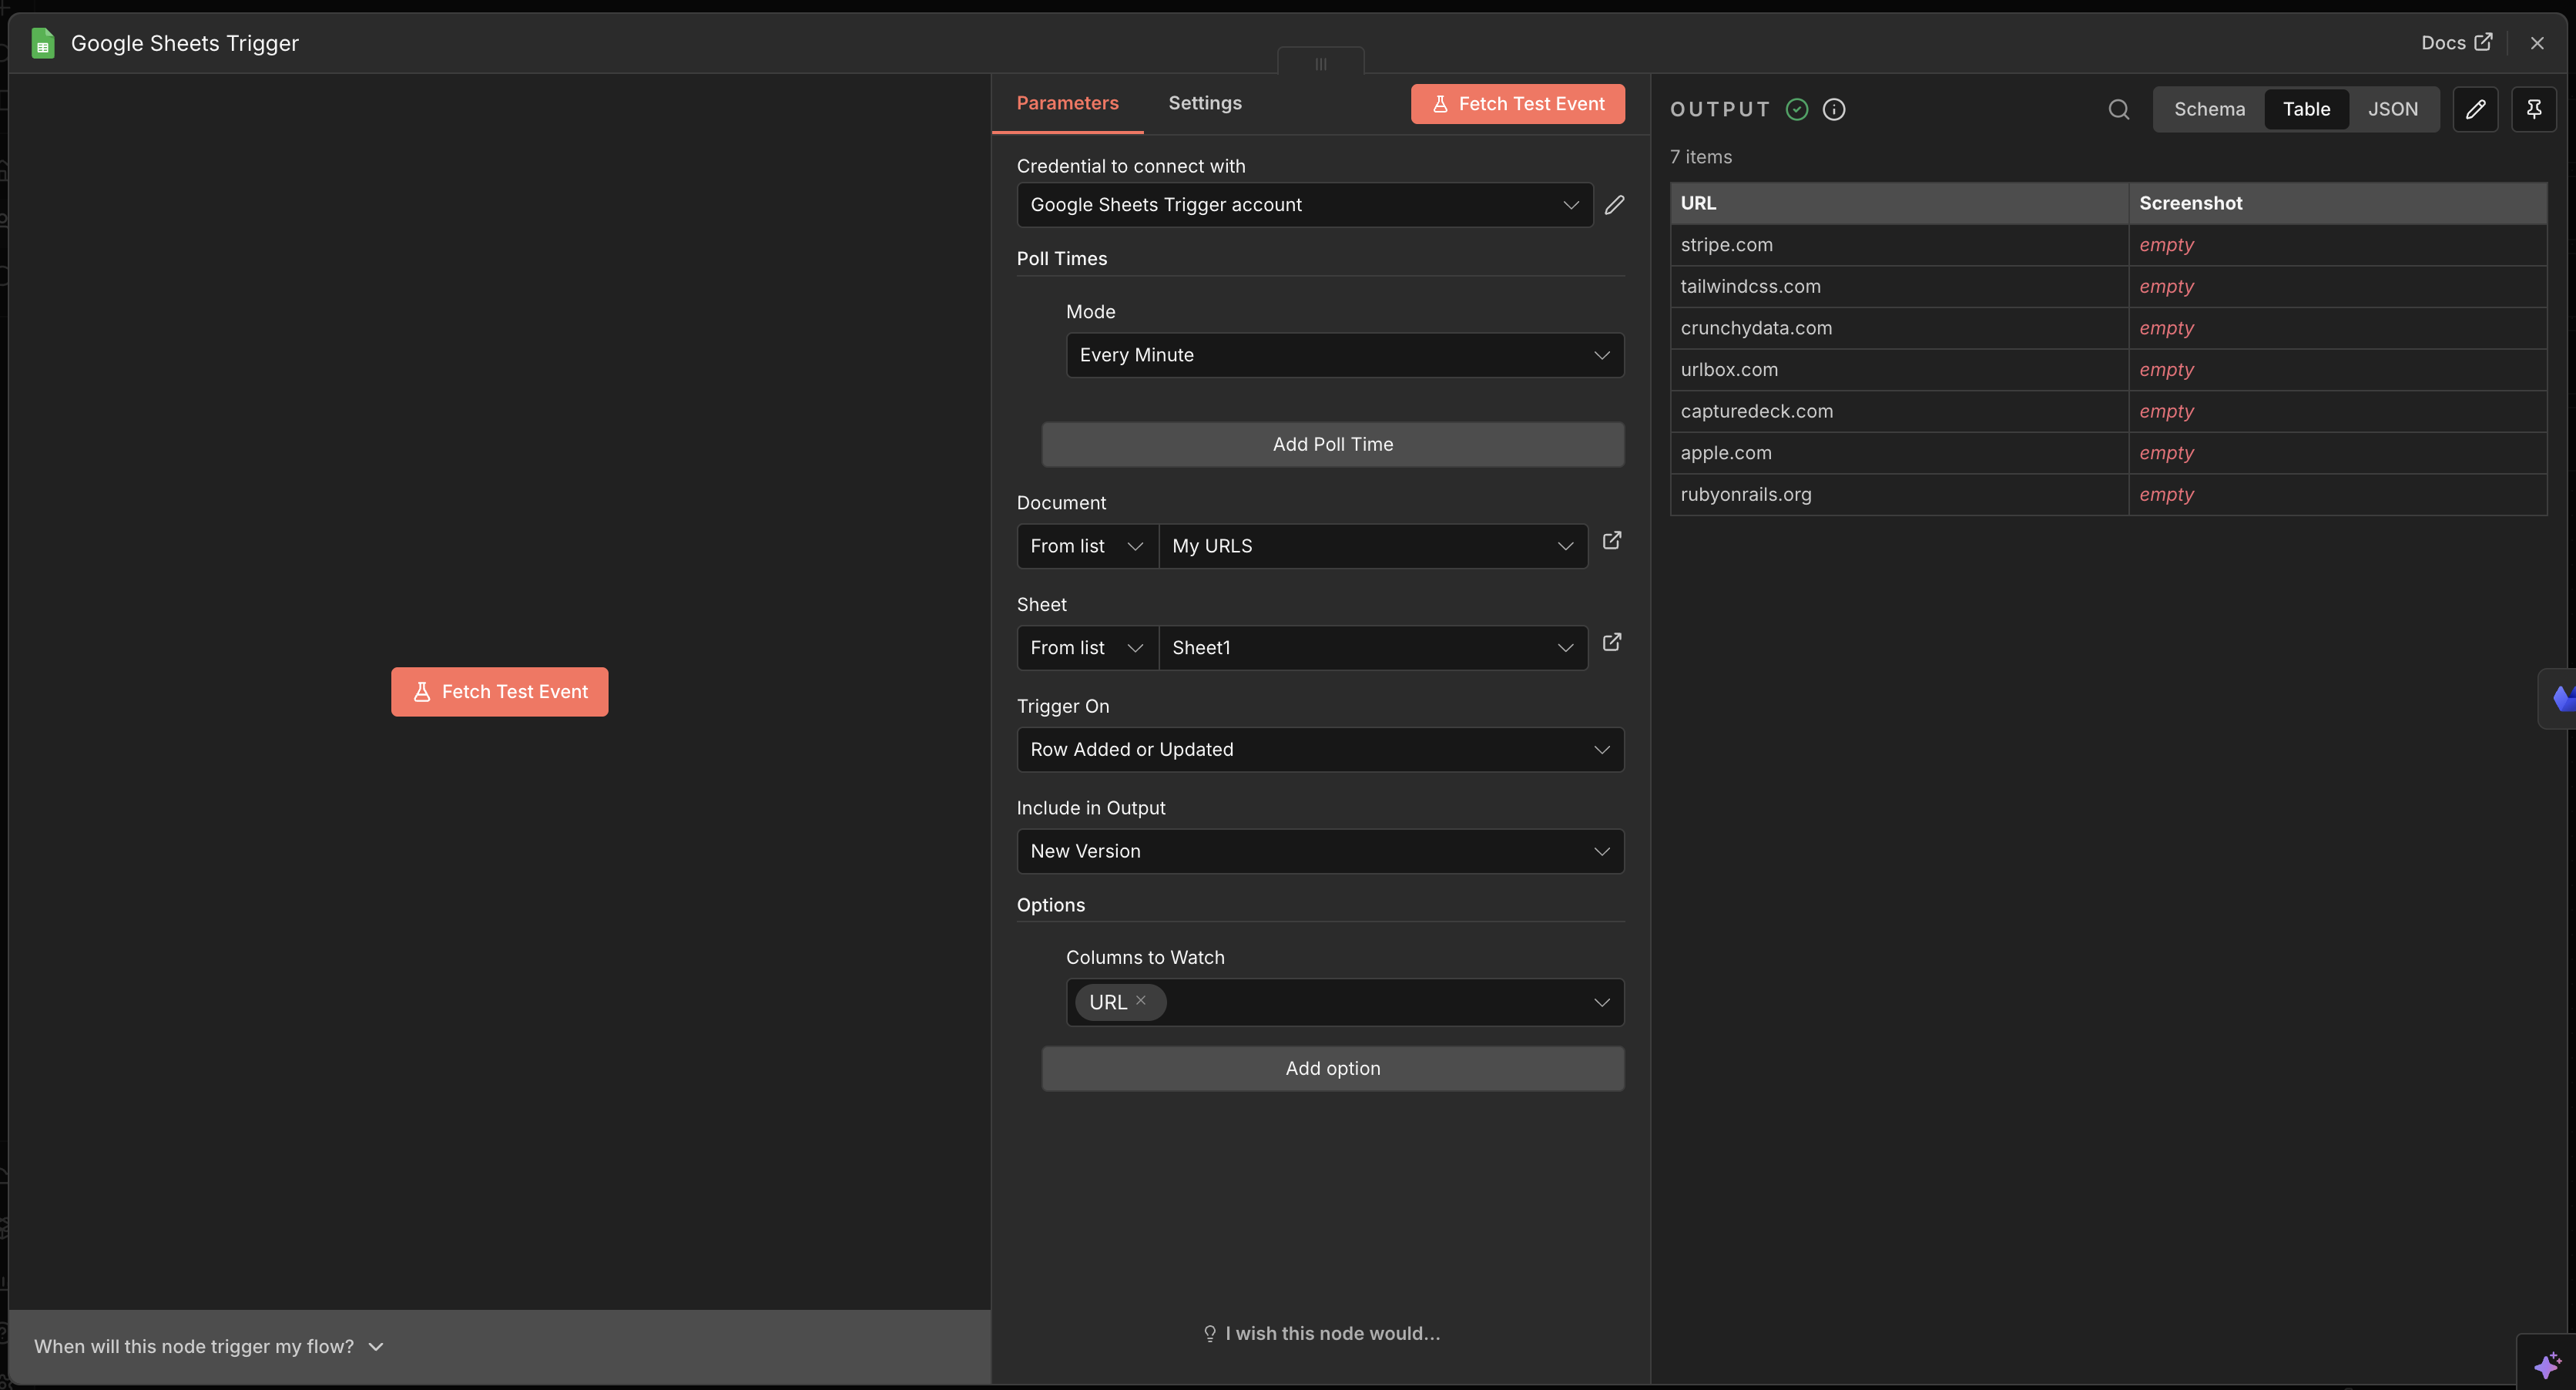
Once your credential has been added, select the Google sheet you made (we named it n8n-urlbox), choose the first sheet, and set this trigger to execute when a row is added or updated.
There's an extra option, 'Columns to Watch', which lets you specify the row to listen to for updates. Choose URL so the workflow only runs when one updates or adds a URL to the sheet. Hit 'fetch test event' and you should see the list of URL's you populated in the output, with the empty 'screenshot' column.
Urlbox Node
Lets now go back in to the main workflow interface, add a new node connected to the Sheets trigger, searching for "Urlbox" in the node panel.
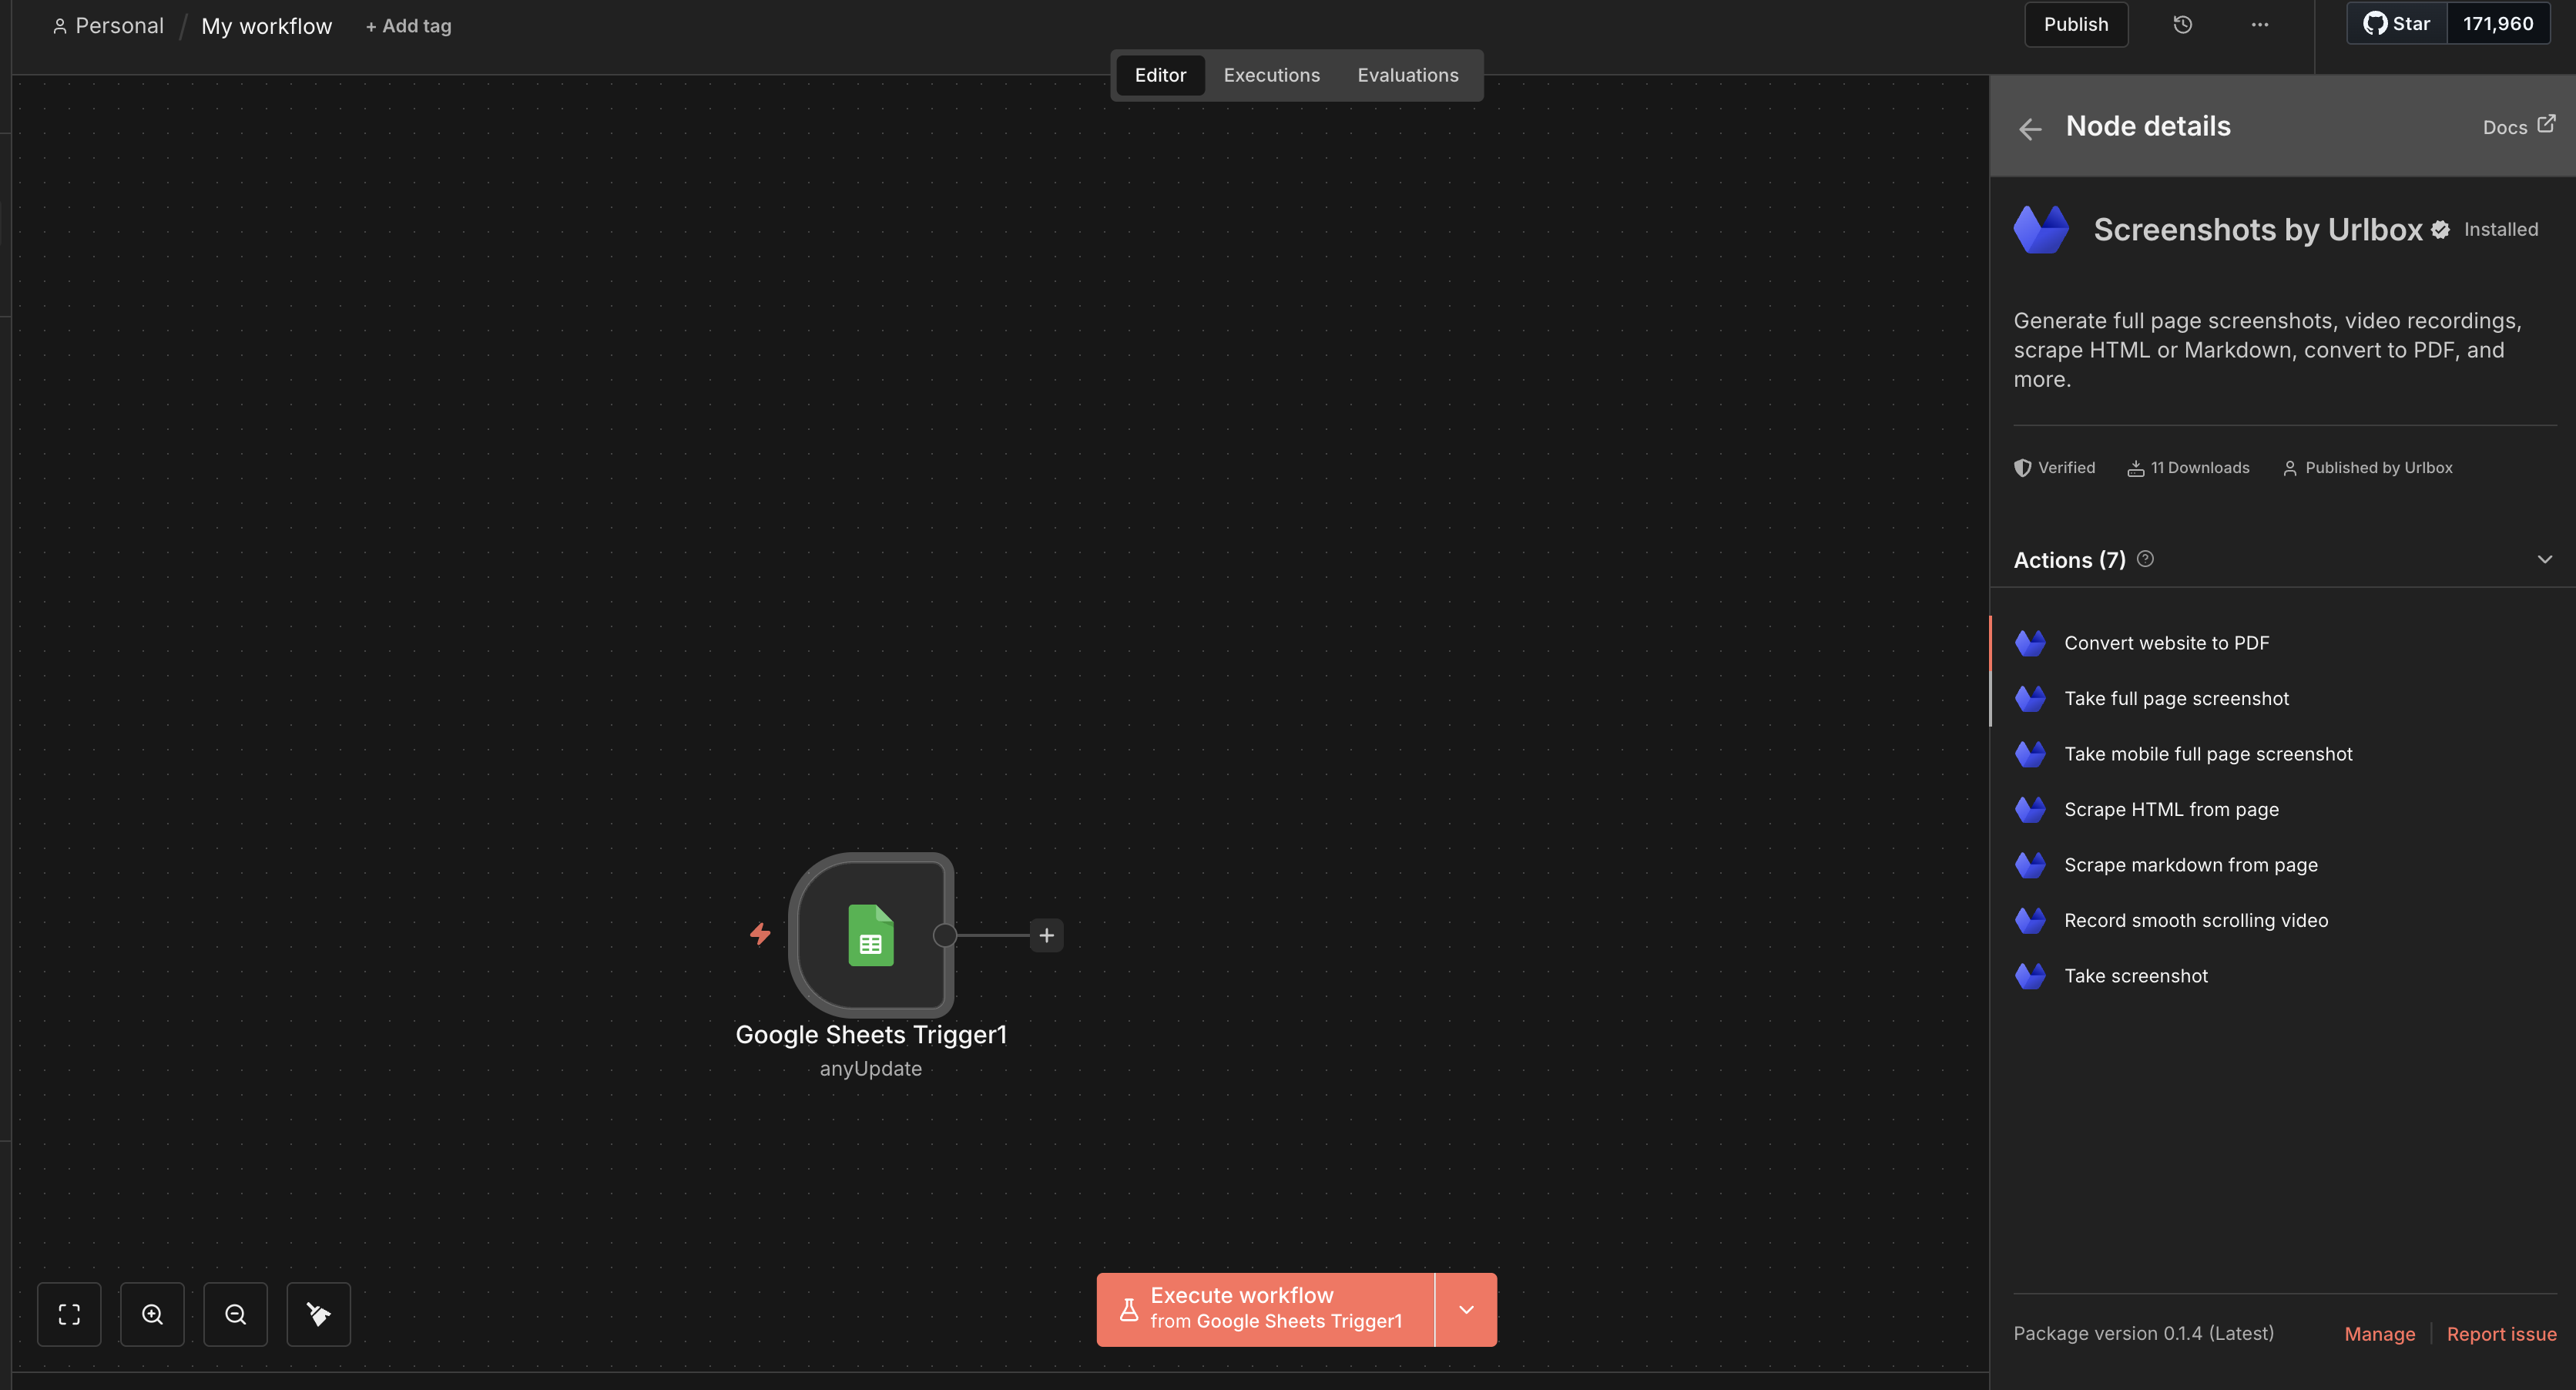
Once clicked, select 'Take screenshot' from the available actions.
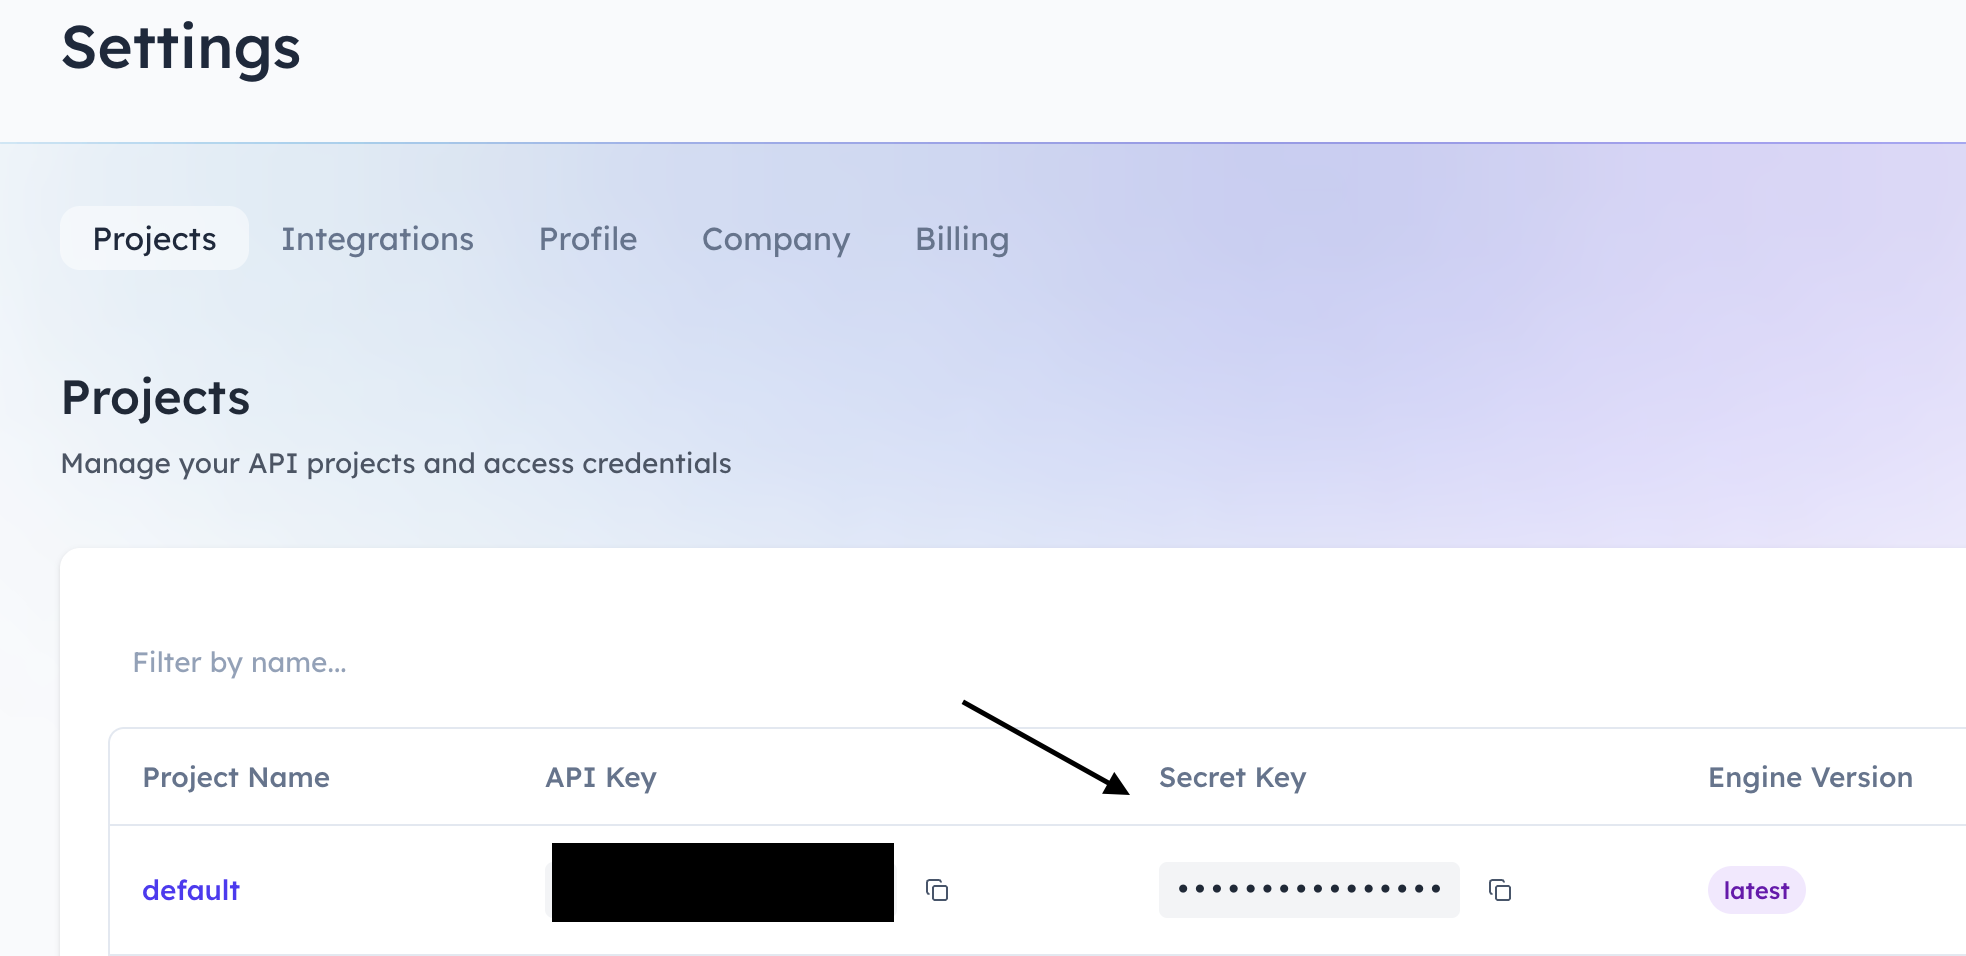
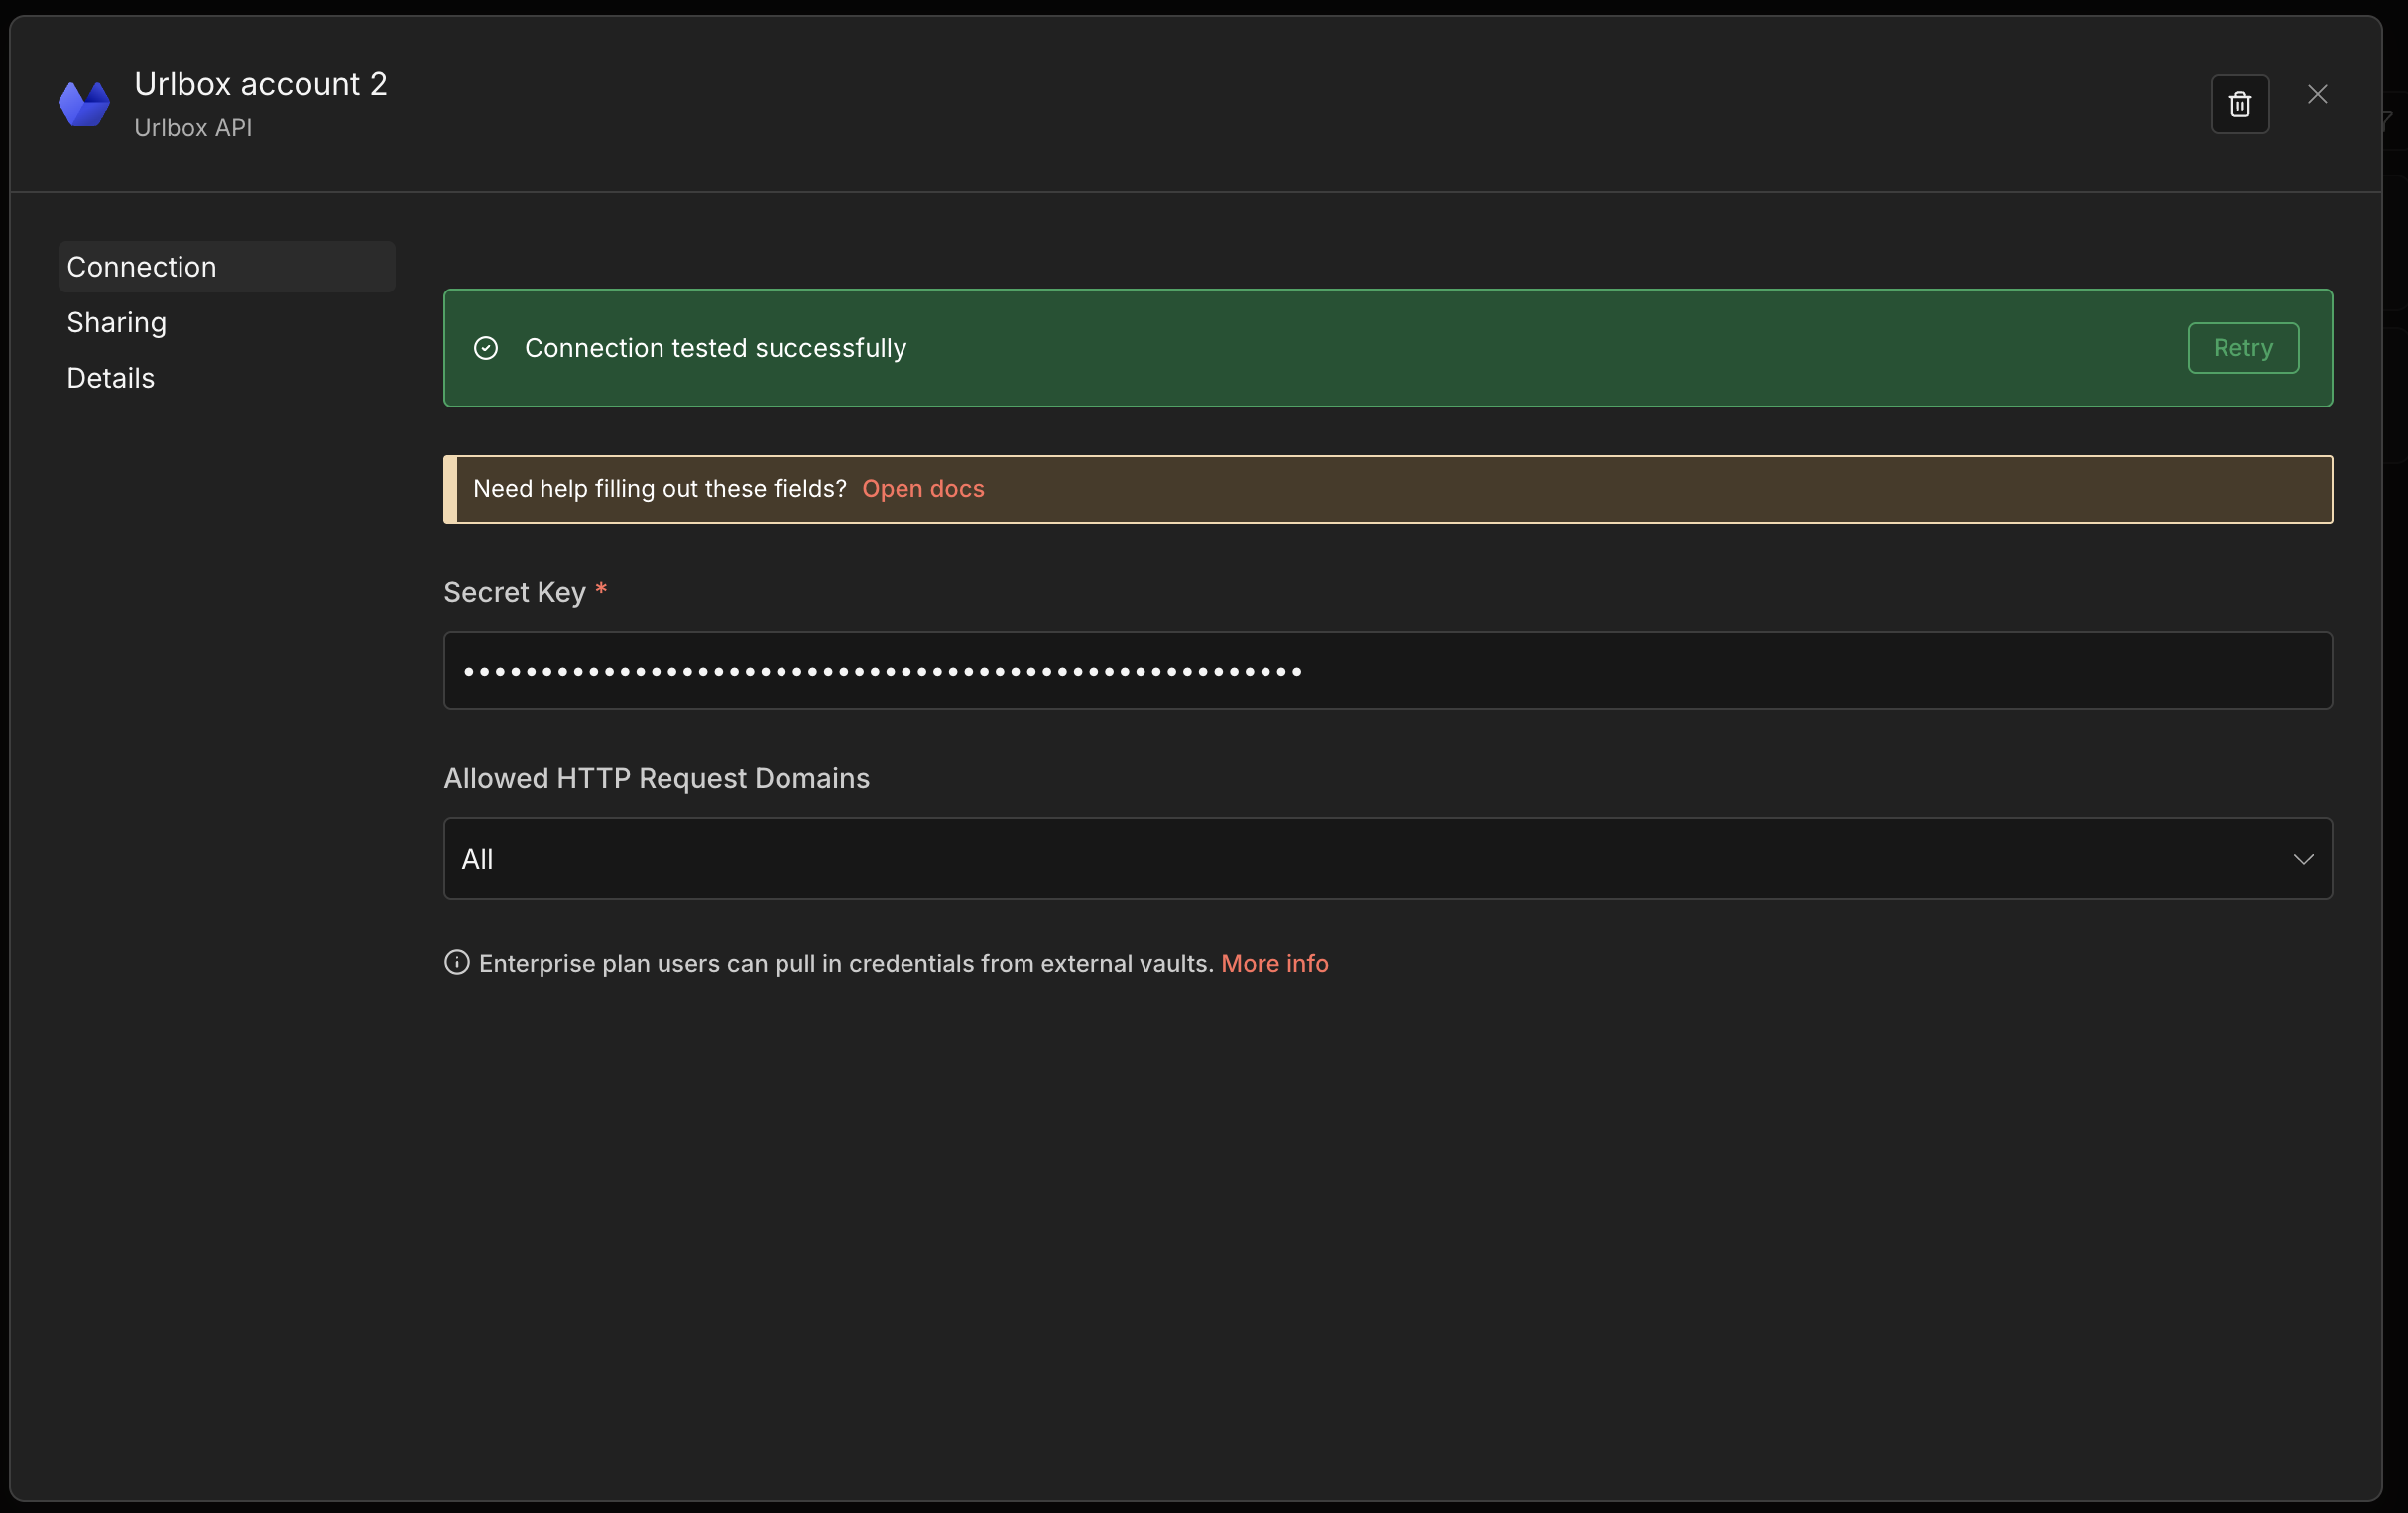
Again, you'll need to configure your credentials for this, so grab your Urlbox secret key (found in your dashboard):
Create a new Urlbox credential (you're prompted from the N8N node if you've not made it before), pasting that key here:
Once setup and assigned to the Node, you can drag the Triggered URL (under Google Sheets Trigger, looks like 'T | URL') into the Urlbox parameters' URL field like this:
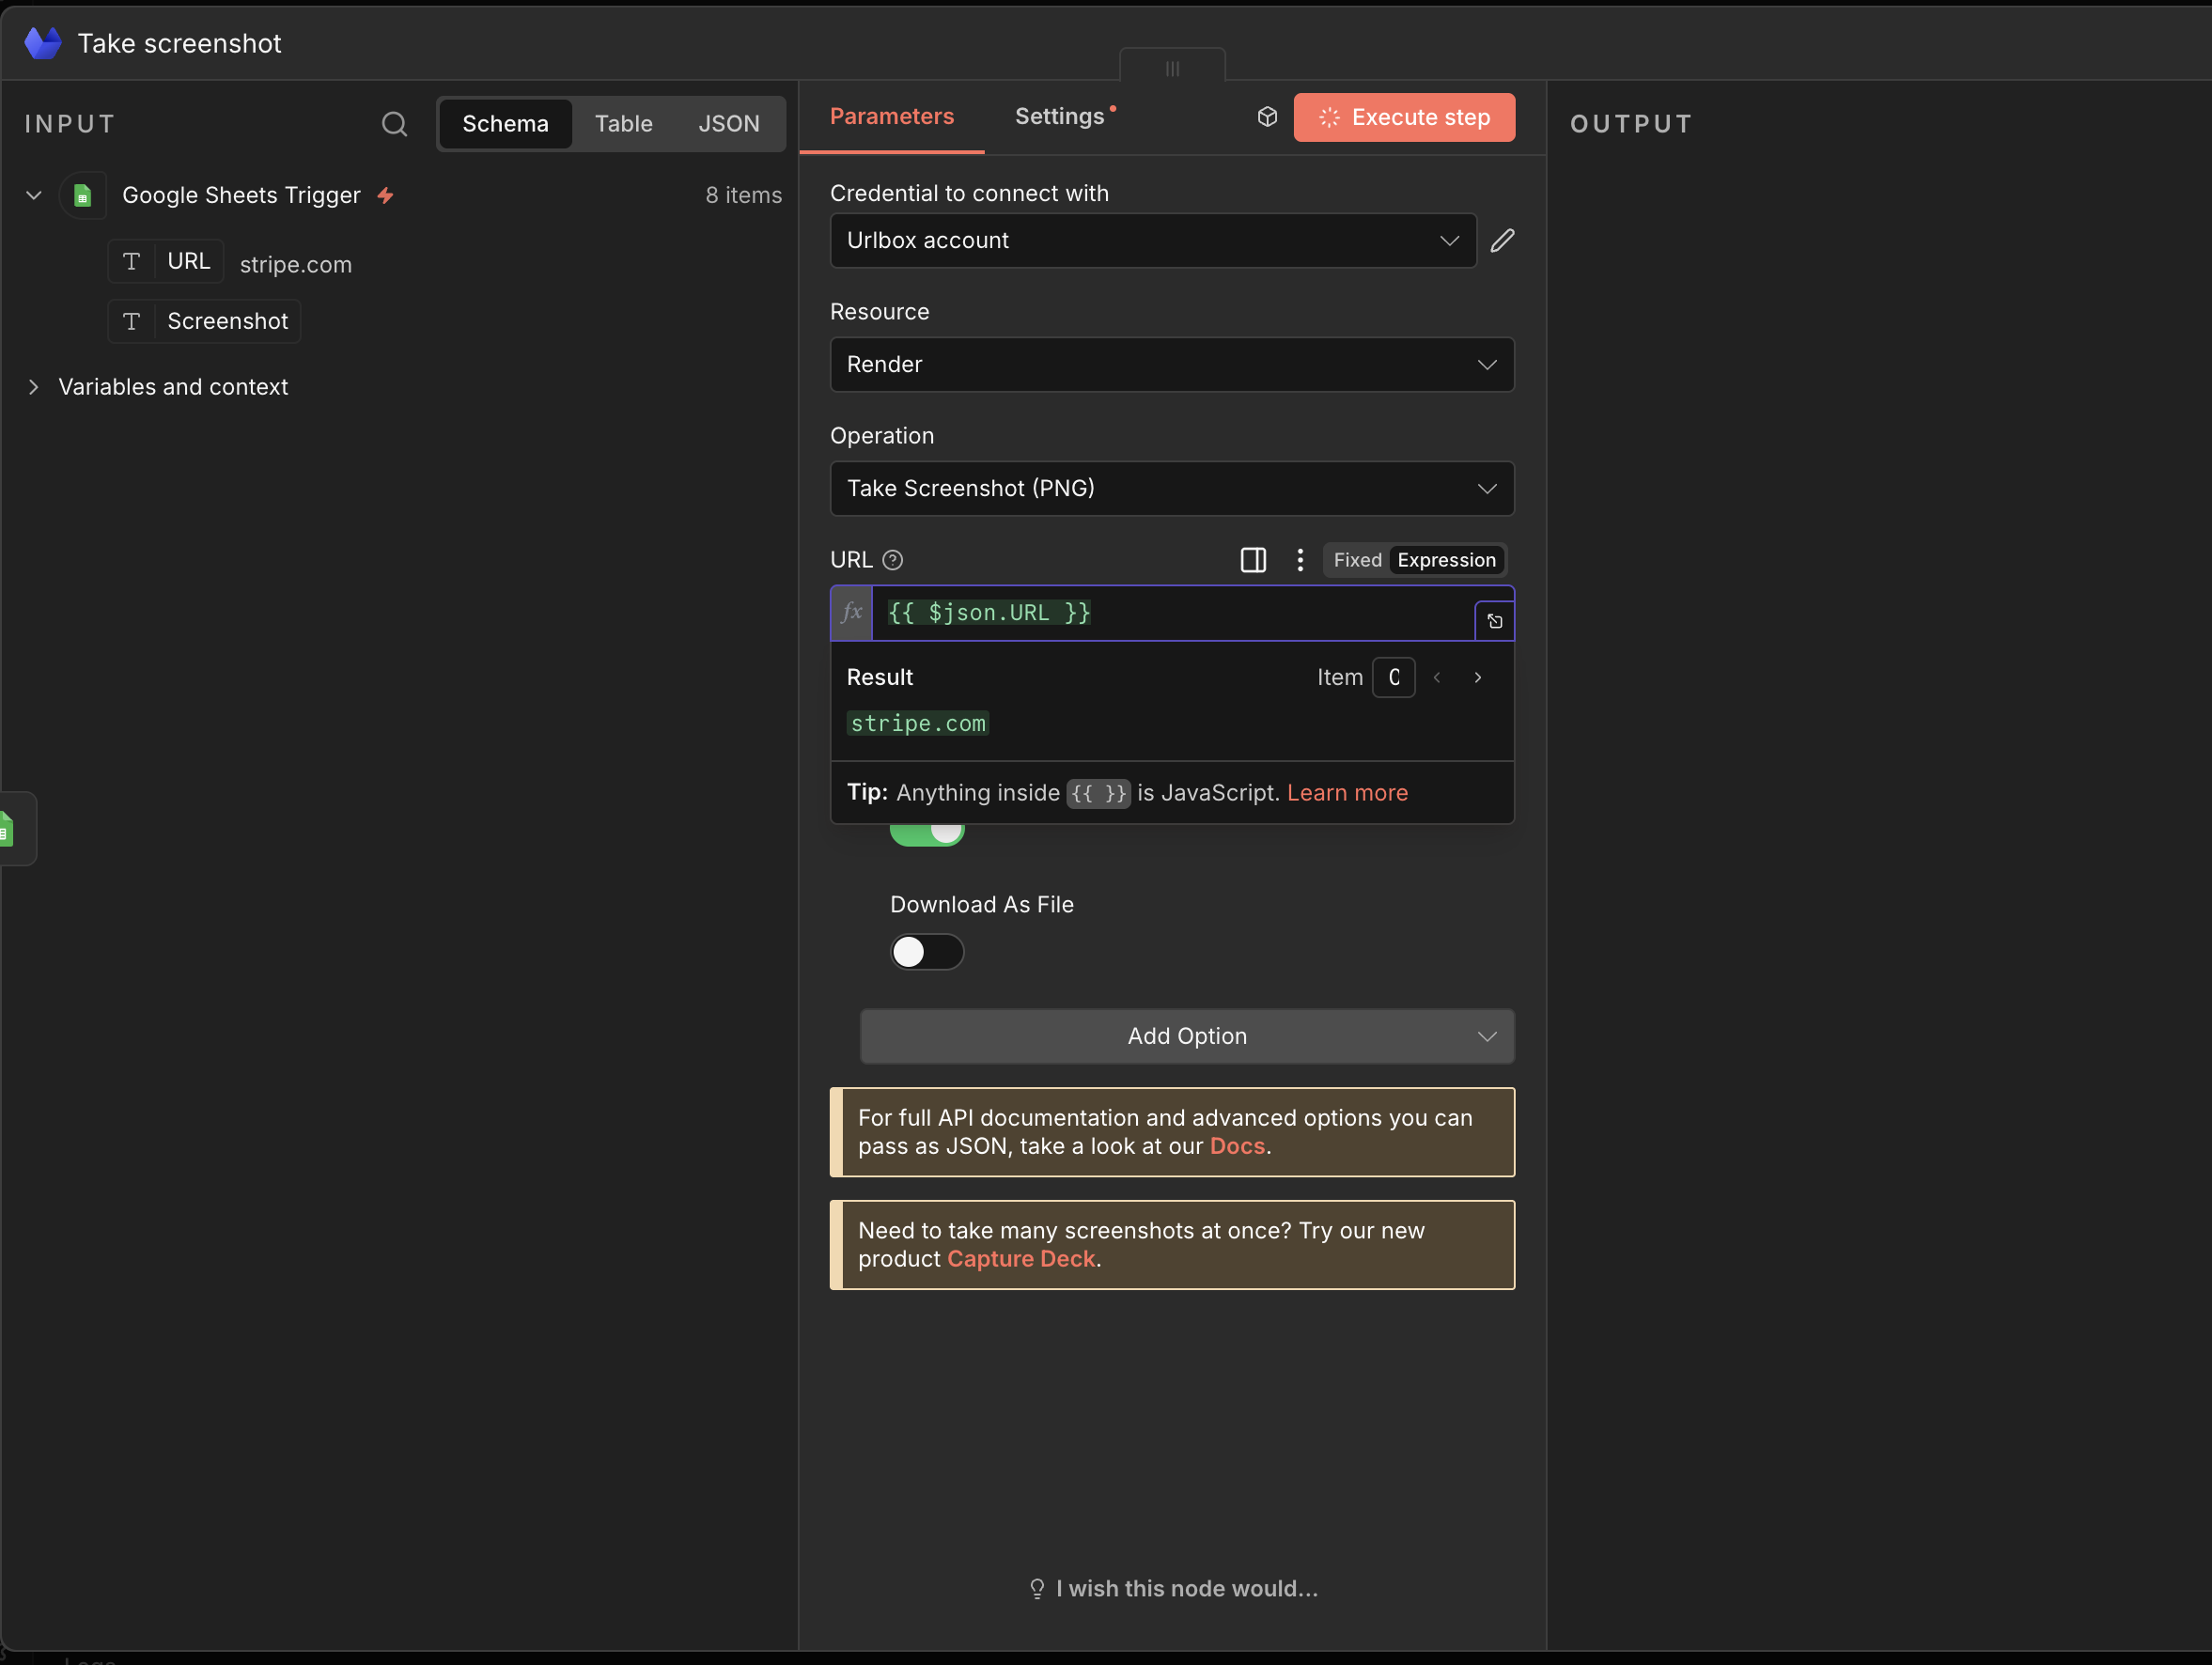
And you'll see a dynamic field automatically populated, which should show you a previewed result of the first google sheet URL entry (in this case stripe.com).
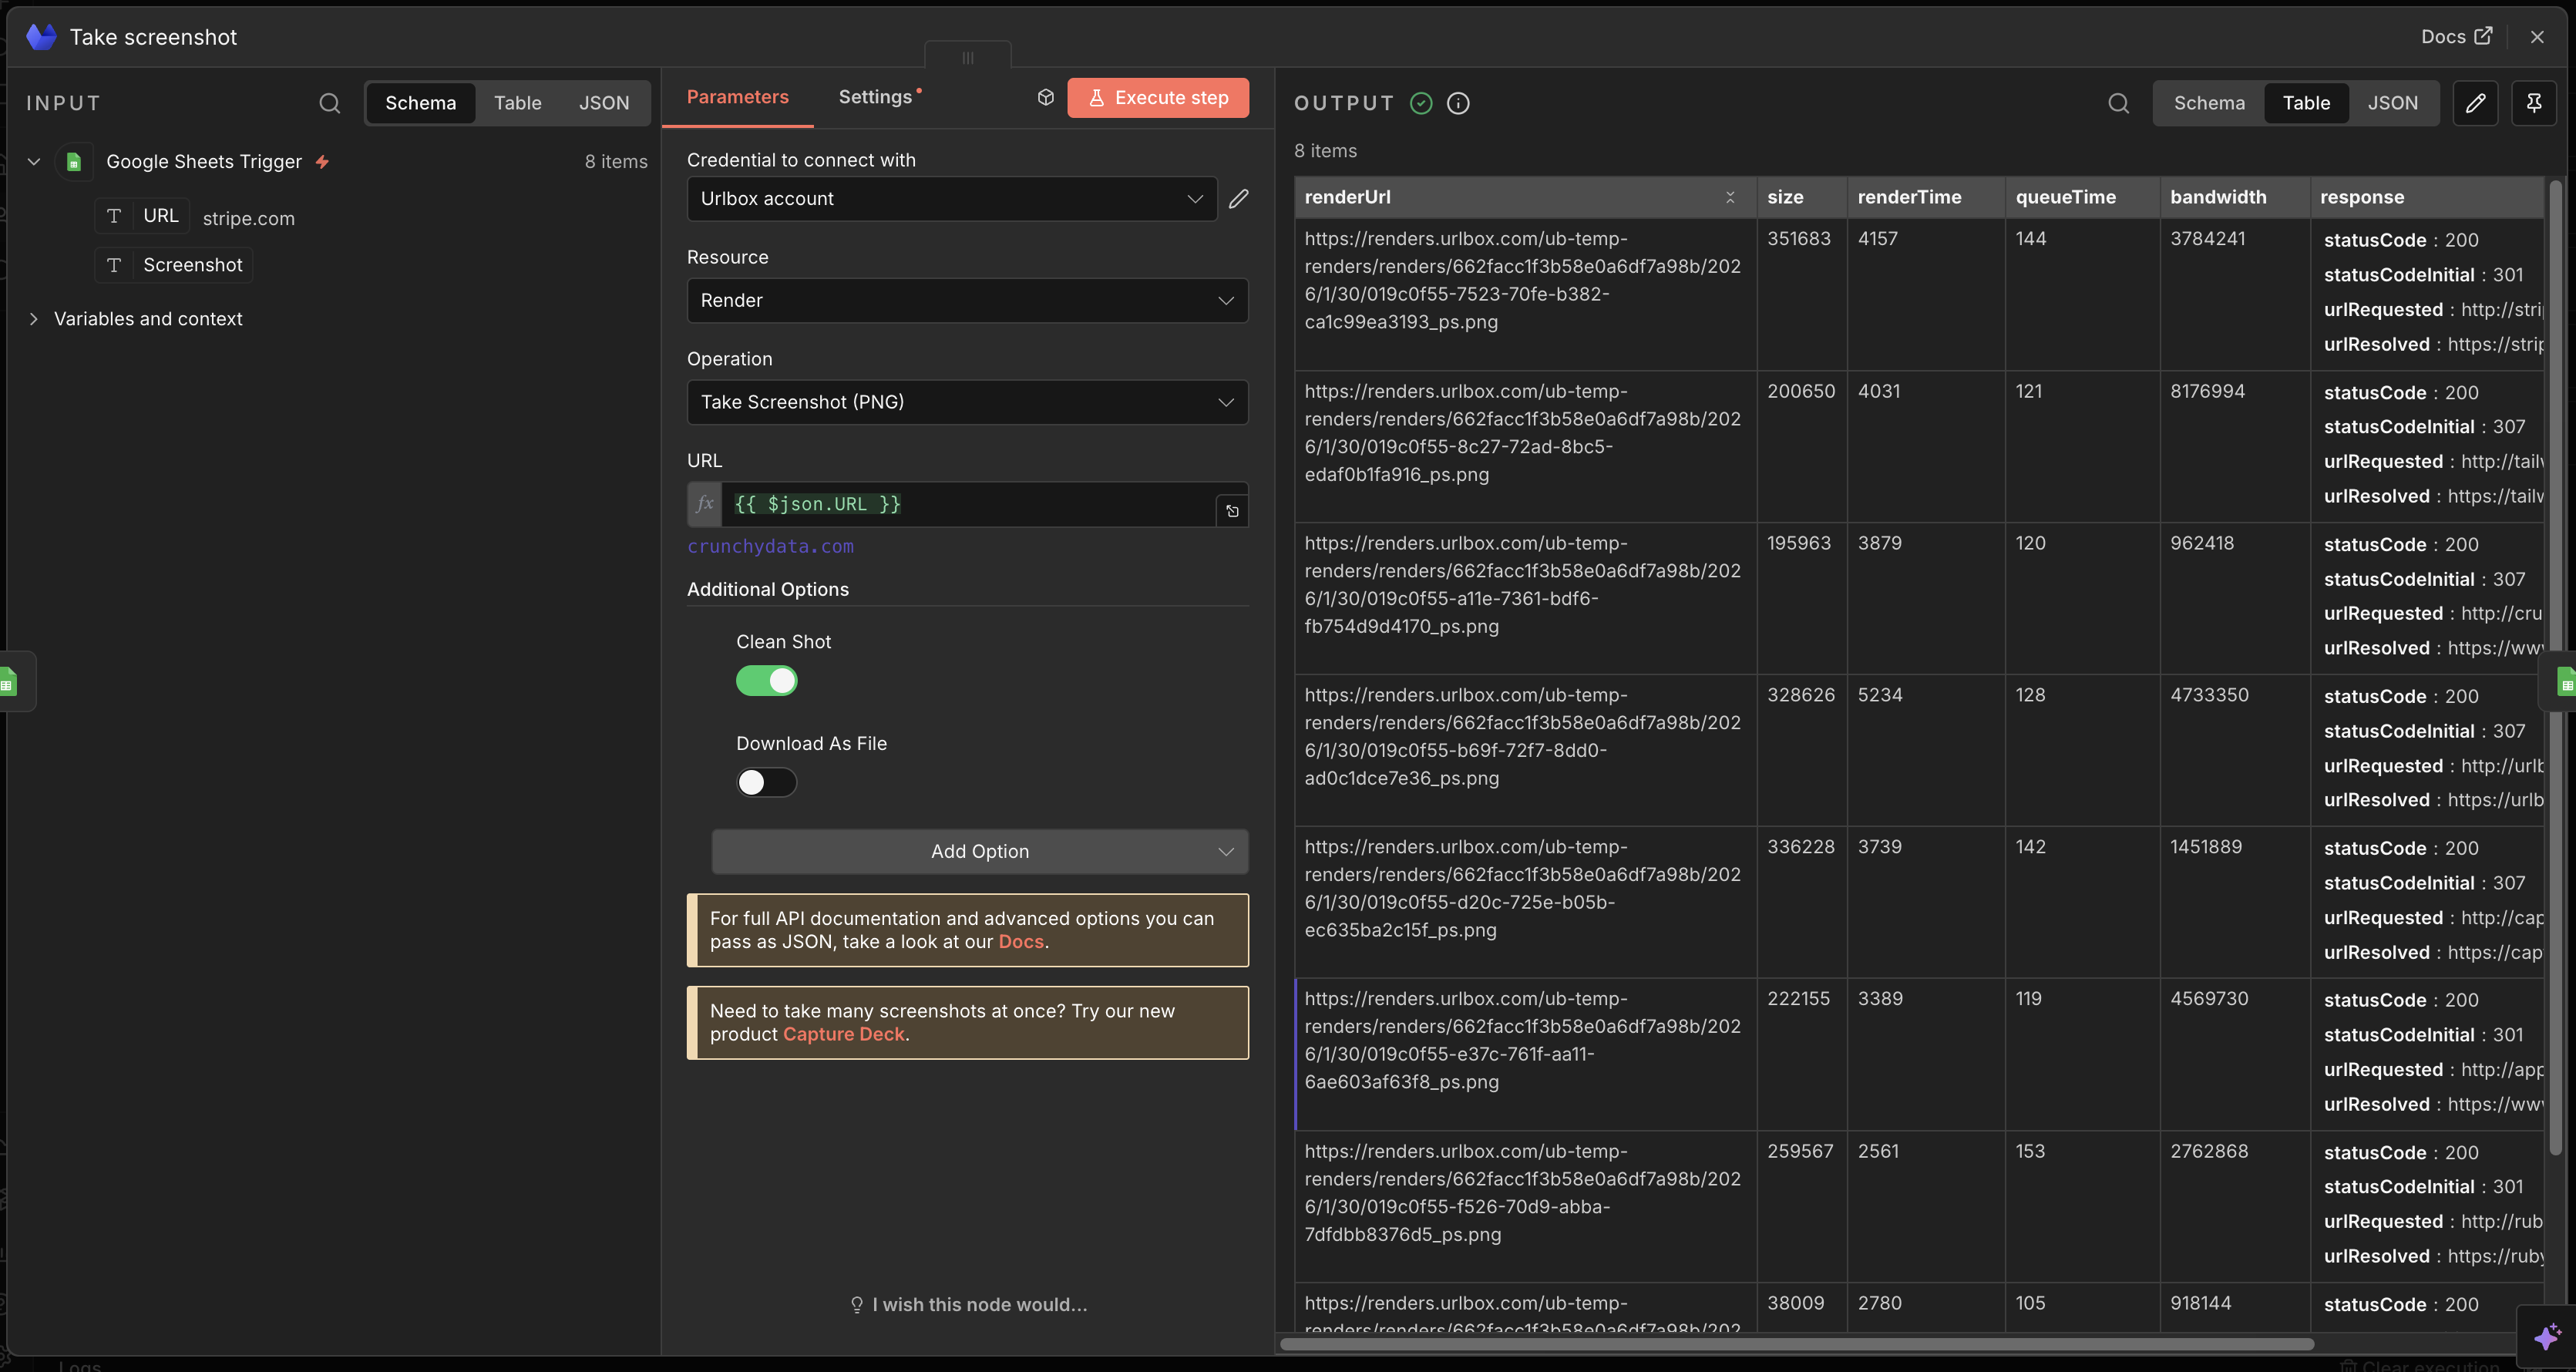
From here you can change the operation, allowing you to take anything from full page shots, to scraping HTML, smooth scrolling videos, or your own custom config using our docs. You can also configure whether to receive the raw render/screenshot file or a storage location URL. We also have some additional options, like rendering HTML content you pass in, instead of a website URL, using a proxy server (super handy for difficult to load websites, such as when trying to take screenshots of social media), or adding your own options on top of the preconfigured operations.
In this example make sure 'Download as file' is unchecked, so that you get back the temporary (30 day) storage location that can populate the Google sheet.
If you actually want to use the above to store permanent locations to your renders, you should try out our s3 feature which automatically saves renders to your own desired cloud bucket. Alternatively, you could check 'Download as file' and use an S3 node to upload screenshots with the output Urlbox produces.
Test it out by hitting 'execute step', and you should get back something like this:
Updating the same Google sheet with the results
The last step we want to add is another Google sheets node.
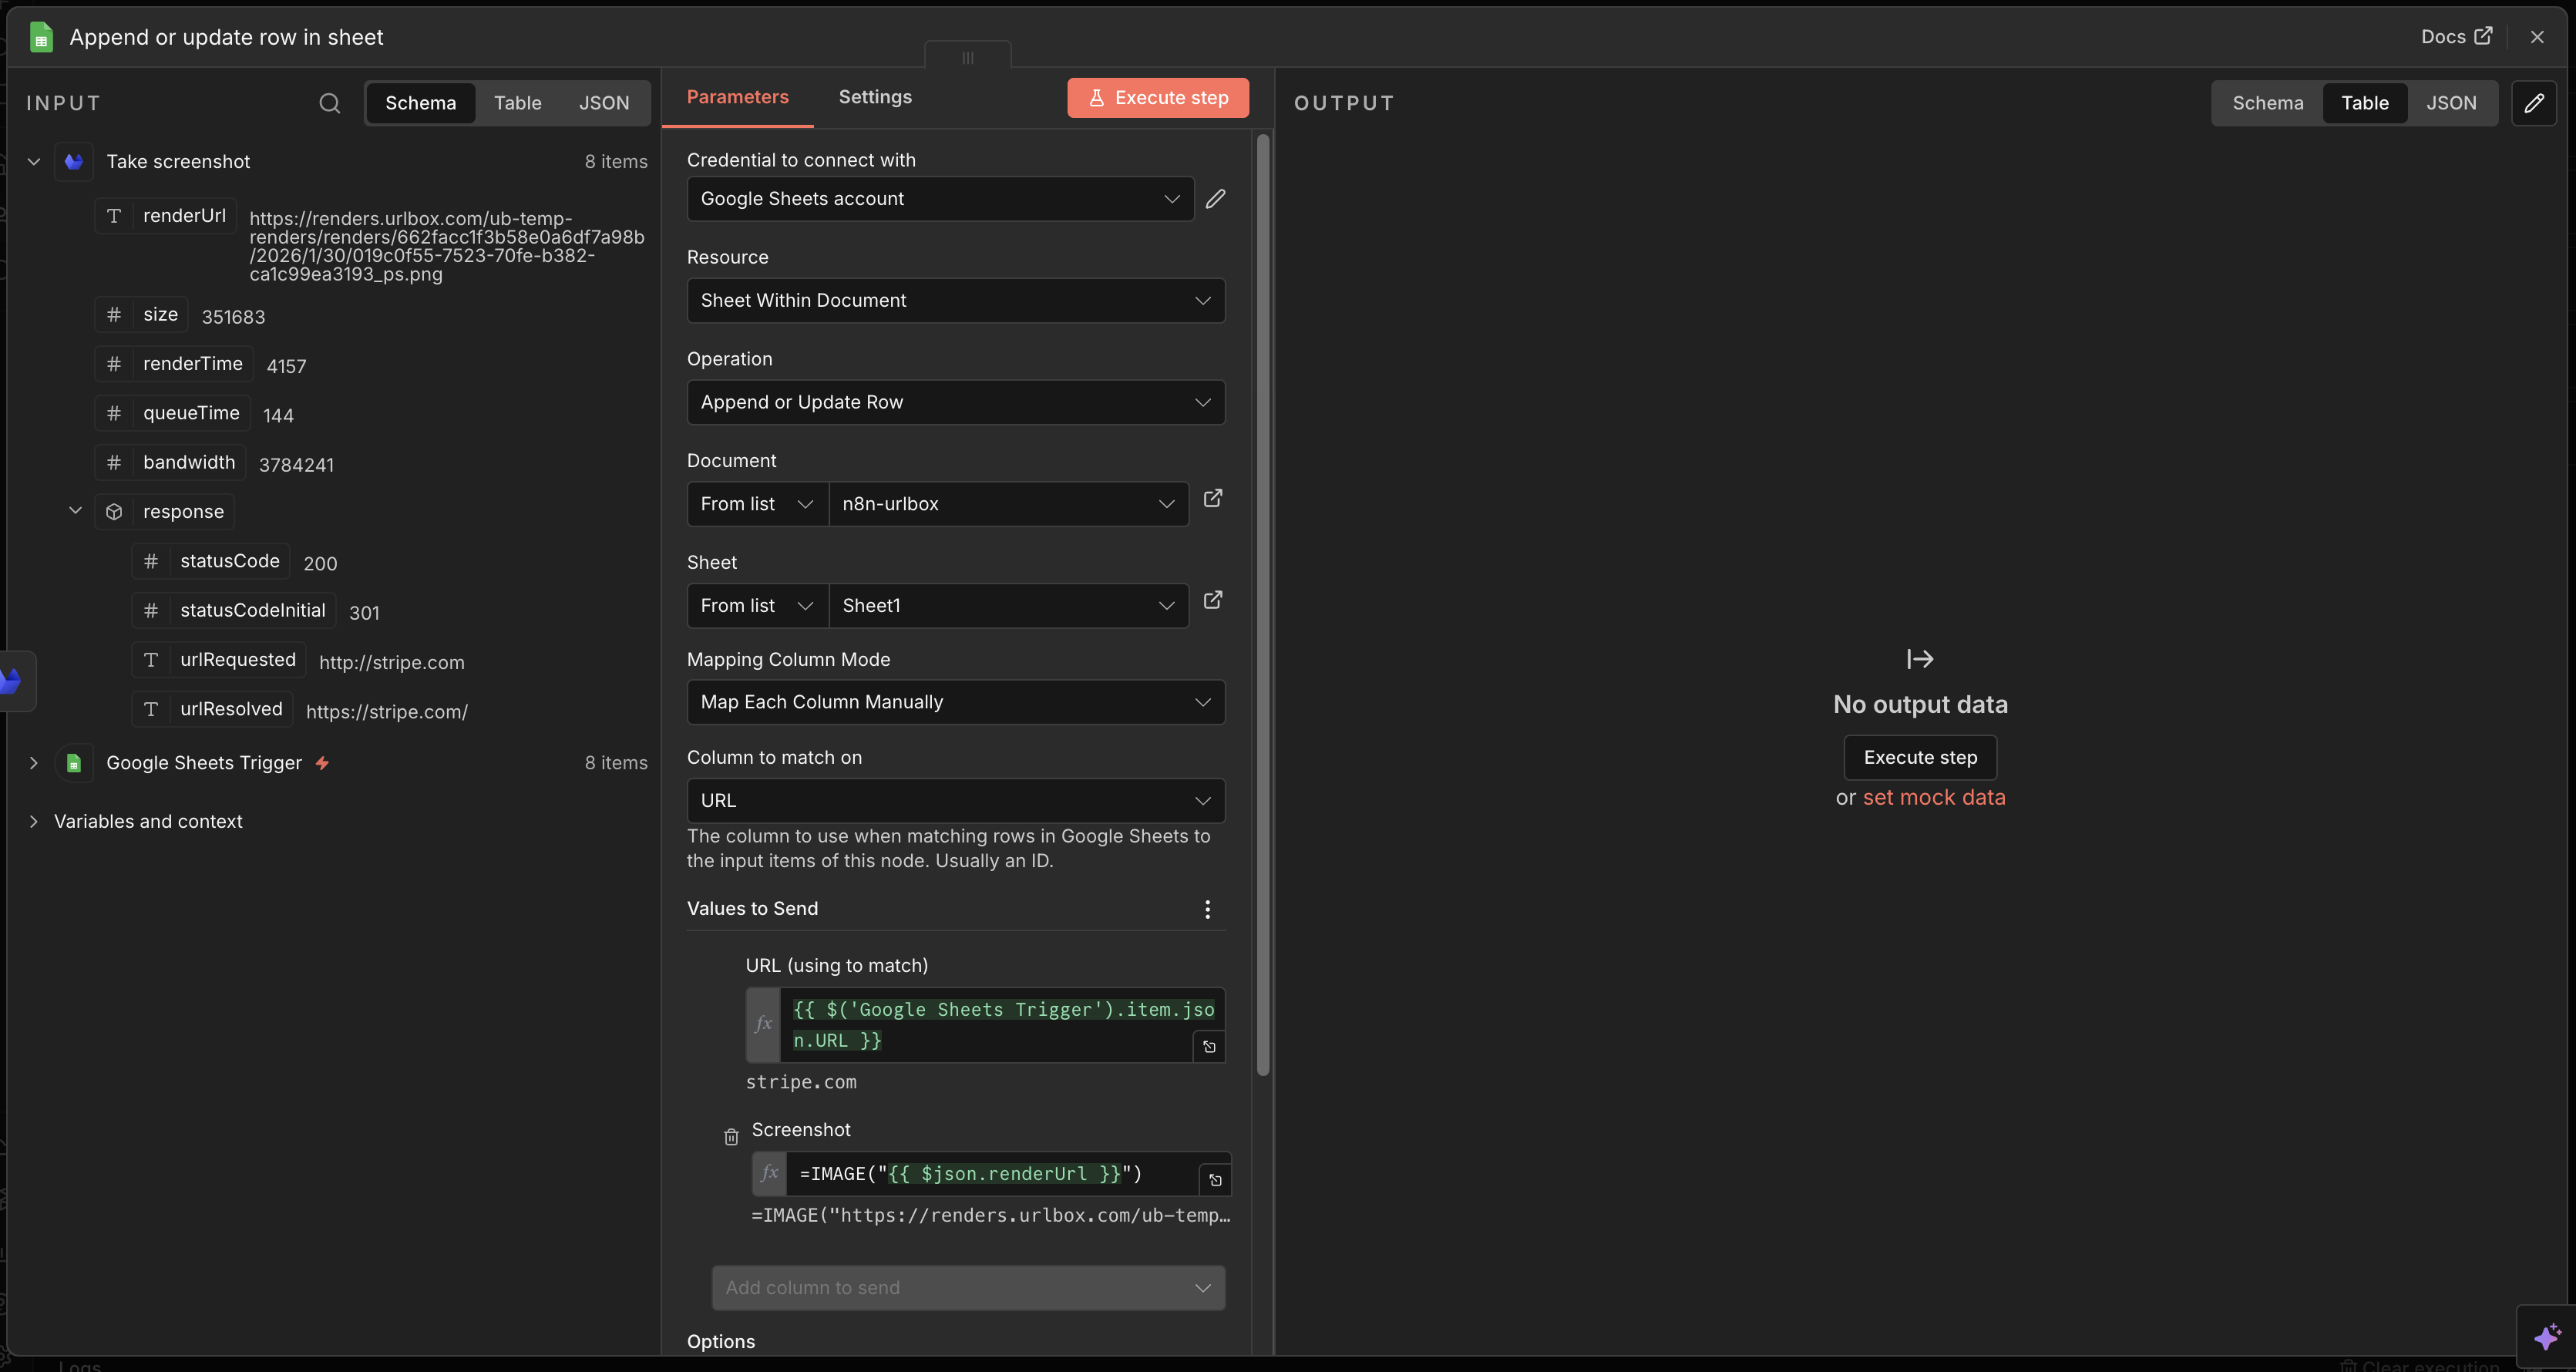
- Add a new node, search for Google Sheets, and choose the 'Append or Update row' action.
- Add the credentials you created in the previous step.
- For this example, choose the same document and sheet (default name is Sheet1).
- By mapping each column manually by URL, dragging the Google Sheet trigger URL as the
URL (using to match)value to send, then opening the 'Take screenshot' input on the left and dragging therenderUrlinto theScreenshotvalue to send, the step will write the Urlbox renderUrl into that row’s Screenshot column. - optionally add the image function IE
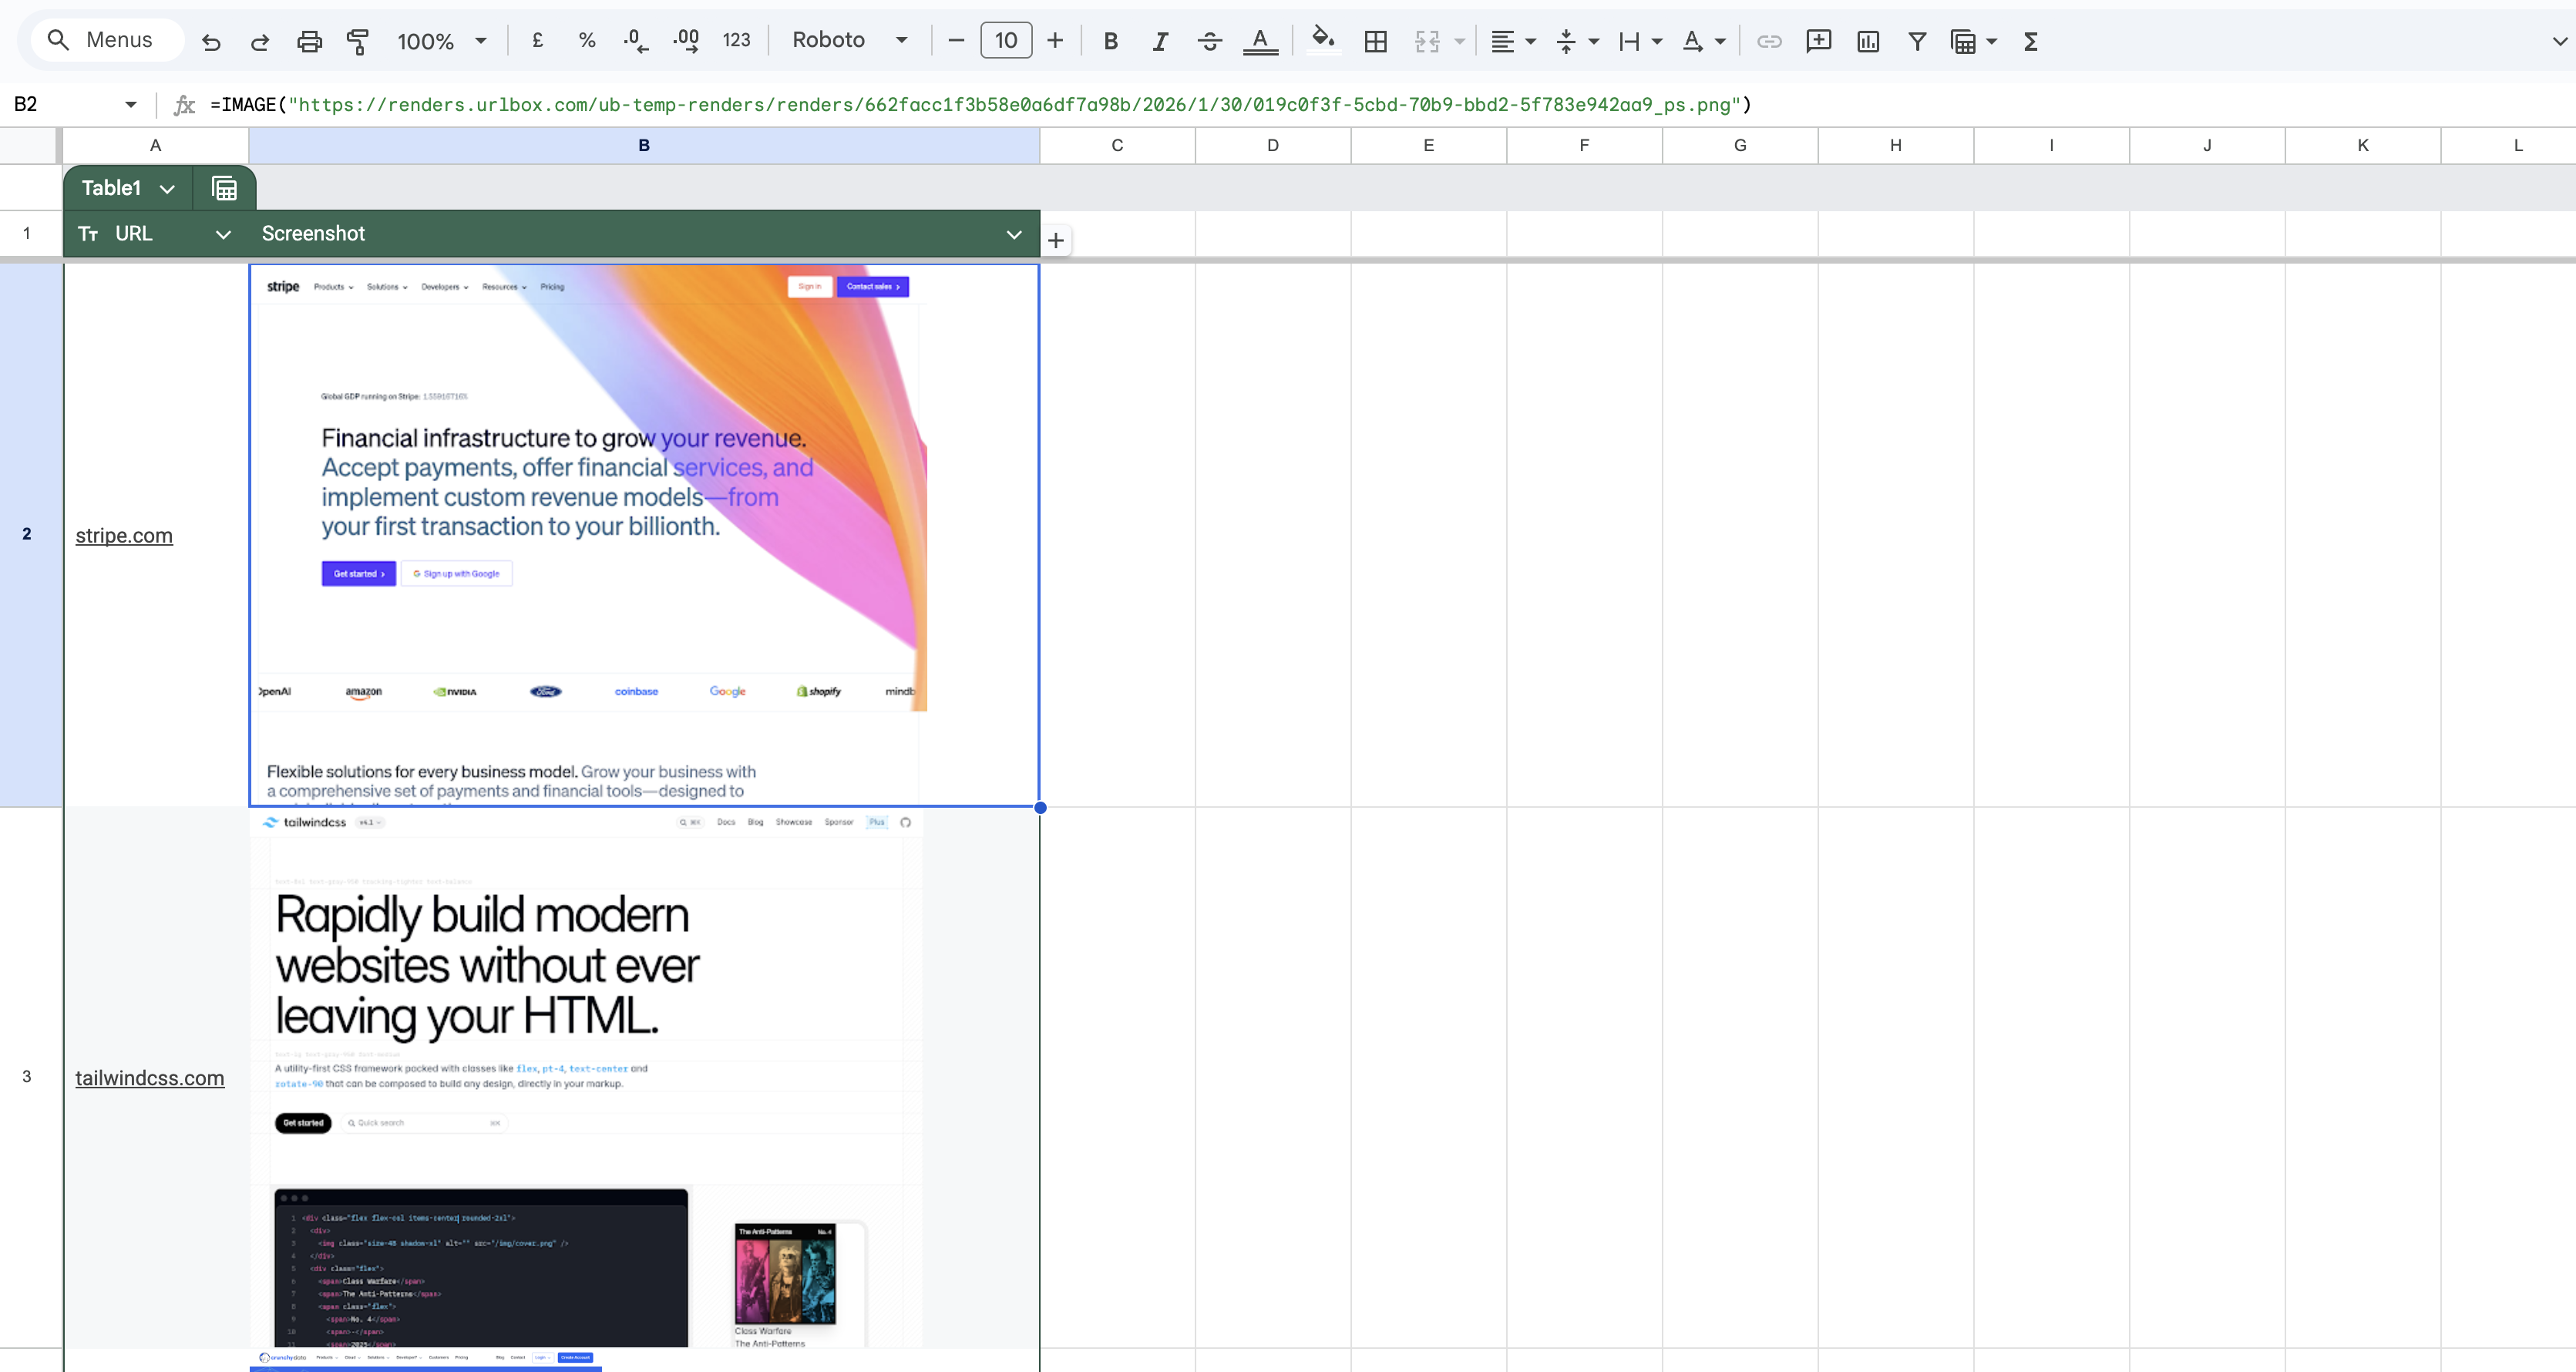
=IMAGE("{{ $json.renderUrl }}")in the screenshot row to populate, so that Excel pre-loads the image for each row, allowing you to see the image itself instead of a link.
Here's how it should look:
Now it's time to go back to the workflow page and click 'Execute Workflow'.
If all has worked, you should be able to refresh your Google Sheet in another tab and see that the screenshot columns have been ✨populated✨! Expand the rows and you'll see each screenshot populated in the row.
You'll notice we don't need to place the Urlbox node inside a loop to iterate over every row in the Google sheet. N8N is smart enough to work that out for us!
What's Next
The integration is available now on npm and through n8n's community node system. You can also read more about it on the N8N website.
We'd love to hear how you're using the n8n integration. We'd also love to help you, so if you get stuck or have feedback or feature requests, just reach out through our support chat or email [email protected].
Already using Zapier? Check out our Zapier integration which offers similar functionality. Both integrations give you no-code access to Urlbox, so choose whichever platform fits your existing workflow.