
Screenshots are useful for just about any aspect of your developer workflow. From grabbing a quick image of each page from a list of URLs in a database, to capturing the current state of your web app, screenshots can provide context for data in your SQL database or simply be used to guide design decisions at your organization. You might even want to use screenshots to dynamically generate images from HTML and CSS for use on social media. There is almost no limit to how you can use screenshots in your day-to-day work.
In this article, you will learn methods for taking screenshots that can be used on both the Linux and macOS command line. You will also learn about Urlbox, a tool to capture screenshots of websites at scale.
If you'd like to see all the code from this tutorial in one place, you can do so in this GitHub repository.
Puppeteer
Many of the tools in this article take advantage of "headless" Chrome. Headless, in this case, means that Google Chrome can be run and managed without directly interacting with a browser window. The "headless" option for Google Chrome was released with version 59. However, since Google released Puppeteer, taking screenshots with Chrome has become much easier.
To get started capturing screenshots with Puppeteer, be sure you have Node.js and npm installed on your machine.
To install Puppeteer, start by creating a folder for your project. Navigate to this folder in your terminal and install Puppeteer with the following command:
npm install puppeteer
Press "Enter", and you should see the Puppeteer library download and install.
Once Puppeteer is installed, create a new file called index.js in the project folder you created above. Your code will run from this file to capture the screenshot, which will be saved in the same directory. In this example, the screenshot will be 500 x 1000.
// load Puppeteer
const pt = require("puppeteer");

// this script accepts a url as an argument
let url = new URL(process.argv[2]);
// the filename will be extracted from the hostname of the url
let filename = `${url.hostname}.png`;

const delay = (ms) => new Promise((resolve) => setTimeout(resolve, ms));

// launch Puppeteer and add image parameters
pt.launch().then(async (browser) => {
  const p = await browser.newPage();

  // capture an image that is 1000 x 500 pixels
  await p.setViewport({ width: 1900, height: 1200 });

  // navigate to the site you would like to capture
  await p.goto(url, { waitUntil: "domcontentloaded" });

  delay(5000).then(async () => {
    // take the screenshot of the site and save it to the current folder
    await p.screenshot({ path: filename });

    // close the Puppeteer browser when you are finished.
    await browser.close();

    console.log("done");
  });
});
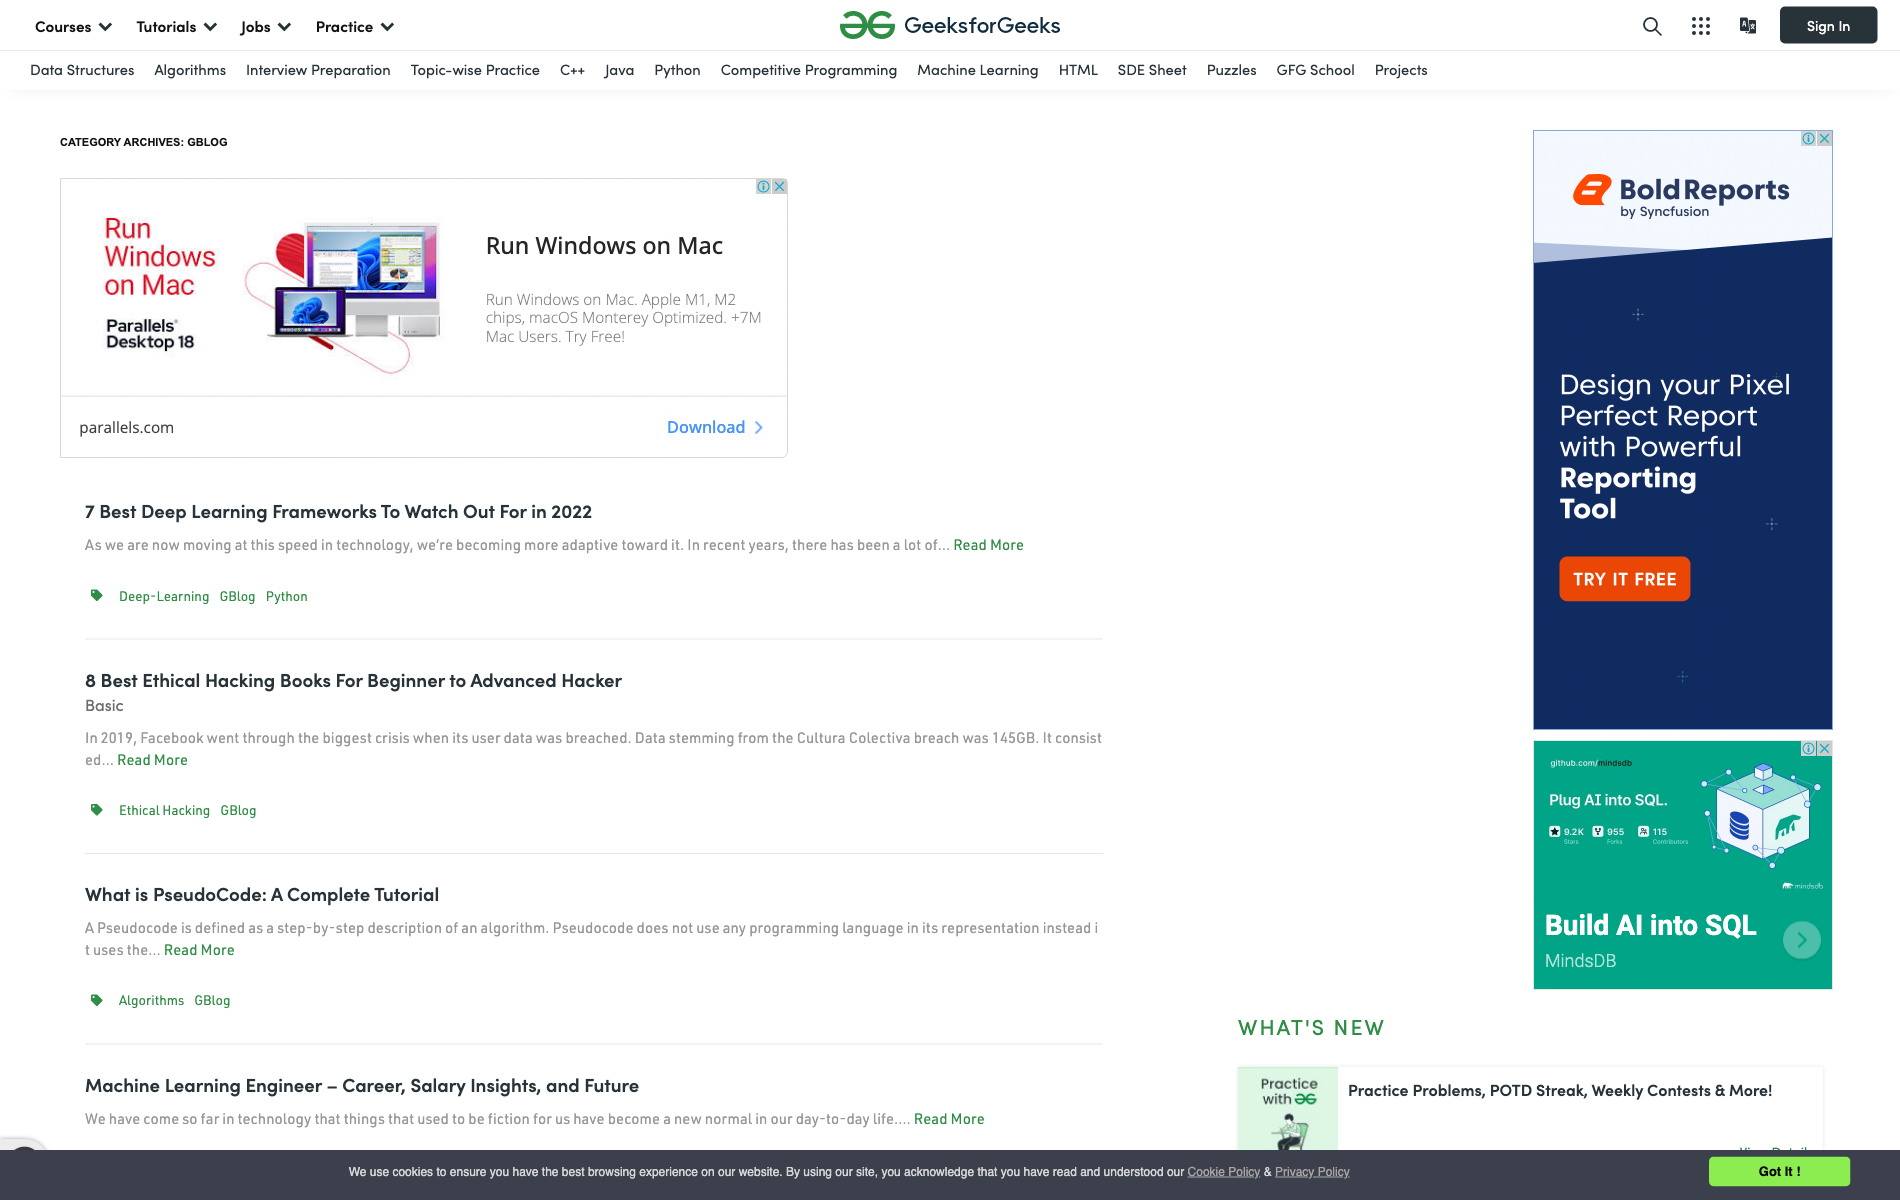
To run the above script, enter node index.js https://www.geeksforgeeks.org/category/guestblogs/ in your terminal. The script will take a few moments to navigate and capture the screenshot, and it will print "done" when it is complete.
With Puppeteer you have a fully featured JavaScript library that can do a lot more than take screenshots, including interacting with the Document Object Model (DOM) of a website, responding to events, and accessing the virtual keyboard via API. These features make Puppeteer a dream if you are looking to interact with websites from the command line.
One major negative is that Puppeteer requires knowledge of JavaScript or TypeScript to use more advanced features, which may be difficult if you are not familiar with one of the languages. Puppeteer requires you develop your own screen capture delay or request option functions, making development much more complicated.
Another issue is that Puppeteer can't block ads or pop-ups from appearing in your screenshots, which means that any image you capture will potentially have these unneeded elements obstructing part of the image. While Puppeteer is a great option if you like the JavaScript ecosystem, it may be a bit much for your needs.
Playwright
Another useful library for capturing screenshots is Playwright. Playwright is similar to Puppeteer in that it allows you to easily capture screenshots with a few lines of code. However, Playwright also allows you to capture screenshots from other browser engines, such as WebKit (Safari) and Firefox.
As with the Puppeteer example, the code below will navigate to a web page of your choosing, take a screenshot, and save the screenshot PNG file to the same folder as the code. To get started, create a project folder and navigate to that folder in your terminal.
Next, install Playwright using npm:
npm init playwright@latest
Note that the install process for Playwright is a bit different than Puppeteer. Playwright will guide you through the process of setting up your default language—JavaScript or Typescript, or you can choose to write a script with Python, .Net, or Java. For this tutorial, you'll be using JavaScript, the default language. After you select your options, npm will download the Chrome, WebKit, and Firefox browser engines to your project folder.
After you have completed the Playwright setup, copy the code below and save it in the project folder as index.js:
// this example uses chromium. you may also use 'webkit' or 'firefox'
const chromium = require("playwright").chromium;

let url = new URL(process.argv[2]);
let filename = `${url.hostname}.png`;

(async () => {
  // launch a chromium instance
  const browser = await chromium.launch();

  // create and load a new page 'context'
  const context = await browser.newContext();
  const page = await context.newPage();

  // navigate to your url
  await page.goto(url.href.toString());
  await page.waitForEvent("requestfinished").then(async () => {
    // take the screenshot
    await page.screenshot({ path: filename });
    // close the chromium instance
    await browser.close();
  });
})();
Now you can run the code to take a screenshot of your desired URL by entering the following command in your terminal:
node index.js https://www.geeksforgeeks.org/category/guestblogs/
Your script will pause briefly while Playwright navigates to the URL specified in the code. When the script is complete, your screenshot will be saved to the current project folder.
Playwright is very similar to Puppeteer and using Playwright will provide you with several advantages. Playwright allows you to manipulate websites using the Webkit and Firefox browser engines as well as Google Chrome, which could provide flexibility depending on your use case. Playwright also allows you to use TypeScript, Python, .Net, or Java in addition to JavaScript, so you are not limited to a single language and development environment to create your scripts.
Unfortunately, like Puppeteer, Playwright requires knowledge of several specific programming languages to develop, and some of the options may be a bit difficult to understand. Additionally, as you can see, it doesn't offer an easy way to block ads or banners on the site you're screenshotting. It is possible to remove elements using Playwright, however, it requires your script to find and hide the specific element showing the advertisement.
Python
JavaScript isn't the only language you can use to take screenshots of websites.
Selenium is a popular Python library that allows you to interact with websites and collect information from the comfort of your terminal. Using Python 3, Selenium, and webdriver-manager you can quickly start taking screenshots of any site you desire.
Before you get started, be sure you have Python 3 installed in your system by running the following command in your terminal:
python -version
If the output of this command shows the currently installed Python version you are good to go. If not, head over to the Python releases page and download the latest Python version for your system.
Once you've verified that you have Python 3 installed, create a folder for this project, and navigate to this folder in your terminal. In your project directory, you can install Selenium and webdriver-manager using pip:
pip3 install selenium webdriver-manager
Next, create a file in your project directory called main.py and paste the following code into it:
import sys
from selenium import webdriver
from webdriver_manager.chrome import ChromeDriverManager

# note: Selenium does not provide a way to resize the screenshot

# this script accepts a url as the first argument
url = sys.argv[1]
# pass a filename to the script as the second argument
filename = sys.argv[2]

# set up webdriver
chromedriver = webdriver.Chrome(ChromeDriverManager().install())

# navigate to the url
chromedriver.get(url)

# save the screenshot to `filename`
chromedriver.save_screenshot(filename)

# quit the Chrome webdriver
chromedriver.quit()

print("done")
Finally, run the script in your terminal using the following command:
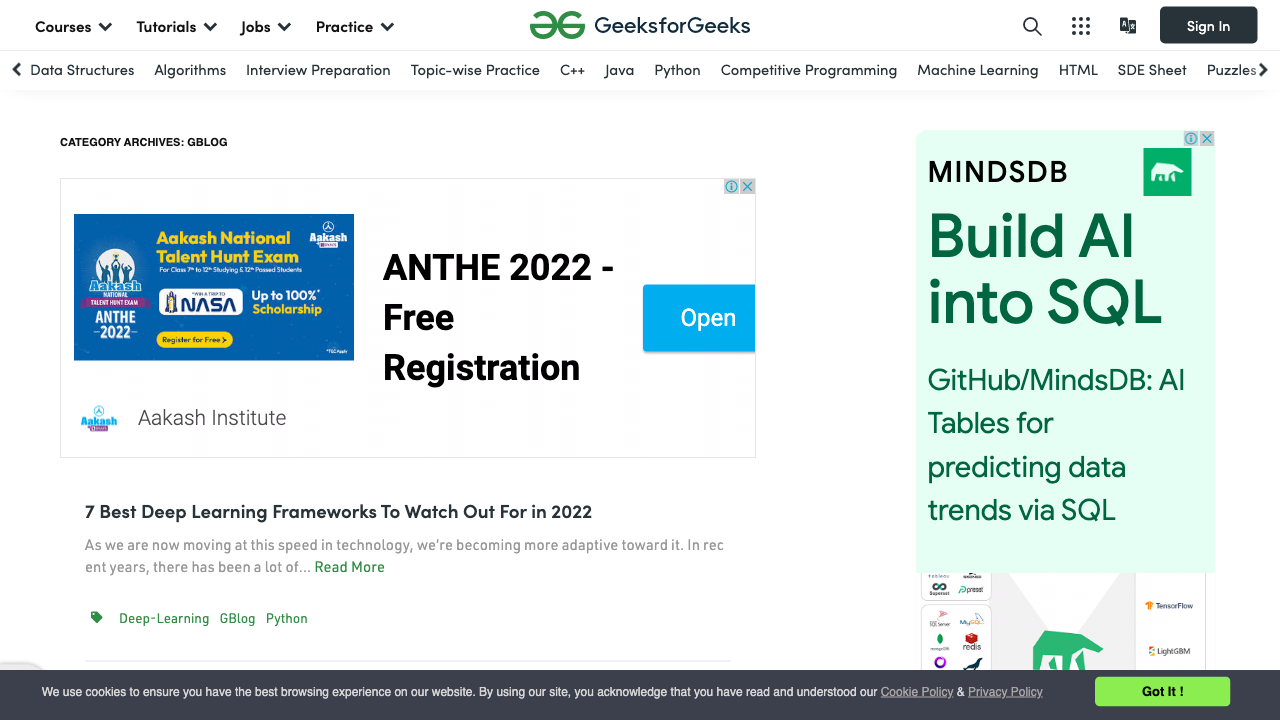
python3 main.py https://www.geeksforgeeks.org/category/guestblogs/ geeksforgeeks.png
Your script will show a progress bar as it attempts to open the website. Unlike with Playwright and Puppeteer, the above script does not run headless, meaning you'll see a Chrome window open briefly while the screenshot is captured, but no interaction is needed from you. The screenshot will save to your current project directory.
Selenium and webdriver-manager offer a simpler way of taking screenshots than the previous Puppeteer and Playwright examples, and like Playwright, Selenium allows you to use your choice of browser engine to interact with websites. Selenium is a fantastic tool if Python is your preferred programming language, and requires minimal setup to get started.
However, while Selenium and webdriver-manager are a bit easier to use than the previous examples, the screenshot produced is decidedly subpar. The image captured with this script is low in quality, containing fuzzy text, which may limit the usability of this image in your project. Another snag is that Selenium has few customization options. You're not able to specify an image size for your captures, and while this image doesn't show any ads, Selenium doesn't actually offer ad blocking or banner dismissal. The lack of ads is actually indicative of another drawback with Selenium: the site didn't fully load before the screenshot was captured, which will require more scripting to work around.
shot-scraper
shot-scraper is a command line tool built on top of Playwright, developed by Simon Willison. Having Playwright as the underlying process means that shot-scraper is easier and faster than developing your own script, and doesn't require you to set up a programming environment or write much code.
shot-scraper is available through pip, and can be installed using the following command:
pip install shot-scraper
Once installed, you will need to run an additional command to install the browser engine:
shot-scraper install
And that's it—you're ready to capture screenshots with shot-scraper.
Since shot-scraper is a standalone command rather than a library, you can use it directly from the command line:
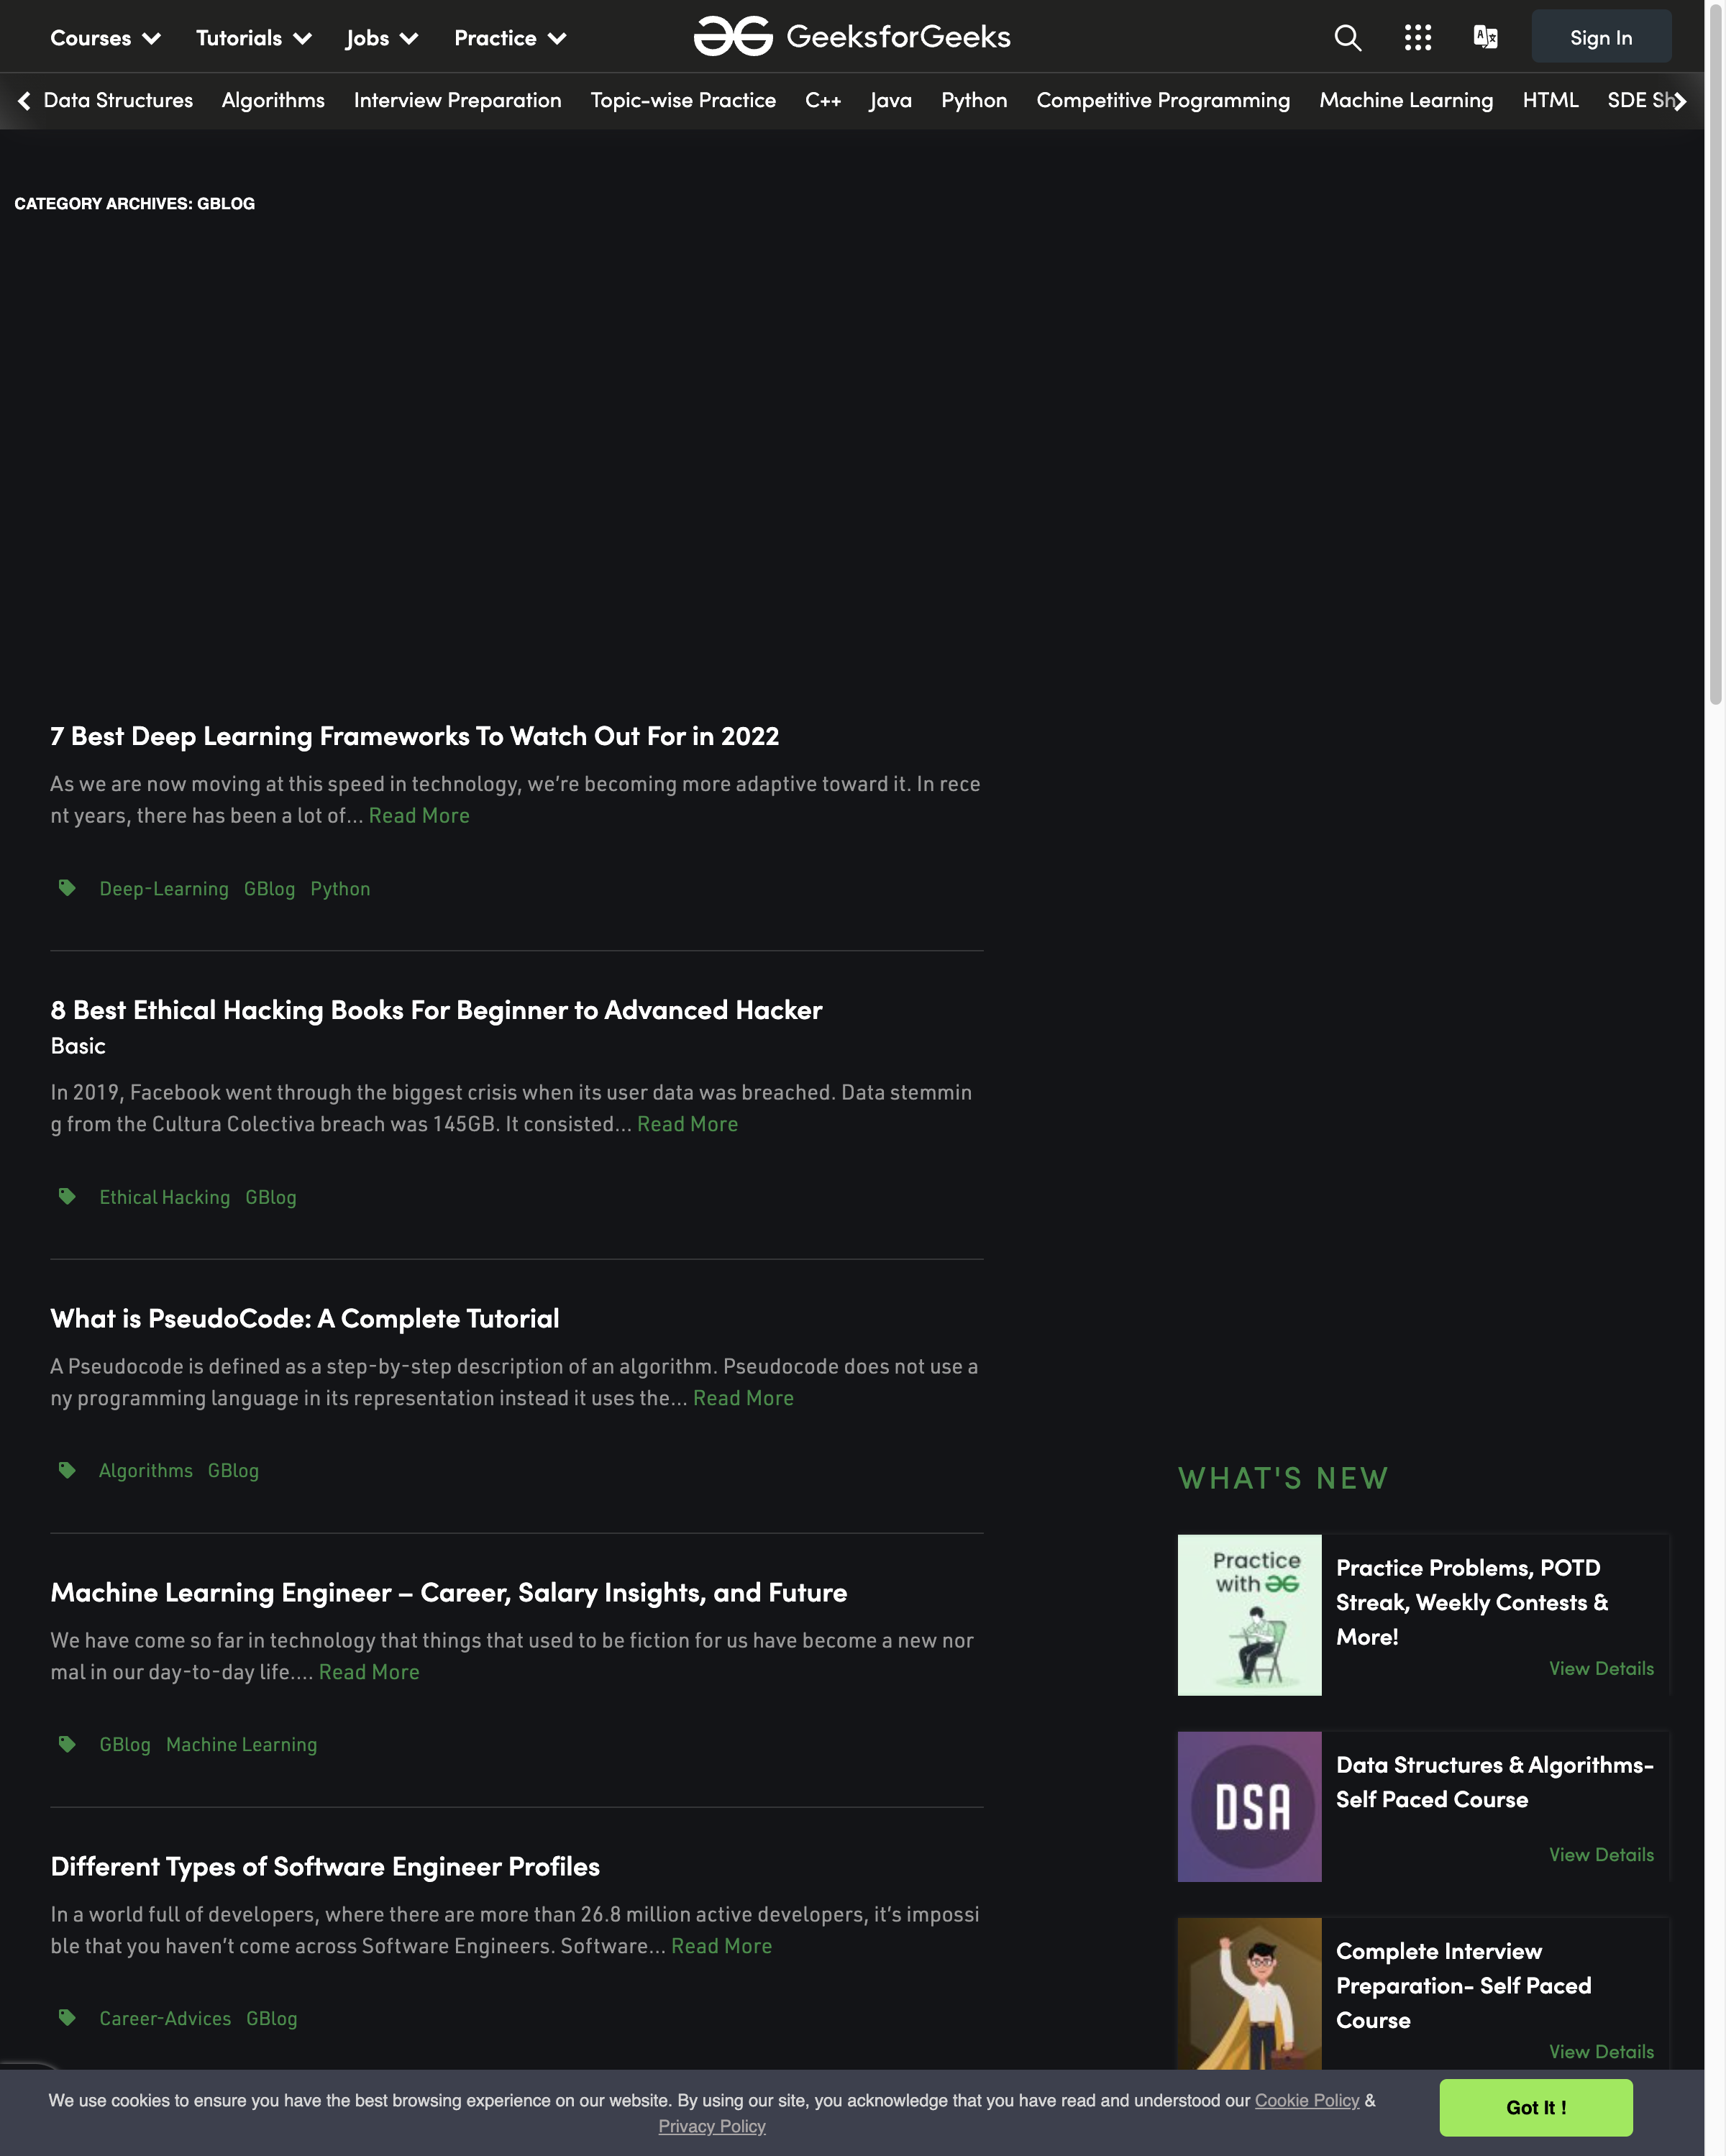
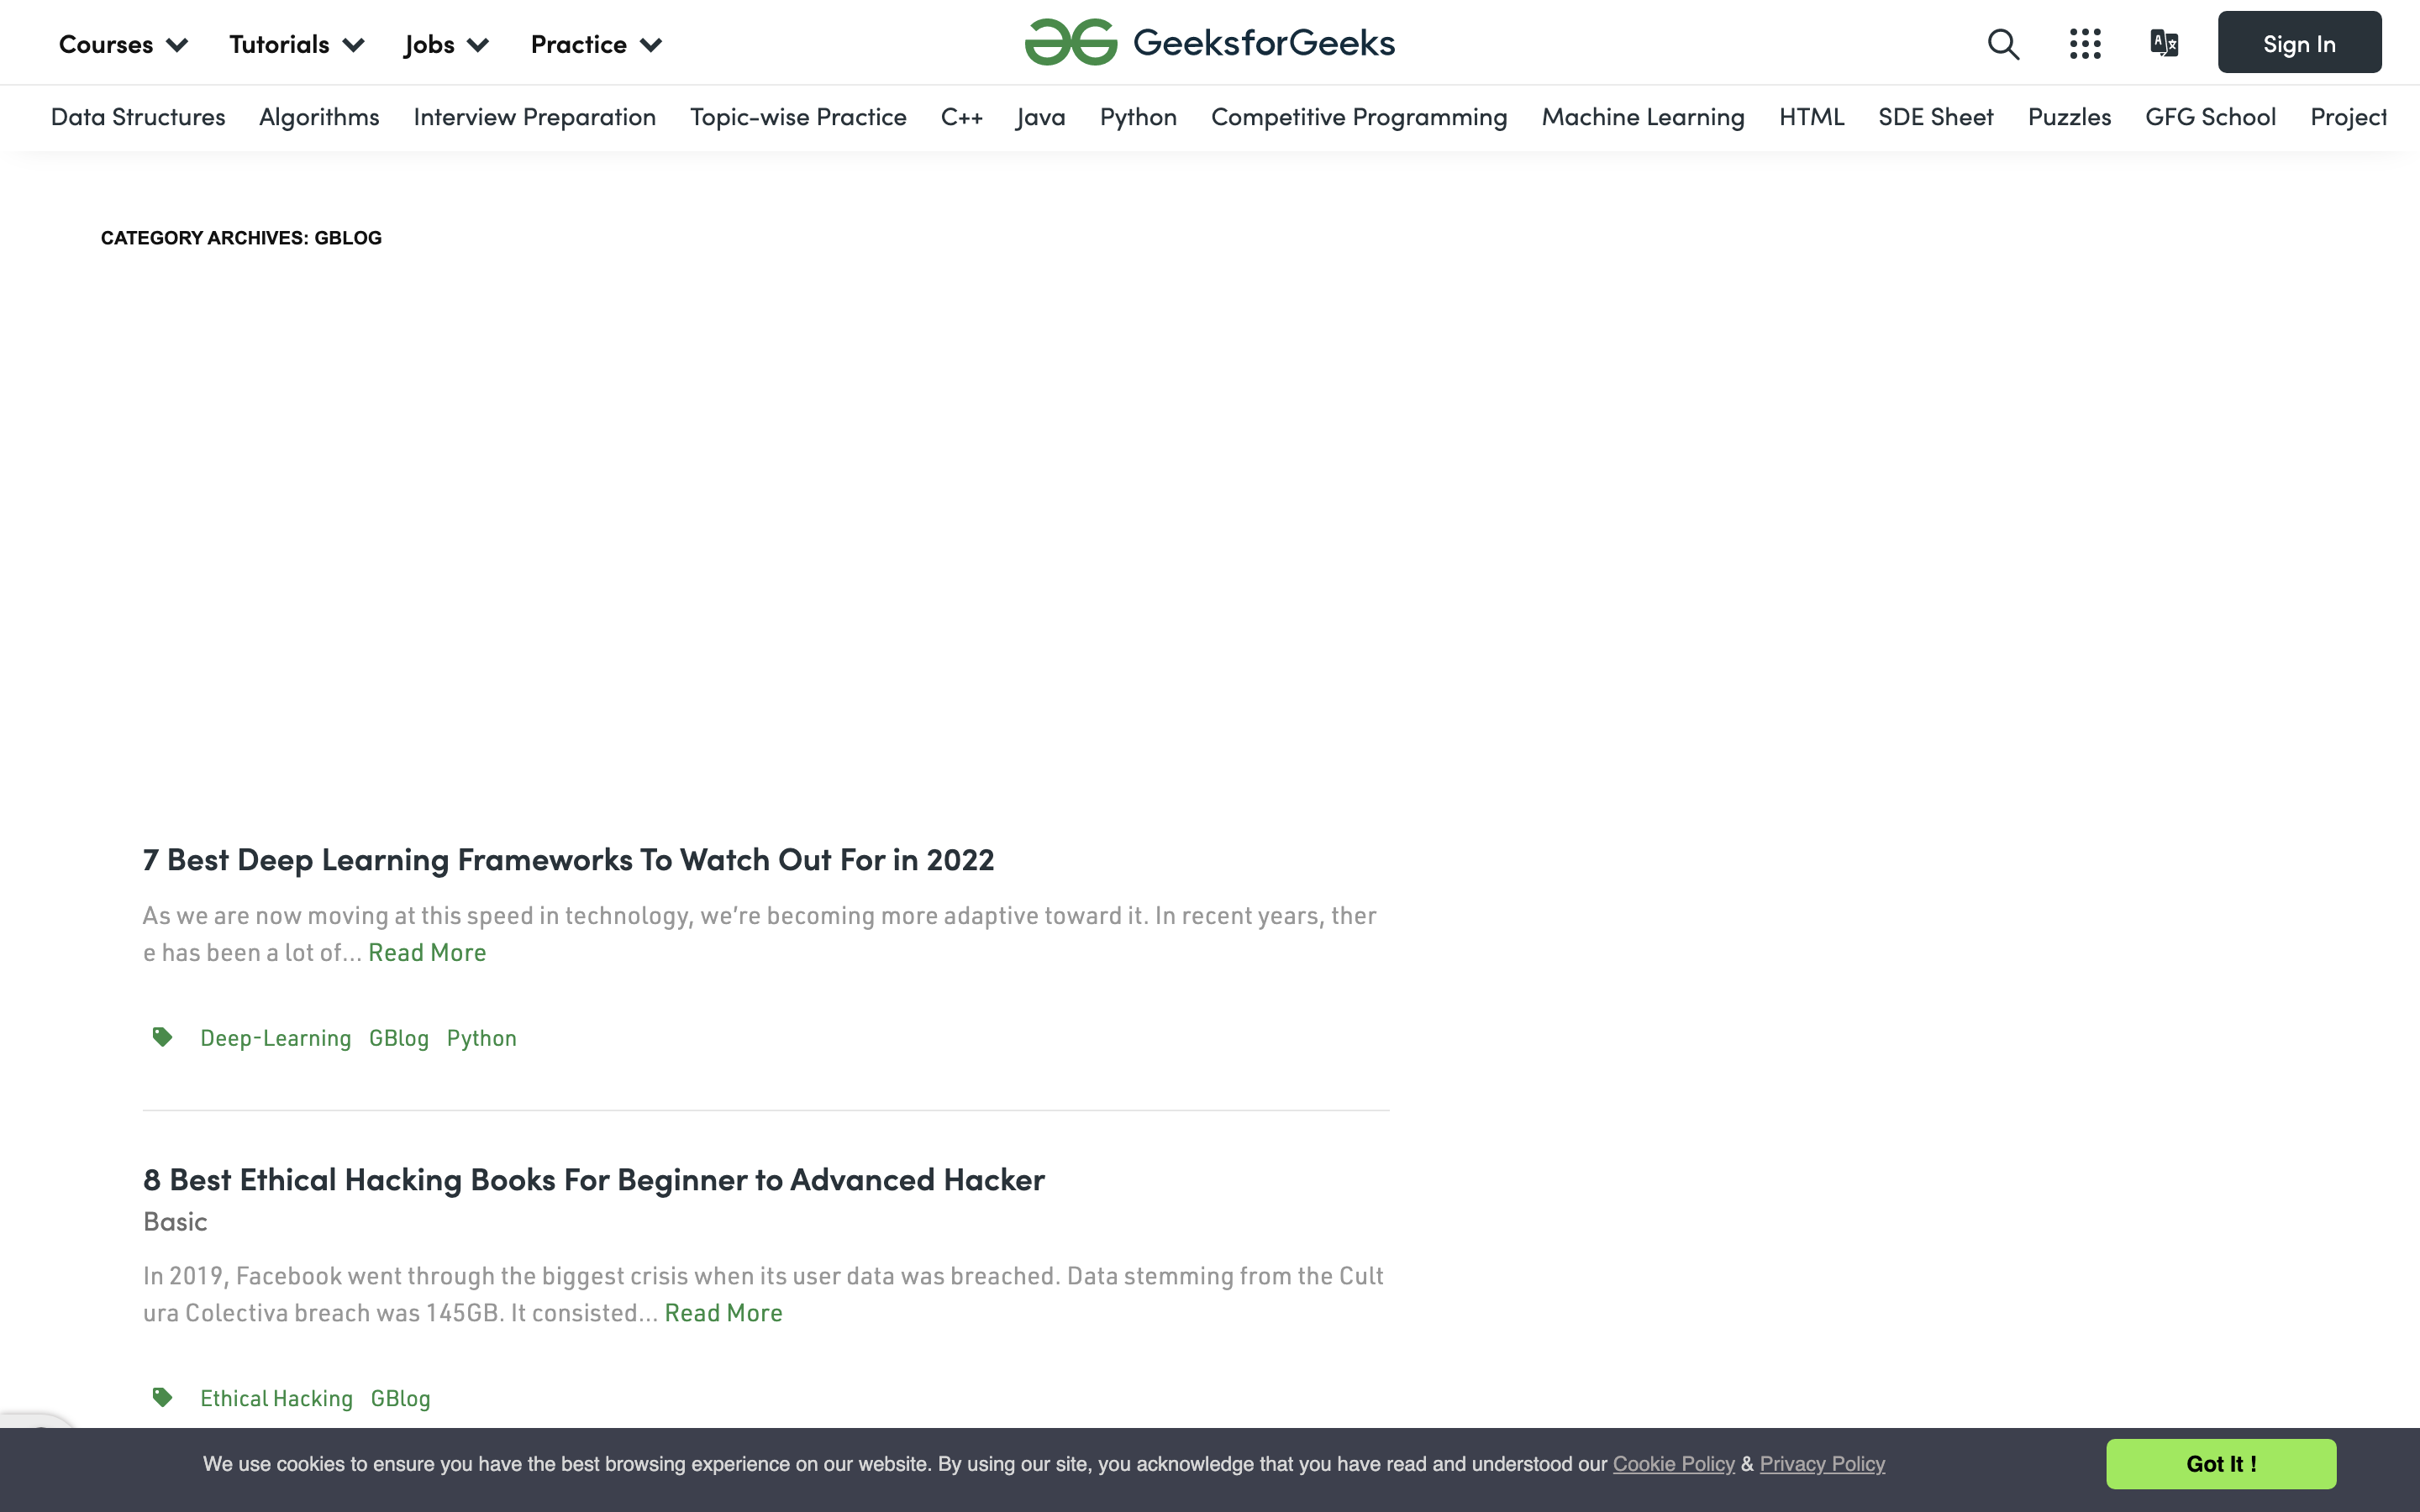
shot-scraper https://www.geeksforgeeks.org/category/guestblogs/
You may also set up a simple bash script for shot-scraper. The code below accepts a URL as an argument, and will save the screenshot to your current directory:
#!/usr/bin/env bash

url="${1}"
shot-scraper "${url}"

shot-scraper has many options available, and doesn't require that you write any additional Python or JavaScript. Using Playwright as the underlying architecture allows shot-scraper to be a robust and full-featured tool that is very easy to use.
While shot-scraper is easy to get started with, adding additional options to your command may require you to create a bash or Python script. Additionally, advanced options such as hiding selectors or highlighting keywords will require you to write additional code. More complex workflows with shot-scraper can quickly grow to meet or exceed the size of a Playwright or Puppeteer script.
Finally, while this screenshot doesn't have ads, shot-scraper doesn't offer ad blocking, so their absence is again likely because the page didn't fully load before the screenshot was taken.
gowitness
Unlike the JavaScript and Python examples above, gowitness is a standalone command that can be run directly in your terminal. The benefit to using gowitness over the other options is that you don't need to know or learn a new programming language to use it—if you're familiar with the command line environment, running gowitness is a smooth process.
Before you get started, be sure you have Go installed and that the Go binary is in your path. Once Go is set up on your machine, you can download gowitness by running the following command in your terminal:
go install github.com/sensepost/gowitness@latest
Once gowitness has been installed, create a project folder, and navigate to that folder in your terminal. To create the run script for gowitness, copy the code below and save it as screenshot.bash in your project folder:
#!/usr/bin/env bash
# make sure gowitness is installed and in your path
command -v gowitness && {
# if your terminal can find the gowitness tool, create the screenshot
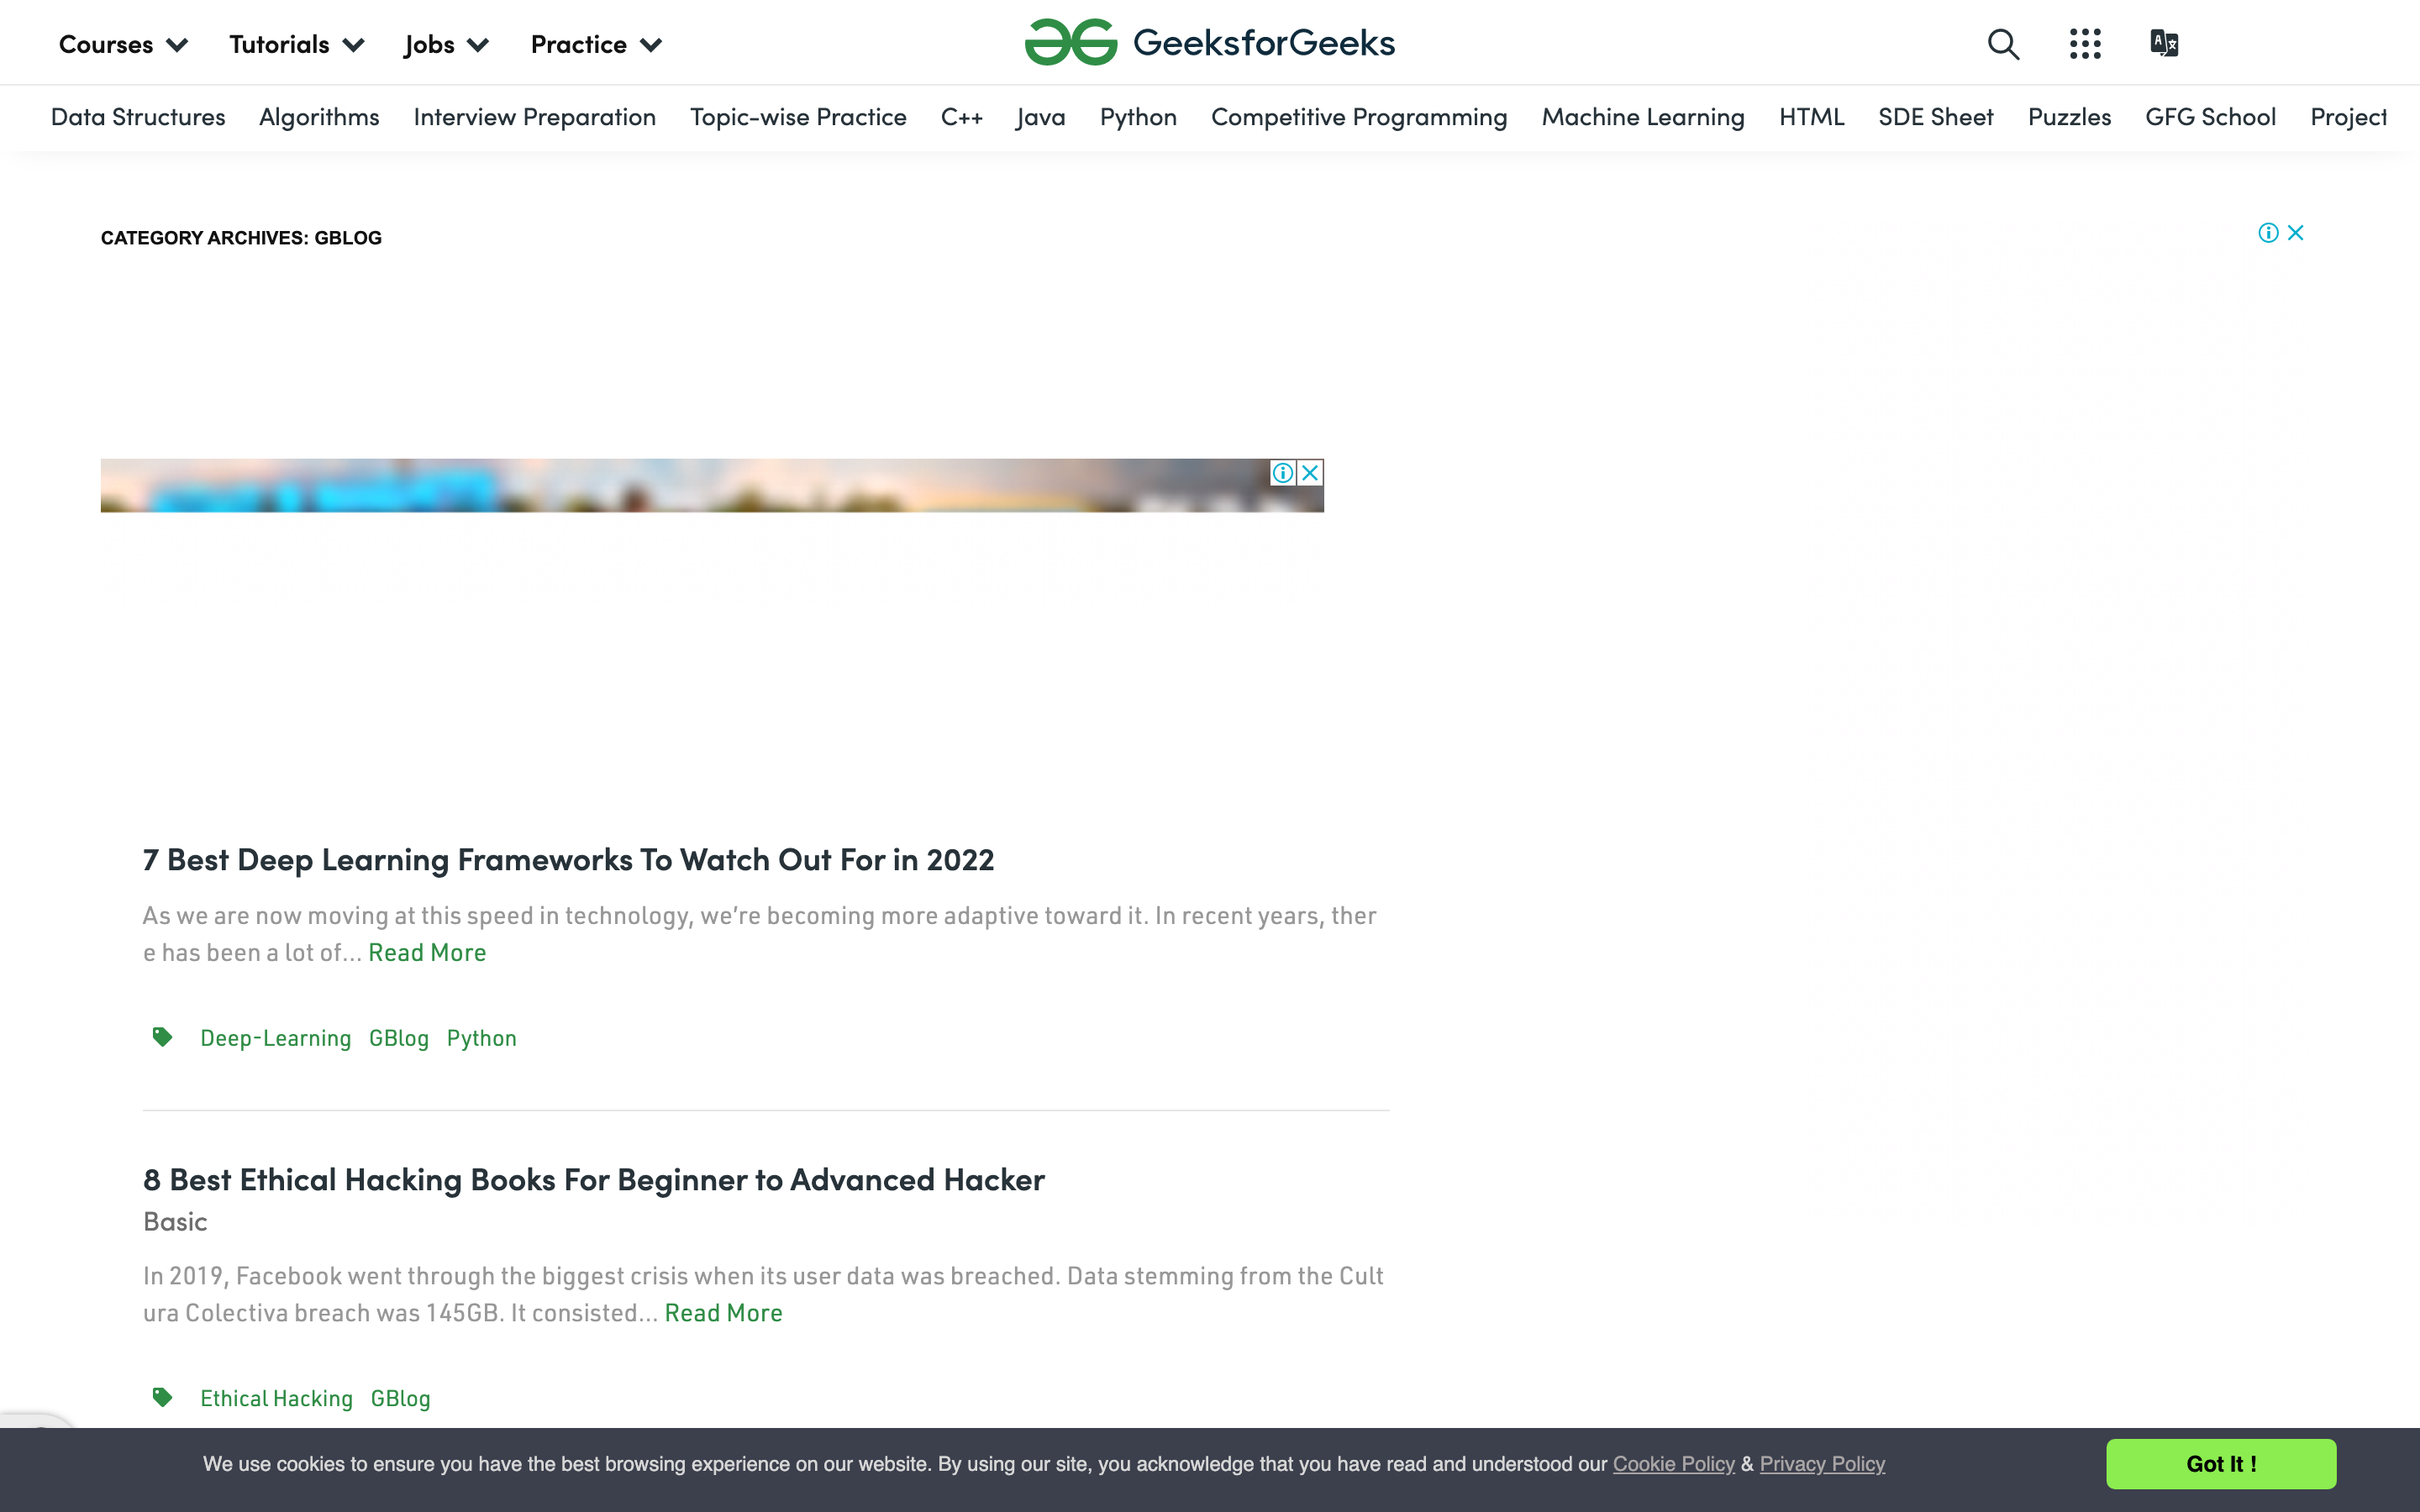
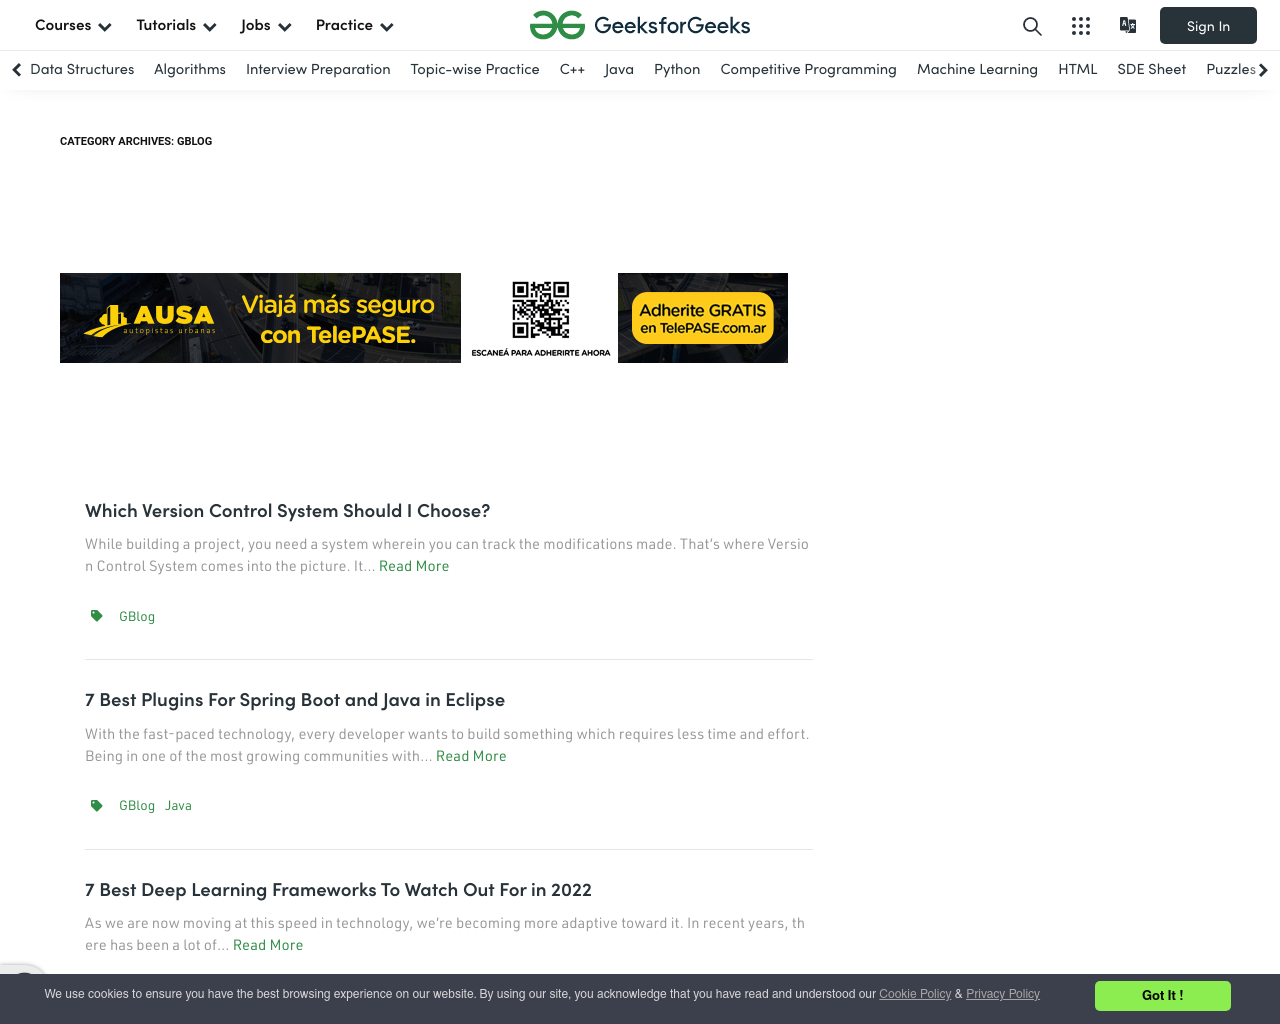
gowitness single -o ./ "https://www.geeksforgeeks.org/category/guestblogs/"
} || {
print "gowitness is not found."
}
As mentioned above, creating a script isn't required to use gowitness. However, the command's options are a bit verbose, so you may want to save more complicated screenshot scripts to a standalone file, such as the screenshot.bash script mentioned above.
Use the following command to capture a single screenshot of a webpage with gowitness:
#!/usr/bin/env bash

# make sure gowitness is installed
# if gowitness is found, capture the image
command -v gowitness && {
  gowitness single –resolution-x 800 –resolution-y 1200 -o ./ "https://www.geeksforgeeks.org/category/guestblogs/"
} || {
  print "gowitness is not found."
}
On your first run of the program, it creates a "screenshots" directory, which will store all screenshots, as well as a SQlite database file that will store logs, request headers, TLS certificates, and requested URLs. This may be excessive for some use cases, and unnecessary if you are using gowitness as a part of a larger program or process.
gowitness has a wealth of options available, including options to source URLs from a file or standard input, using screenshot services from nmap XML files, creating reports, and creating a web service that can take screenshots on your behalf. These options make gowitness a fairly robust tool, however there are no options to block ads. Additionally, the process of saving a screenshot with gowitness is also very slow, which means that any script using gowitness may take much longer to execute than other options listed.
gowitness has the benefit of simplicity—it is easy to install and use immediately, without any set up beyond installing the command from GitHub or by using go get… in your terminal. This is a great option if you want to get started quickly, or if you're a Golang enthusiast and want to contribute to the codebase.
Despite the ease of use, gowitness shares a number of issues presented by previous solutions. It does not have the ability to block ads, so these will show up in any image captured using this tool. Additionally, gowitness does not provide a command to wait until the page is fully loaded before capturing the screenshot, which limits the usability of the tool for slow-loading websites. You can see both of these issues in the screenshot above.
rustywitness
rustywitness is a slimmed-down version of gowitness, offering fewer options in exchange for increased ease of use. Both gowitness and rustywitness use headless Chrome to interact with URLs, and both programs will allow you to capture screenshots from URLs listed in a text file.
You can install rustywitness from the GitHub project releases. If you already have the Cargo package manager installed on your machine, you can install rustywitness by using the following command:
cargo install rustywitness
To capture a screenshot with rustywitness, you can use the following command in your terminal:
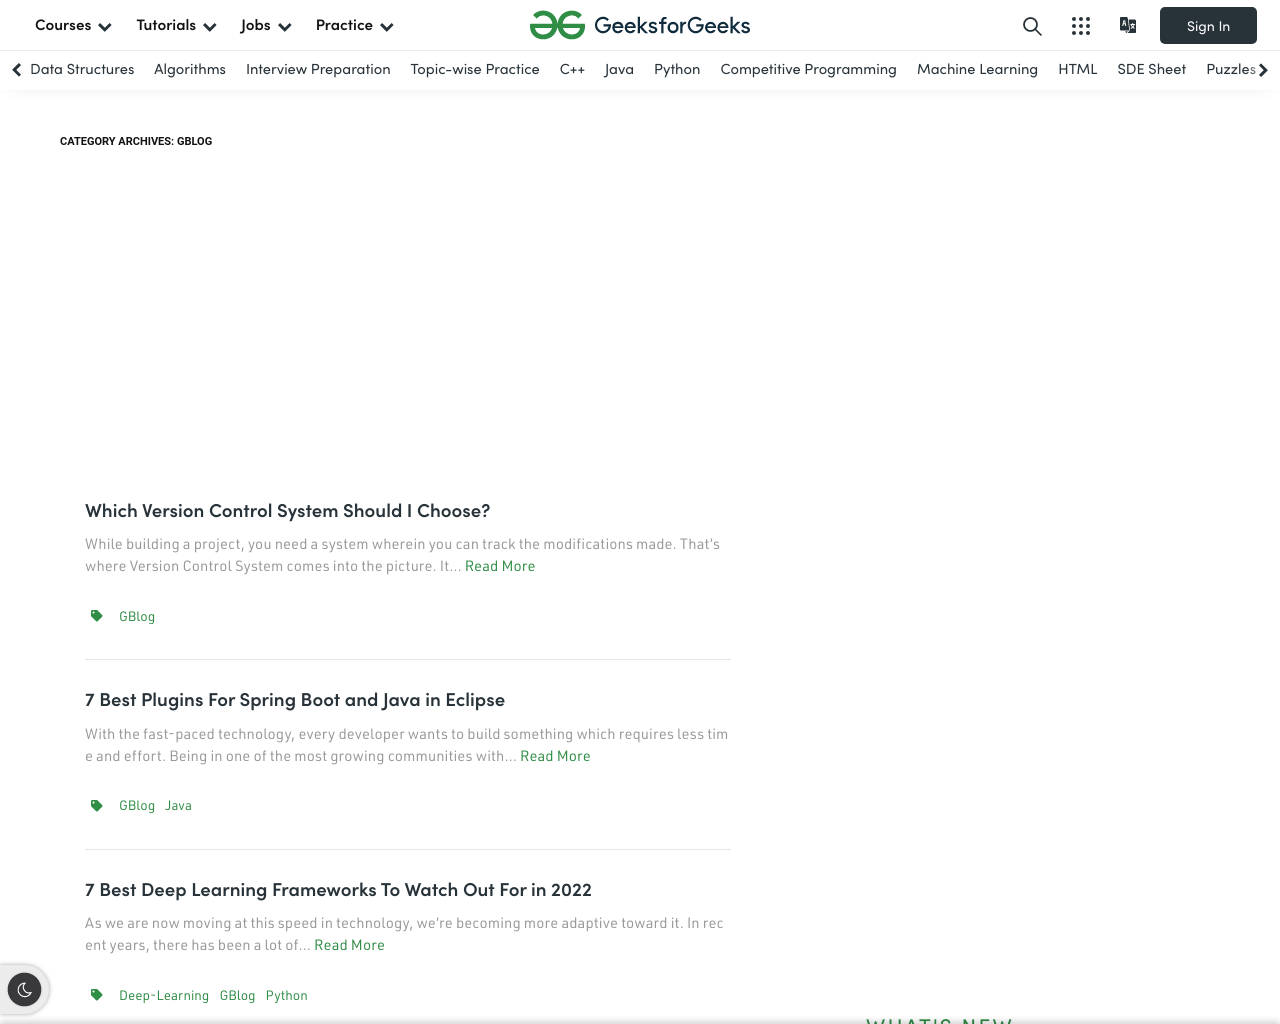
rustywitness "https://www.geeksforgeeks.org/category/guestblogs/"
The command will save the screenshot to a folder titled "screenshots". You may also save the screenshot to a specific location by specifying the output directory using the -o option:
rustywitness -o ./screenshots "https://www.geeksforgeeks.org/category/guestblogs/"
rustywitness is simple to use, but has far fewer options than the other examples in this article. This makes rustywitness easier to incorporate into your workflow, since there are no libraries to load or programming environments to manage. rustywitness worked very well during testing for this article, with no issues gathering screenshots from the example code above.
However, rustywitness is a young project, so you may encounter the occasional bug. Additionally, many options provided by tools like gowitness are not available in rustywitness, despite the similar names. For example, rustywitness doesn't allow you to specify dimensions for your captured image, focus on specific selectors, or add a delay before capturing the screenshot. It also doesn't offer the ability to dismiss banners or pop-ups. This means that if you need more control over the screenshots, rustywitness may not be flexible enough for your workflow.
Taking Screenshots with Urlbox
Urlbox is a tool that allows you to capture perfect screenshots and PDF documents from any URL or HTML. Urlbox has options for capturing full-page screenshots using the screenshot API, and captures responsive screenshots by allowing you to change the viewport dimensions. Additionally, Urlbox has web font and emoji support, ensuring that the images you capture will appear exactly as they would if you were to visit the page directly. Best of all, Urlbox works at scale, providing you with the ability to capture accurate screenshots on sites using the most recent JavaScript, HTML, and CSS features.
Getting started is nearly instant—just sign up and you are ready to capture screenshots of any URL. If you just want to see how your HTML is rendered, you can also use Urlbox to render images from arbitrary HTML with a unified, easy-to-use dashboard.
Urlbox provides many useful options that allow you to capture just the viewport of the loaded URL, capture a specific element, and select the output format from a range of supported formats, including JPG, PNG, and PDF.
Urlbox saves you headaches by allowing you to capture images without writing a single line of code, but if you want to flex your programming chops, you have the option to add custom JavaScript or CSS to manipulate the rendered image. You can even incorporate Urlbox into your Node or Python project if your screenshots are a part of a larger application or process.
For more information about options, use cases, and integrating Urlbox into your project, visit the Urlbox docs.
Urlbox Examples
Urlbox offers a fully featured dashboard, and you can access the Urlbox API using simple curl commands. Before you can make any requests to the Urlbox API, you need to create an account and retrieve your API key from the Urlbox dashboard.
After grabbing your key from the dashboard, create a project folder and navigate to this folder in your terminal . Finally, copy the code below and paste it into a file called urlbox.bash. The examples below will use this script. The examples below will all use the following script:
#!/usr/bin/env bash
api_key=<YOUR_API_KEY_HERE>
api="https://api.urlbox.com/v1/${api_key}/png"
url="$1"
filename="$2"

composed_url="${api}?url=${url}"

curl --silent "${composed_url}" --output "${filename}"
Capturing a basic screenshot using curl and Urlbox can be done using the following command:
bash urlbox.bash "https://www.geeksforgeeks.org/category/guestblogs/" "guestblogs.png"
The command above produces the following image:
Unlike some options, the site is fully loaded, which is a good start. The down side of this is that there's an ad at the top of the page, and a banner at the bottom. Urlbox offers the ability to easily remove both of these elements with the block_ads and hide_cookie_banners options:
bash urlbox.bash "https://www.geeksforgeeks.org/category/guestblogs/&block_ads=true&hide_cookie_banners=true" "guestblogsclean.png"
Urlbox also allows you to quickly and easily make much more extensive customizations to your screenshots. You can specify the size of the viewport to simulate a larger or smaller screen, capture specific selectors, highlight a word or words, or scroll to a specified point on the page before capturing the image. You can also customize the output of the screenshot, such as requesting a retina-quality image, or saving to different formats, such as PDF, HTML, SVG, and JPG.
Urlbox is a complete, highly customizable solution for capturing images from URLS or raw HTML, resolving all of the issues that arise when using other tools. You also don't have to write a single line of code with Urlbox, which lets you get started immediately—without the overhead of setting up a Python or Node project, or installing anything else on your machine.
Conclusion
In this article you learned about several methods for capturing images from URLs on the command line. You've also seen how Urlbox can solve some common issues with these solutions by providing an all-in-one platform where you can get started capturing images quickly.
Finally, you learned that Urlbox can grow with your project, letting you use the request URL and JSON options in your own projects, either on the command line or alongside other automation tools. Start capturing screenshots now with Urlbox.