
Puppeteer is a popular browser automation tool for remote controlling Chrome and Firefox instances. It lets you build website screenshot APIs by using code to launch a headless browser, navigate to a target page, and capture an image.
Puppeteer-based services can be challenging to scale because they're usually resource-intensive. The presence of a full browser install means they also have heavy dependencies. Kubernetes helps make screenshot APIs more scalable by simplifying key tasks such as resource management, network security, and auto-scaling based on actual service usage. It lets you run your Puppeteer screenshot solution as containers you can replicate across multiple physical compute nodes.
In this article, we're going to tour some key Kubernetes scalability features and explain their benefits for Puppeteer-powered screenshot APIs. We'll develop the container image from our How to Build a Docker Image for a Website Screenshot Service article to demonstrate a simple Kubernetes deployment in action.
Why Use Kubernetes for Puppeteer APIs?
Kubernetes is a container orchestration system. It automates the process of deploying, scaling, and managing containers within cloud infrastructure environments. It's an ideal fit for microservices architectures where all your components must be highly available, but also need to be scaled individually.
Kubernetes helps solve many of the issues you might encounter when running Puppeteer at scale. Key advantages include:
- Easy Puppeteer operations as a microservice: The Kubernetes architecture lets you more easily run your Puppeteer API as a standalone microservice alongside your application code. This improves ease of management by allowing components to be scaled, changed, and deployed individually.
- Scale up automatically, based on user activity: Kubernetes has built-in autoscaling capabilities. It can start extra replicas of your service as they're required, letting you seamlessly handle spikes in demand. This is particularly important for screenshot services where each request can take several seconds to fulfill.
- Simple scheduled job management: Kubernetes includes its own cron job mechanism to run containers on a schedule. This lets you easily take website screenshots periodically or process a capture queue, for instance. Projects such as Kueue expand on this functionality.
- Precisely set resource utilization constraints: Kubernetes has a sophisticated resource management model that lets you control exactly how much CPU and memory your Puppeteer containers can consume.
- Maintain performance for concurrent captures: The Kubernetes networking layer includes automatic load-balancing to distribute capture requests between your service's replicas. This helps keep overall load low to ensure stable performance at scale.
- Achieve high availability: Kubernetes makes it easy to deploy multiple replicas of your Puppeteer screenshot API, ensuring there's no service disruption if an instance or a compute node fails.
Now let's take a look at the main options available for scaling Puppeteer with Kubernetes.
Techniques for Scaling Puppeteer on Kubernetes
You can use Kubernetes to scale Puppeteer and your Chrome (or Firefox) instances in two key ways:
- One browser instance per Puppeteer container: Under this model, each Puppeteer container runs exactly one browser instance. Containers can still serve multiple requests concurrently by opening new browser pages.
- Separate pool of shared browser instances: With this model, the containers that run Puppeteer code don't host browser instances. Instead, Puppeteer's configured to connect to a browser instance running as a separate service in your cluster. This approach lets you scale your Puppeteer code independently of your browser pool.
We're focusing on the first approach in this guide. It's easy to configure and scales well for most use cases. By keeping your Puppeteer code as a tightly scoped microservice, you can minimize any overheads that could affect performance. But if your code is complex, or does more than just call Puppeteer, then you may benefit from decoupling your browser and Puppeteer containers using the second approach.
When scaling Puppeteer, it's also important to plan how you’ll manage browser state. Different browser instances operate independently of each other, so cookies, sessions, and local storage created by a browser running in one container won't be available if a second request lands with another container. This won't typically be an issue if your service simply takes a URL, then captures a screenshot as the public sees it. However, you'll need to enable Kubernetes sticky sessions for your service if users are allowed to login to websites before requesting a series of captures.
Guide: Scaling Puppeteer With a Kubernetes Deployment and Service
Let's look at a simple demo of how to start a scalable Puppeteer deployment in a Kubernetes cluster. These steps are no different to running any typical web service in Kubernetes, but we'll discuss some Puppeteer-specific best practices in the next section. This guide offers a starting point for new Kubernetes users to understand how to deploy a container image, whether it uses Puppeteer or not.
We're using Minikube and the sample Puppeteer app and container image available in this article's GitHub repository. You should have Minikube, Docker, and Git installed before you continue. Clone the GitHub repository to get started:
$ git clone https://github.com/jamesheronwalker/urlbox-puppeteer-kubernetes-demo.git
The app within the repository uses Node.js and Express to provide a simple HTTP API. Calling the /capture?url=<url> endpoint uses Puppeteer to generate a screenshot of the requested URL. The screenshot is provided in the API's HTTP response. You can learn more about the Puppeteer code and Dockerfile in our How to Build a Docker Image for a Website Screenshot Service article.
Use Docker Compose to build the project's container image:
$ docker compose build
This will build the image and tag it as urlbox-puppeteer-kubernetes-demo:latest on your machine.
Next, use the minikube image load command to make the image available to your Minikube cluster. Minikube can't automatically access the images on your host machine, so the image must be manually loaded unless you've already pushed it to a public container registry.
$ minikube image load urlbox-puppeteer-kubernetes-demo:latest
The image is now ready to use as urlbox-puppeteer-kubernetes-demo:latest in your Kubernetes deployments.
Prepare Your Kubernetes Manifests
To run Puppeteer in Kubernetes, you need to create two main resources:
- Deployment: The Deployment object manages a set of Pods to ensure a specified number of replicas is available.
- Service: Kubernetes Services route network traffic to Pods. They provide load balancing between the available replicas.
You can find Kubernetes YAML manifest files for the Deployment and Service objects within the k8s folder in the sample repository.
Here's what the two files look like.
1. Deployment
apiVersion: apps/v1
kind: Deployment
metadata:
  name: puppeteer
spec:
  replicas: 1
  selector:
    matchLabels:
      app: puppeteer
  template:
    metadata:
      labels:
        app: puppeteer
    spec:
      containers:
        - name: puppeteer
          image: urlbox-puppeteer-kubernetes-demo:latest
          imagePullPolicy: IfNotPresent
          ports:
            - containerPort: 3000
This manifest specifies that a single Pod replica (replicas: 1) will be deployed initially. We’ll scale this up later on. The Pods run a container called puppeteer that uses the image we pushed into the cluster in the step above. Setting imagePullPolicy to IfNotPresent ensures Kubernetes uses this existing image, rather than trying to pull an update from a non-existing public source.
The Deployment manifest specifies a container port of 3000. This is the port that our Express API service listens on within the container.
2. Service
apiVersion: v1
kind: Service
metadata:
  name: puppeteer
spec:
  type: LoadBalancer
  selector:
    app: puppeteer
  ports:
    - port: 80
      targetPort: 3000
The Service object specifies how traffic reaches the Puppeteer Pods. In this example, we're creating a LoadBalancer service that can be reached outside the cluster for testing purposes, but other types of Service are available for different use cases.
The Service is configured to route traffic to Pods with an app: puppeteer label assigned. This label matches that assigned to the Puppeteer Pods by the template.metadata.labels field in our Deployment manifest above. The Service's port 80 is then configured to route traffic to port 3000 within the Pods.
Apply (Deploy) Your Kubernetes Manifests
Use the kubectl apply command to create the Deployment and Service in your Kubernetes cluster:
$ kubectl apply -f k8s
deployment.apps/puppeteer created
service/puppeteer created
You can then use kubectl get deployment puppeteer to check that the Pods created by the Deployment are ready:
$ kubectl get deployment puppeteer
NAME READY UP-TO-DATE AVAILABLE AGE
puppeteer 1/1 1 1 1m
Test Your Service
Now you can test the Puppeteer service running in your cluster! First, use minikube tunnel to open a network route to your cluster. This emulates having an external load balancer in front of your Kubernetes services. Run the command in a new terminal window, then keep the session open until you’re done testing.
$ minikube tunnel
Next, use the kubectl get services command to find the external IP address assigned to your puppeteer service:
$ kubectl get services
NAME TYPE CLUSTER-IP EXTERNAL-IP PORT(S) AGE
kubernetes ClusterIP 10.96.0.1 <none> 443/TCP 13m
puppeteer LoadBalancer 10.100.130.191 10.100.130.191 80:32106/TCP 1m59s
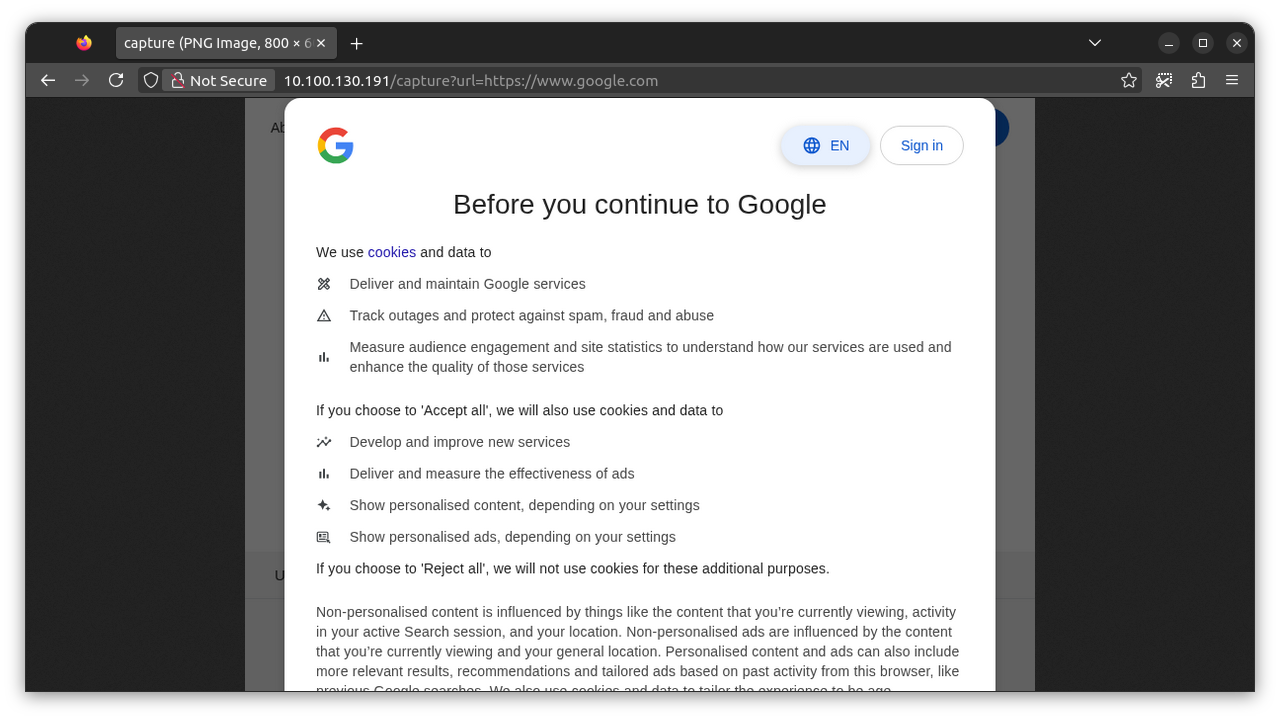
We can see the service has an external IP address of 10.100.130.191. Visiting http://10.100.130.191/capture?url=https://www.google.com in your browser should display a screenshot of the Google homepage, as captured by your Puppeteer API:
Scale Your Deployment
Finally, you can now scale your Kubernetes Deployment to start additional Puppeteer replicas. Try using the kubectl scale command to resize to three replicas:
$ kubectl scale deployment/puppeteer --replicas 3
deployment.apps/puppeteer scaled
Kubernetes will start new Pods to run your service, improving capacity and redundancy. Use the kubectl get deployments command to check the rollout's progress:
$ kubectl get deployments
NAME READY UP-TO-DATE AVAILABLE AGE
puppeteer 3/3 3 3 4m
You can then try requesting a new screenshot capture using the same URL as before. The Kubernetes Service model will ensure your requests are transparently load balanced between the three running Pods.
Best Practices and Strategies for Scaling Puppeteer on Kubernetes
The steps above are a simple guide to getting started operating scalable services with Kubernetes. But scalability is much more than manually adjusting replica counts, particularly when it comes to resource-intensive processes like capturing website screenshots with Puppeteer.
The following best practices and advanced strategies ensure performant, secure, and maintainable operations for Puppeteer and Kubernetes at scale.
1. Use a GitOps-Powered Deployment Model
Having developers run kubectl apply and kubectl scale commands isn't scalable. It’s more efficient to use tools such as Argo CD and Flux CD to manage your deployments. These tools implement GitOps strategies to automatically update your Kubernetes deployments after you commit changes to your manifest files. Packaging your manifests as a Helm chart also makes it easier to reuse them across different environments.
2. Consider Using a Capture Job Queue Instead of Load Balancing
The demo solution shown above scales Puppeteer capacity by load balancing screenshot capture requests across multiple replicas of your app. This isn't always the best way to scale: each replica in our example runs its own browser instance, causing increased resource consumption and higher cluster costs.
Modelling your system as a job queue can help make performance more consistent at scale. Instead of having each request capture a screenshot synchronously, add new captures to a queue that your Puppeteer code can pull new jobs from. Kueue is a popular Kubernetes-native job queuing system that lets you precisely control when jobs start and stop.
3. Run Chrome Independently of Your Puppeteer App
We discussed this above, but it's worth mentioning again: large-scale systems may be easier to maintain if you host Chrome containers independently of your Puppeteer code. You can then use Kubernetes to separately scale your browser pool and Puppeteer instances.
Your browser pool should sit behind a Kubernetes service that your Puppeteer code can connect to using connect(). The Service must have sticky sessions enabled for this to work (set spec.sessionAffinity to ClientIP in the Service's manifest).
4. Use Kubernetes Network Policies to Restrict Puppeteer API Access
Kubernetes Pods can exchange network traffic with any other Pod in your cluster by default. This is a potential security risk—if one Pod is compromised, then it could start sending requests to your Puppeteer service. If you're running your browser instances in separate Pods, then the risk is even higher: a compromised Pod could let attackers directly open a Puppeteer connection to the browser.
To mitigate this risk, you must correctly configure Network Policies for each Pod you deploy. A Network Policy is a Kubernetes object that specifies which Pods are allowed to communicate with a target Pod. The following basic example restricts Pods labelled app-component=chrome so that they can only be reached by other Pods labelled app-component=puppeteer.
apiVersion: networking.k8s.io/v1
kind: NetworkPolicy
metadata:
  name: demo-policy
spec:
  podSelector:
    matchLabels:
      app-component: chrome
  policyTypes:
    - Ingress
    - Egress
  ingress:
    - from:
        - podSelector:
            matchLabels:
              app-component: puppeteer
  egress:
    - to:
        - podSelector:
            matchLabels:
              app-component: puppeteer
5. Configure Horizontal Pod Autoscaling to Auto-Scale Puppeteer Based on Load
Kubernetes supports automatic horizontal auto-scaling via its HorizontalPodAutoscaler (HPA) component. It adjusts your Deployment's replica counts based on actual CPU and memory utilization, ensuring more replicas are created as load increases. HPA will then remove replicas when the load subsides, avoiding excess costs.
The following HorizontalPodAutoscaler resource will dynamically change the replica count of the puppeteer Deployment to maintain an average CPU utilization of 50%. The minReplicas and maxReplicas fields cap the replica count to ensure there's always at least three, but no more than nine, replicas running.
apiVersion: autoscaling/v2
kind: HorizontalPodAutoscaler
metadata:
  name: demo-autoscaler
spec:
  scaleTargetRef:
    apiVersion: apps/v1
    kind: Deployment
    name: puppeteer
  minReplicas: 3
  maxReplicas: 9
  metrics:
    - type: Resource
      resource:
        name: cpu
        target:
          type: Utilization
          averageUtilization: 50
HPA is easy to configure using different metrics sources, but other options offer even more precision for advanced use cases. For instance, Keda allows simple event-driven autoscaling, a concept that's highly applicable to Puppeteer screenshot APIs. You can use it to autoscale your service based on the current number of capture requests or job queue entries, for example.
6. Set Correct Resource Requests and Limits for Your Puppeteer and Browser Instances
Kubernetes resource requests and limits set Pod CPU and memory consumption constraints. It's important to set correct requests and limits so your browser instances have enough resources to capture screenshots performantly, without negatively impacting other workloads in your cluster. Constraints are configured within the spec.containers[].resources section of container manifests, such as in the following adaptation of our Deployment resource from above:
apiVersion: apps/v1
kind: Deployment
metadata:
  name: puppeteer
spec:
  # ...
  template:
    metadata:
      labels:
        app: puppeteer
    spec:
      containers:
        - name: puppeteer
          image: urlbox-puppeteer-kubernetes-demo
          imagePullPolicy: IfNotPresent
          resources:
            requests:
              cpu: 100m
              memory: 1Gi
            limits:
              cpu: 1000m
              memory: 2Gi
This example specifies that the Puppeteer Pods will only schedule onto cluster Nodes that can provide 100 millicores of CPU capacity (0.1 of a logical core) and 1Gi of memory. The Pods can actually consume up to 1000 CPU millicores and 2Gi of memory. If the CPU limit is exceeded, then the Pod will be throttled; if the memory limit is exceeded, then the Pod becomes eligible for termination.
Constraints that are too high cause resources to be wasted, but going too low leads to CPU throttling or unexpected Pod out-of-memory events. It's therefore important to analyze your service's actual resource utilization, then refine your requests and limits accordingly. You can also use the optional Kubernetes vertical pod autoscaler component to dynamically change your Pod's requests and limits based on observed conditions in your cluster.
7. Use Liveness and Readiness Probes to Prevent Sending Traffic to Non-Ready Containers
Puppeteer screenshot capture APIs can take time to become ready to use. You’ll need to wait while the browser launches and Puppeteer acquires a connection, for example. During this time, your service won't be able to successfully handle a capture request. To prevent errors, the Kubernetes Pod shouldn't receive any traffic until it's fully operational.
Kubernetes liveness and readiness probes are a mechanism for implementing this functionality. Readiness probes tell Kubernetes when a Pod is ready to begin receiving traffic from Services, while liveness probes enable failures to be detected.
To enable these probes for a Puppeteer API, you should provide an API endpoint that Kubernetes can periodically call. The endpoint should indicate whether your Puppeteer service is healthy. For instance, if the browser is running and connected, then you would return a successful response code (2xx). If the browser's not connected, then sending a 4xx or 5xx error status code informs Kubernetes either not to send traffic yet (for readiness probes) or to restart the failed container (for liveness probes).
Here's a simple example of a readiness probe configured for the Pods in a Deployment:
apiVersion: apps/v1
kind: Deployment
metadata:
  name: puppeteer
spec:
  # ...
  template:
    metadata:
      labels:
        app: puppeteer
    spec:
      containers:
        - name: puppeteer
          image: urlbox-puppeteer-kubernetes-demo:latest
          imagePullPolicy: IfNotPresent
          readinessProbe:
            httpGet:
              path: /healthy
              port: 3000
            initialDelaySeconds: 10
            periodSeconds: 5
The probe's configuration instructs Kubernetes to make an HTTP GET request to the /healthy endpoint served on port 3000 in the container. The initialDelaySeconds option defers the first check until 10 seconds after container creation, while the periodSeconds option specifies a 5-second delay between subsequent checks until a healthy status is returned. Kubernetes will then start sending traffic to the Pod via Services.
8. Implement Robust Monitoring and Alerting
As with any service running at scale, continuous monitoring is key to the success of Puppeteer operations. Kubernetes doesn't come configured for observability by default, but it's easy to enable using popular solutions like kube-prometheus-stack. This runs a Prometheus and Grafana stack inside your cluster. It automates the process of collecting metrics and logs from your Pods and other cluster components.
Beyond resource utilization stats, you also need visibility into what's going on within your service. For instance, metrics such as the number of screenshots being generated, success and error rates, and average capture times all help you make more informed scaling decisions. You can instrument your Puppeteer code to provide these values as Prometheus metrics, ready to scrape alongside your cluster-level monitoring.
Security Considerations of Scaling Puppeteer on Kubernetes
Beyond the best practices discussed above, it's crucial to keep security in mind when running Puppeteer in Kubernetes. Browsers like Chrome and Firefox have a large attack surface. Successfully compromising a zero-day vulnerability could let attackers escape the browser's sandbox to affect your container or surrounding cluster.
You can mitigate these risks by applying Kubernetes security protections such as Pod security contexts:
apiVersion: apps/v1
kind: Deployment
metadata:
  name: puppeteer
    spec:
      replicas: 1
      selector:
        matchLabels:
          app: puppeteer
      template:
        metadata:
          labels:
            app: puppeteer
        spec:
          securityContext:
            runAsUser: 1001
            runAsGroup: 1001
          containers:
            - name: puppeteer
              image: urlbox-puppeteer-kubernetes-demo:latest
              imagePullPolicy: IfNotPresent
              ports:
                - containerPort: 3000
              securityContext:
                allowPrivilegeEscalation: false
Setting a security context lets you ensure your Puppeteer containers run as a non-root user with privilege escalation disabled, even if you forget to specify a non-root user in your Dockerfile. If an attacker escapes the browser, then their ability to cause more damage in the container or cluster will be limited.
Similarly, it's important to keep browser sandboxing technologies enabled. Chrome and Firefox isolate web content using sandboxed processes when running as a non-root user. These protections are disabled if you use Puppeteer's --no-sandbox launch option, a flag that's commonly found in Puppeteer containerization tutorials. Disabling sandboxing makes it easier to build a functioning Puppeteer Docker image by letting you run the container as the default root user, but this effectively eliminates all security protections.
When operating a Puppeteer screenshot API, you should also consider the general security implications of letting users capture web content. For instance, users may abuse SSRF attacks to try to capture internal services hosted in your cluster, perhaps in combination with DNS rebinding techniques. Improper session isolation could also be exploited to capture content belonging to other users, if your service lets users login and start persistent sessions.
Summary
Puppeteer-based screenshot APIs must be scalable so you can maintain consistent capture performance even during times of high demand. In this article, we've seen how Kubernetes provides a platform for deploying and scaling your Puppeteer services as containers. It lets you use autoscaling, load balancing, and resource requests and limits to ensure stable Puppeteer operations.
Even so, there's still significant complexity involved in preparing a Puppeteer container image and then correctly deploying it to Kubernetes. It takes even more work to configure vital capture features such as full-page screenshots, infinite scroll workarounds, and captcha defeats.
For an easier option, check out Urlbox. Our high-performance website screenshot API is built to give beautiful results every time. You don't need to maintain your own Puppeteer service or master any scaling settings. Urlbox provides predictable captures with over 100 customization options and built-in ad, popup, captcha, and cookie banner blockers. We even screenshot the challenging elements that don't always work with standard Puppeteer, including canvas elements, videos, and WebGL content. You can get started taking screenshots at scale with a 7-day free trial.